Background
For some time i had wanted to install a water tap at the caravan to allow easy watering of the plants and those of my Mum's neighbors at her caravan. I struggled on for a couple of years filling the watering can in the kitchen sink or in the shower but this was slow and often messy. I started filling the watering can using the drain valves under the caravan but these were about 12-18 inches from the edge and it was not easy. As the number of plants increased, it became more difficult getting access to the drain taps as the plant containers had to be moved to get access to them. I decided to install an external tap to make life a bit easier. There were a number of objectives.
- The finished installation had to be attractive, easy to use and easy to access.
- The connections to the tap had to be flexible to allow movement between the tap and the caravan.
- The entire installation must be easy to dismantle at the end of the season to allow drainage of the caravan water system and to prevent damage from frozen pipes during the winter.
- The installation must allow the drain taps to be used to drain the water system when required(during winter) and to allow the water to be shut off to the tap.
 Original water drain taps under caravan.
The pipes and drain valves for the boiler currently hang below the caravan but were not easily accessible. The first job was to remove the quarter turn drain valve and cut off a small section of pipe to remove the olive joint and free the securing nut of the valve. I could have left all this in place but it would have meant that the brass elbow joint would be secured in place using a steel nut and at the end of the pipe a brass nut would secure the valve in place. In temperature extremes this raises problems with the different expansion rates of the metals leading to possible leaks.
After cutting off the olive joint the end of the pipe was cleaned up and a new pipe stiffener inserted. The brass elbow joint was fastened in place at the required height for the exit of the valve at the side of the caravan.
After cutting off the olive joint the end of the pipe was cleaned up and a new pipe stiffener inserted. The brass elbow joint was fastened in place at the required height for the exit of the valve at the side of the caravan.
 Wooden bracket and first tap modified.
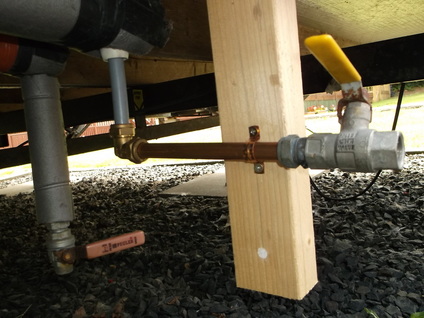
A T-Piece wooden bracket was fitted between the wooden joists of the caravan with the "T" dropping down to act as a support for the pipes and valves.
Brass saddle clips were used to secure the pipes in place.
The valve was then secured to the end of the pipe. In this photograph the cold water valve has been relocated and the hot water valve is still in its original position.
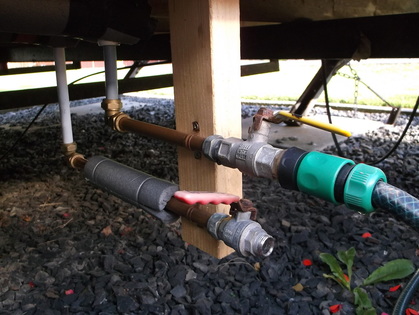 Both taps modified and mounted.
The same procedure was used to re-route the hot water valve at a slightly lower level.
A brass adapter piece was added to the output of the valve to allow standard garden hose pieces to be attached.
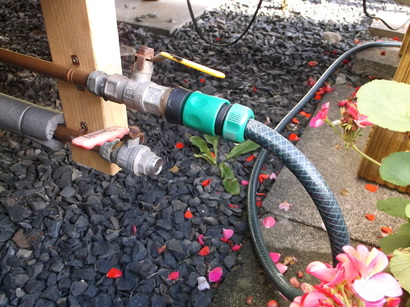 Both taps modified. Removable connection to tap.
A length of standard garden hose connects from the valve to the water tap mounted nearby on the satellite support pole.
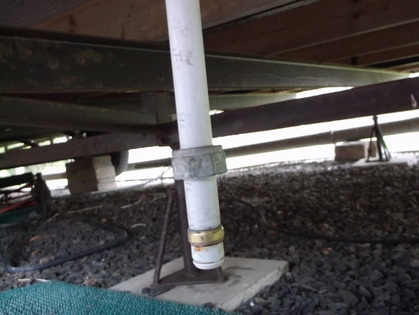
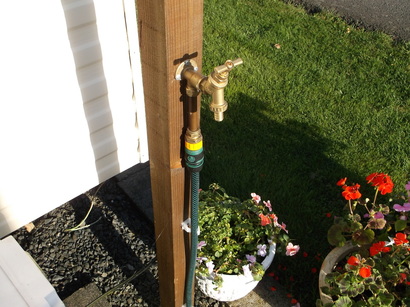 Completed tap installed on Satellite Dish support pole.
The garden tap was mounted on the wooden satellite support pole. A short length of copper pipe with a brass adapter piece allows standard hose connectors to be used.
When the caravan is vacated during cold weather the hose is disconnected from the drain valve under the caravan. The main water valve is closed and the hot and cold drain valves opened so that the pipes drain avoiding damage due to water freezing inside.
When the caravan is opened again, the drain valves are closed, the hose pipe attached to the cold water drain valve,the main water valve opened and the cold drain valve re-opened to allow the water tap to be used.
Moving the drain valves allows them to be used to feed an external tap and to be easily accessed to allow the caravan to be safely drained.
The copper pipe used was left over from previous projects as were some of the brass fittings and saddle clips. The only parts purchased were the tap and the brass adapters for the hose connectors.
