Background
My mum's neighbour is now on his third hedge trimmer in about 5 years. I was admiring his new one when he told me that this one had stopped working reliably so he had purchased a new one. I was rather disappointed that he had not spoken to me about the problem so i said i would at least strip it down to have a look at it and if it could be repaired i would do so assuming that the cost was not excessive. Then he would have a spare machine in the event he had problems with the new one! This makes it sound like there is a whole world of failing hedge trimmers out there which hopefully there is not but i was aware that my Mum's neighbour did tend to put rather a lot of strain on his hedge trimmers in the way he used them. He did tend to put the blades at an angle to the hedge and dig into it rather than keeping the blade parallel to the surface of the hedge. This tended to result in the blades 'finding' the thick 'woody' parts of the hedge causing the blades to jam, in turn causing the motor to stall which results in large surge currents flowing in the motor.
The motor would run for a few seconds and then would lose power then start to operate normally again. Unfortunately when the motor power decreased it would tend to cause the motor to stall and the blades jam in the hedge.
The motor would run for a few seconds and then would lose power then start to operate normally again. Unfortunately when the motor power decreased it would tend to cause the motor to stall and the blades jam in the hedge.
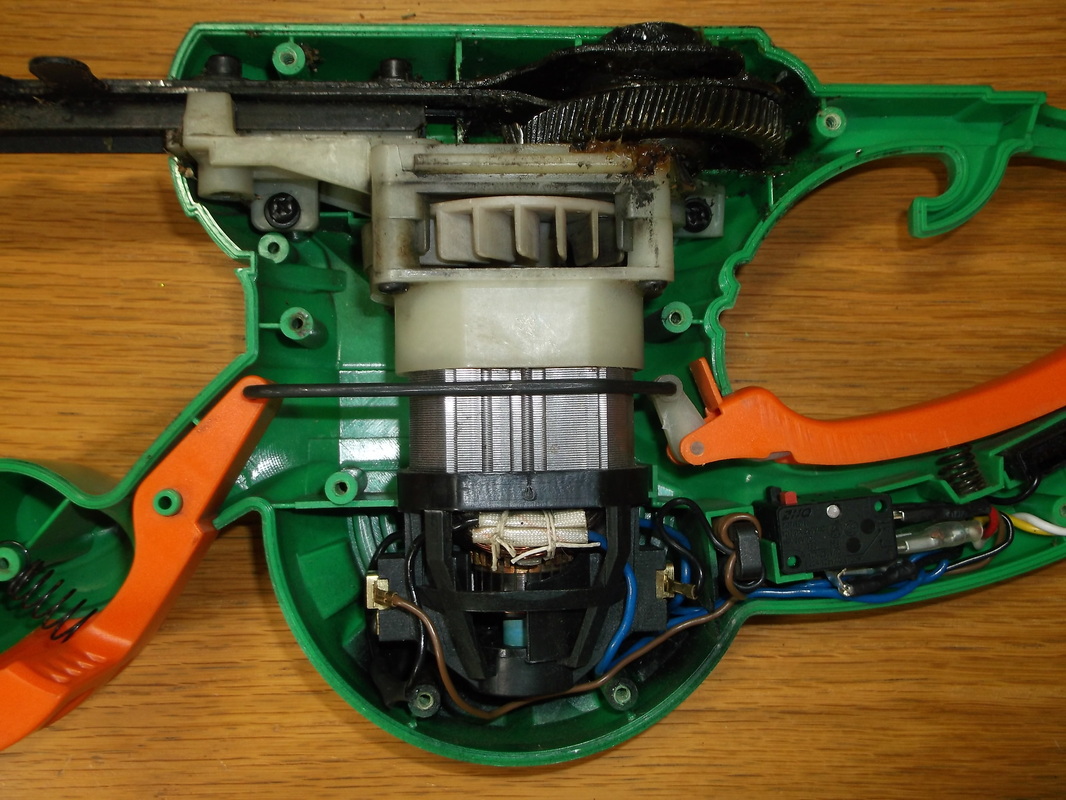
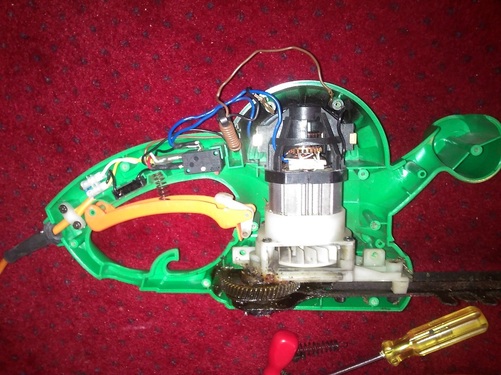 Hedge trimmer internal layout. Note: Mechanical safety interlock parts removed for clarity.
I have dismantled a number hedge trimmers over the years. The generic models(non 'Big Brand' name) sold by large DIY chains etc on the high street or on-line over the past 15 years are generally made in China. The internals are pretty much universal , the only difference is the external casing shape and colour.
In this picture, going from the left to right the main parts are.
1. The mains input cable(orange)
2. The small black item is a filter capacitor to cut down RFI/EMI.
3. The control switch. This is a double micro-switch unit.
4. The wires from the switch are wound on a ferrite loop, to block 'common-mode' noise from the motor being fed back into the mains. It also helps stop mains spikes reaching the motor.
5.The motor, gearbox and blade reciprocating unit are at the bottom of the casing.
I would not be surprised if the western companies selling these type of units simply provide the design for the external casings and the Chinese supplier fits their standard mechanism to the molded casings. Just a few weeks before i started looking at this trimmer I repaired a 'McCulloch' branded machine manufactured in 2006, this one is from 2011 another neighbour had cut through the mains cable and i am convinced that i could have taken the internals from each of these machines and swapped them over, they were so similar.
I was able to remove one side of the casings and run the machine. It ran for a few seconds and then lost power, slowing down and then recovering. Most noticeable was that there was a lot of arcing from the motor commutator particularly when starting and stopping and there were frequently what appeared to be parts of the motor carbon brushes shooting out of the motor as white and red hot trails of sparks.
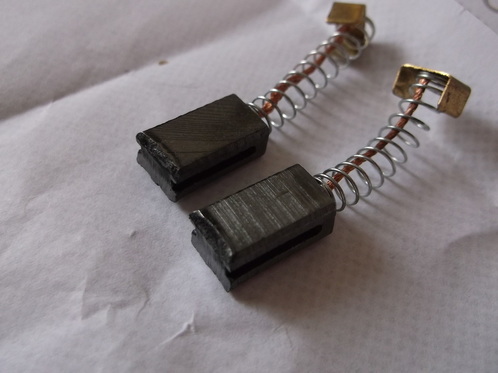 Both damaged original brushes removed from trimmer.
After removing the wiring connectors to the carbon brushes i was able to remove and examine them.
As can be seen in this picture the edges of the brushes are badly disfigured. They should have sharp clean edges. it is easy to rub off small fragments of carbon from the damaged areas.
I suspect that the stalling of the motor caused by the trimmer blades jamming on the thicker parts of the hedge has resulted in large current surges causing the carbon brushes to heat up and expand breaking down the internal structure and weakening it.
The weakened areas then break off due to the abrasive action of the motor commutator sections passing under them. The electrical current passing through these causes them to heat up and burn creating the sparking fragments.
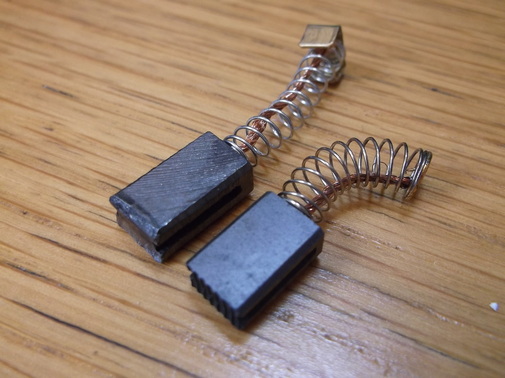 An original damaged brush(left) and new one(right) for comparison.
Here one of the old brushes on the left can be seen with a new brush on the right. The difference in their condition can be seen most clearly at the edges of the brushes.
The new brushes cost £5.99. A comparable new trimmer would cost £25.00 so it was well worth the time and cost to replace them.
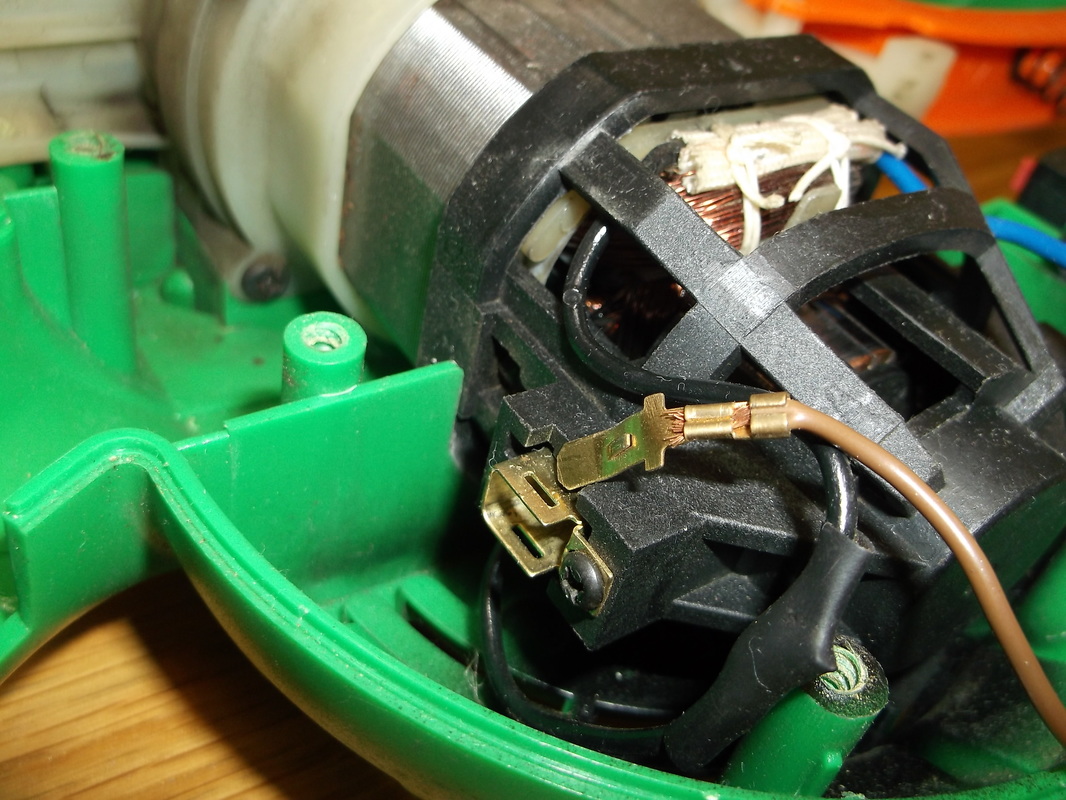
Carbon brush mounting socket and connector.
In this picture the mounting slot for one of the carbon brushes can be seen just before the new brush was inserted. The blade connector inserts into the slot holding the brush in place. There is a small 'tongue' on the blade to stop it sliding out.
|
Motor internals fully re-assembled ready for testing.
In this picture the internals of the hedge trimmer have been re-assembled ready for the second half of the case to be attached.
|
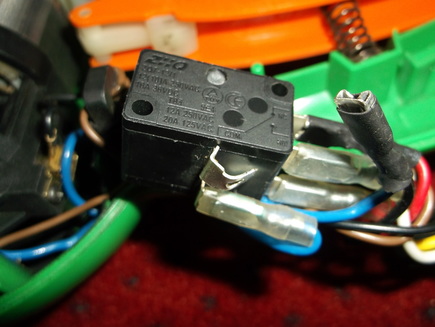 Microswitch with damaged connector.
When the trimmer was first dismantled i noticed that one of the connectors on the micro-switch was damaged. While the components were removed from the case i carefully straightened the contact using a pair of long nosed pliers.
After a final check of all the wiring and removing some debris from inside the casing the trimmer was bench tested with the case still open. The motor ran well with no excessive sparking from the commutator and there were no parts of the brushes breaking off providing a mini fireworks display!
The case was re-assembled. I noticed that the blade securing bolts were a little loose so these were tightened and the blade teeth oiled. The total time to test, diagnose and repair the trimmer including ordering parts was approximately 90 minutes.
Later in the day the trimmer was used to cut a hedge to 'run in' the new brushes and test its operation. The hedge was cut with no problems and there was no variation in the speed. Another successful salvage operation saving a usable piece of kit from the recycling yard!
