Background
My parents have had a static caravan in the Scottish Borders for over 30 years. They have always parked the car on the grass beside the caravan but over the past couple of years the ground seems to have changed and both my parents and visitors got stuck on the grass after very heavy prolonged rain. The wheels simply spin causing damage to the grass which can take a long time to recover. When the car got stuck the first time i spent a great deal of time spreading sand and top dressing to improve the soil and using fertilisers to improve the grass. I also forked the grass regularly to try to improve the drainage. Although there seemed to be temporary benefits, ultimately the problem remained and so i decided to it was time to lay some sort of permanent parking surface that would ensure we could always get the car on and off the grass safely.
I looked at using plastic matting and tiling that is embedded into the grass but examination of the soil revealed it had a very high clay content and so drainage would be a problem. This left either concrete or slabs. I hate long lengths of concrete particularly out in the country so it was down to using slabs. I wanted to minimise the impact of the slabbed area and maintain as much grassed area as possible so i used the lowest number of slabs required for the length of car. To reduce costs and carbon footprint i obtained second hand slabs for a few pounds each. Sharp sand was used to provide a good bed to lay the slabs.
I looked at using plastic matting and tiling that is embedded into the grass but examination of the soil revealed it had a very high clay content and so drainage would be a problem. This left either concrete or slabs. I hate long lengths of concrete particularly out in the country so it was down to using slabs. I wanted to minimise the impact of the slabbed area and maintain as much grassed area as possible so i used the lowest number of slabs required for the length of car. To reduce costs and carbon footprint i obtained second hand slabs for a few pounds each. Sharp sand was used to provide a good bed to lay the slabs.
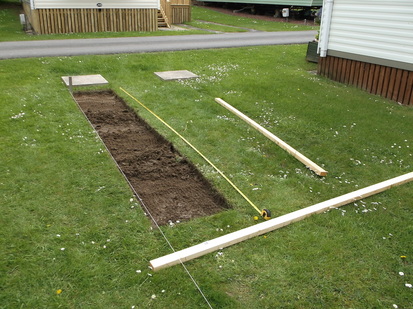
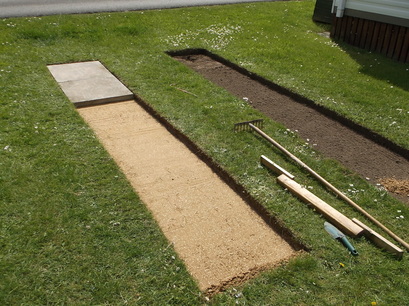
The first job was to measure out the layout of the slabs based on the wheelbase and track of the car. The flattest section of ground was selected to make it as easy as possible to lay the slabs, far enough from the access road so the car is not visible between the adjacent caravans but as close as possible to the access road to minimise the amount of grass that has to be crossed during very wet weather so that the car does not get stuck! A string was used to mark the area and a lawn edging iron was used to cut the grass to be removed into manageable sections. The grass sections were removed as carefully as possible as i wanted to reuse these for another project.
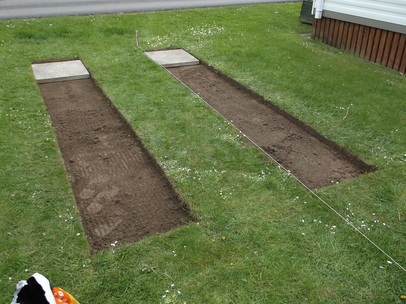
After both trenches had been dug out the depth was checked by test fitting a slab at various points to ensure that there was enough depth to add a compacted sand base with the slab on top to ensure that the grass cutting machinery could pass over the top without hitting any part of the slabs.
I had also made a simple wooden pattern using a few offcuts of wood. This was constructed to allow the sand bed to be compacted and set to the correct height so that the slab can simply be placed on top with out having to be removed several times to ensure a good level fit. I used this same home made tool when laying bases for greenhouses a few years ago.
I had also made a simple wooden pattern using a few offcuts of wood. This was constructed to allow the sand bed to be compacted and set to the correct height so that the slab can simply be placed on top with out having to be removed several times to ensure a good level fit. I used this same home made tool when laying bases for greenhouses a few years ago.
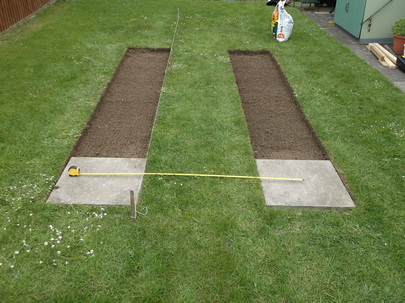
Before starting the heavy lifting laying the slabs into position all the dimensions and alignment were checked one last time....measure twice, dig once, lay and pack sand and lay the slab one time only!
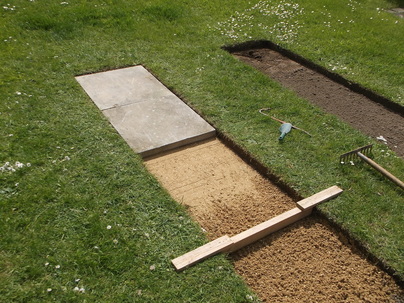
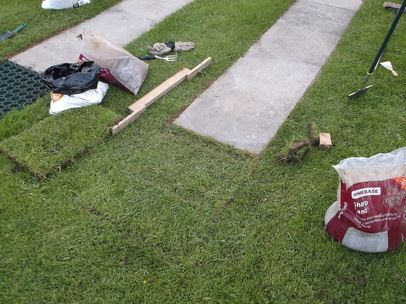
Once the trench was prepared to the correct depth it was filled with sand covering approximately two slab areas and then the wooden bar seen in the foreground was used to spread the sand and pack it down to a uniform depth to create a good solid bed for the slab.
When an area of sand approximately the size of three slabs was prepared the first two slabs were laid into place. Because the trench had been cut to the correct width the slabs were a good fit and there is no danger of them slipping out of alignment in future.
Once i was sure that the theory was translating into practice i continued laying and packing the sand along the entire length of the trench.
I was then able to quickly lay the remaining slabs into position one after the other.
I was then able to quickly lay the remaining slabs into position one after the other.
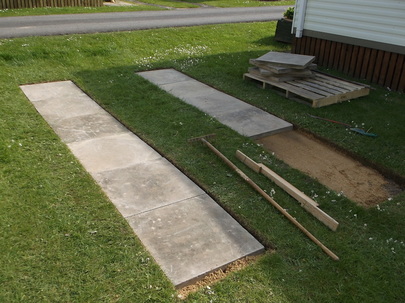
As soon as one side of the driveway was ready i started on the other side using exactly the same method.
Within a couple of hours of starting to lay the slabs rapid progress had been made.
Within a couple of hours of starting to lay the slabs rapid progress had been made.
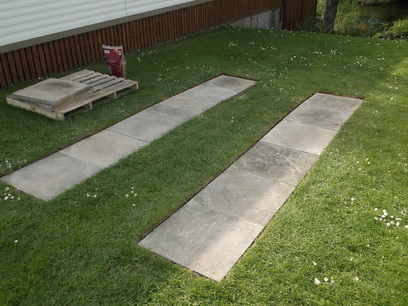
After less than three hours all of the slabs had been laid in place with little or no adjustment to the sand base to get the correct alignment of the slab surfaces.
The method used to prepare the sand base means that the slabs follow the contours of the ground rather than on a level but then the site is on a slope so it would be a major job to level the entire area before laying the slabs.
The area of grass chosen ensured that the undulation of the slabs would be minimal.
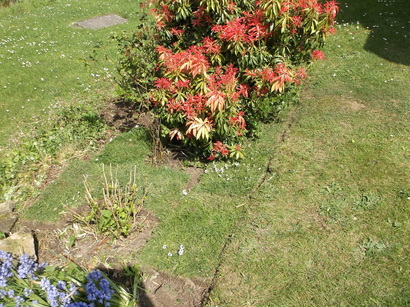
I had carefully removed the grass in manageable sections so that it could be used to fill in a flower bed which over the years had become a bit too difficult to manage. The weeds seemed to do better than the plants and it was no pleasure to arrive at the caravan and then spent a few hours on a slope trying to get the weeds under control.
I removed the worst of the weeds, root as well and leveled the surface with the surrounding area using the soil dug from the trenches of the driveway. I then laid the grass sections on top filling in the gaps between sections with more of the trench soil. The entire area was then well watered.
I was able to recycle old slabs from the caravan park, grass and soil all on the same site. The only items purchased were bags of sand which greatly reduced the amount of effort required preparing, working on and cleaning up the site. A very good example of 'reduce, reuse, recycle' !
Update: June 2014........
After a month or so of use it became clear that the drive length was a little too short to make driving onto it easy so i extended each side of the driveway length by one slab(approx 600mm).
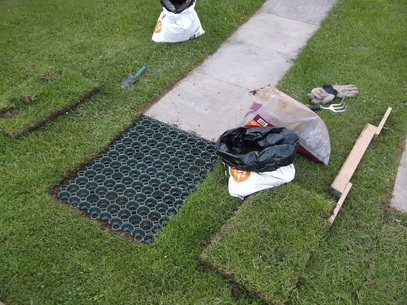
I decided to add additional 'hidden' length by addiing underground plastic grids which would act like slabs but would not be visible and they would allow good drainage.
After the additional slabs were installed a trench was dug to allow the plastic grids to be installed.
After the trench was prepared, sand was laid over the soil and then the plastic grids were laid in place.
Some sand and sieved soil was put into the bottom of the plastic grid to provide a base for the turf roots to fix into.
The turf which had been carefully removed to the dimensions of the plastic grid was well watered, laid over the plastic grid and pushed down by hand and foot to force it into the grid until it would go down no further.
The turf was then well watered and a grass fertiliser applied.
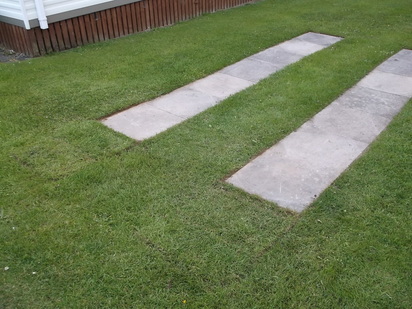
This photograph shows the drive way after the additional slabs and plastic grids had been installed.
As can be seen from the photograph the effect on the appearance has been minimal and is barely noticeable. A month later it was impossible to tell that the plastic grid had been installed.
The result has been to install a driveway with the minimal amount of visible concrete, no interference with the foundations to the access road, good drainage and most import of all a reliable method of getting onto and off of the parking area.
