Below is a summary of the construction of the planters featured in this section. Although i have made a number of different sized planters the general construction is the same. The planters use decking wood cut to the required sizes, stainless steel bolts nuts and washers, decking screws and general purpose corrosion resistant wood screws. The wood shapes and cuts required to achieve them were designed to be easy for a basic DIY user. The decking used has dimensions 2400mm x 144mm x 28mm. All pieces are cut from one length. The description below details the construction of a free standing planter.
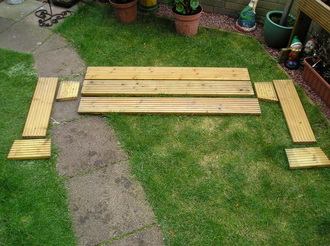
The parts laid out on the ground are as follows:
- 3 x 1200mm pieces making up the sides and base.
- 2 x trapezoidal pieces making up the ends of the planter.
- 2 x 800mm pieces making up the vertical leg sections.
- 2 x trapezoidal pieces making up the feet sections of the legs.

- The first step is to drill pilot holes in the ends of the side and base sections ready to take the decking screws .
- The end pieces of the planter are secured to one of the side pieces.
Do not fully tighten the screws at this stage. This will allow the parts to be eased into place and correctly aligned during assembly without fear of splitting the wood. All the screws can be fully tightened at a later stage.
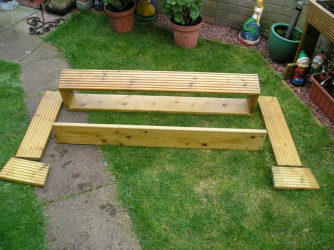
Attach the second side of the planter to the end pieces.
Again do not fully tighten the screws at this stage.
- Align one end of the second side to the end piece and secure in place.
- Gently ease the other end of the side piece to align it with the other end piece and secure in place.
Again do not fully tighten the screws at this stage.
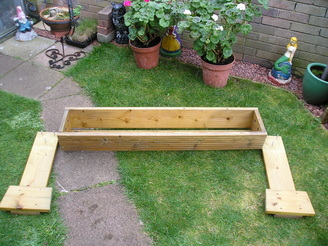
Completing the basic planter base unit.
- Attach the base piece to the end pieces using decking screws.
- Now ensure the planter sits level by placing it on a solid flat surface. If it does not sit level apply gentle pressure to the corners to square up the assembly.
- Now fully tighten up all the screws around the planter.
- Attach the feet pieces to the leg sections using general purpose wood screws.
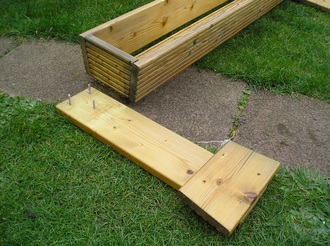
Installing the legs to the base unit.
- Insert the stainless steel bolts into the pre-drilled holes at the top of the legs.
- Line up the ends of the bolts with the pre-drilled holes in the end pieces of the planter body.
- Push the bolts through the wooden end pieces.
- Apply a stainless steel 'penny' washer and stainless steel nut to the bolt on the inside of the planter body. Do not fully tighten the nuts at this point.
- Repeat the process for the other leg.
Place the planter on a solid flat surface and adjust the alignment of the legs to the ground. When level fully tighten all the nuts on the inside of the planter body.
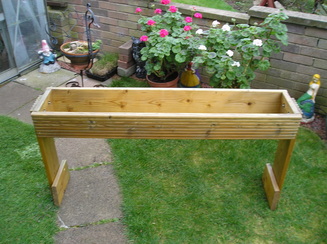
This picture shows the fully assembled planter ready for use. It will hold up to 7x6inch pots or 1 x 800mm plastic planter plus 2 x 6inch pots.
This picture shows the fully assembled planter ready for use. It will hold up to 7x6inch pots or 1 x 800mm plastic planter plus 2 x 6inch pots.
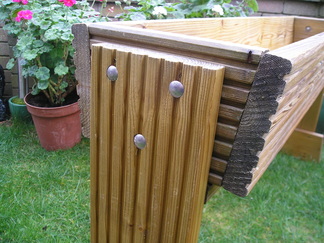
This picture shows the details of the stainless steel mounting bolts used to fasten the bolts in place. On later versions hex set screws and stainless steel penny washers were used in place of the stainless steel coach bolts shown here. The coach bolts can prove difficult to prevent from 'spinning' when trying to tighten the nut on the inside of the planter. The hex head on the set screw overcomes this problem.
