Background : Heated Sand Bed / Propagator (Permanent)
I developed this heated sand bed 5 years ago to bring on seeds early in the year as at the time i did not have a working heated propagator and i wanted to have something that could be used throughout the year in the greenhouse. I did a bit of research and found that heated sand beds were popular for maintaining an even steady heat . I found a source of reasonably priced electric heating cable and decided to make my own sand bed/propagator.
The frame is made from decking wood because it is pressure treated to protect it from damp and rot. It is readily available, easily cut and worked and provides good structural rigidity. Domestic housing hard foam insulation is used to insulate the base of the bed and electric heating cable is used as the heat source. The sand provides a way of supplying an even spread of heat under the seedlings and also acts as a heat store evening out the heat provided when the ambient temperature varies such as during the night.
After the seed growing season is over i remove the electric heating cable from the sand, clean and safely store it. The sand bed is then used for plants and seed trays.
The base is made from 6mm marine plywood and is screwed to the base of the frame.
Domestic hard foam insulating board with a metal film which is normally used to insulate house cavity walls was used as an insert and cut to size to insulate the base of the frame. The insulation was cut so as to be a tight fit and to stop the sand dropping down the side between the wooden frame and insulation.
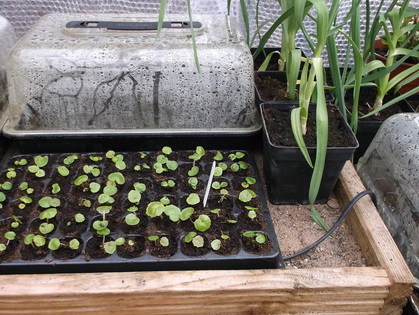
Sharp sand approximately 30-40mm deep was then laid into the frame on top of the insulation to provide a bed for seed trays and pots to sit on.
In this picture Garlic bulb's begonia tubers and begonia seedlings are on the sand bed to encourage early development.
Domestic hard foam insulating board with a metal film which is normally used to insulate house cavity walls was used as an insert and cut to size to insulate the base of the frame. The insulation was cut so as to be a tight fit and to stop the sand dropping down the side between the wooden frame and insulation.
Sharp sand approximately 30-40mm deep was then laid into the frame on top of the insulation to provide a bed for seed trays and pots to sit on.
In this picture Garlic bulb's begonia tubers and begonia seedlings are on the sand bed to encourage early development.
Once the sand was in place the electric heating cable was put in place by scraping a curved path into the sand with a small soil dipper and then laying the cable in place. I found it was easier to do this with the cable plugged in so that it was softer and easier to manipulate.
I originally started with a 10m length and this was used on the sand bed and also lead out through large plastic seed trays that were filled with sand with the electric cable buried in then the same way is in the wooden frame.
I took this idea a good bit further in the following years using large 'grow bag' trays. Click here to see more details of this.
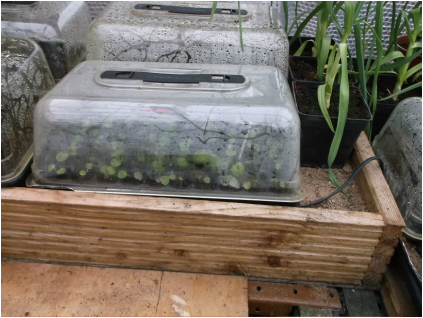
In this picture from 2015 i am using a 15m length of cable which allows me to heat the sand bed and two large 'grow bag' trays filled with sand. The electric heating cable can be seen leaving the wooden sand bed and going into the temporary heated sand beds. This gives enough area to heat up to 16 full size seed trays allowing many hundreds of seedlings to be brought on early in the season. Assuming 60 cell trays are used to bring on seedlings this amounts to 960 seedlings in a very compact area!
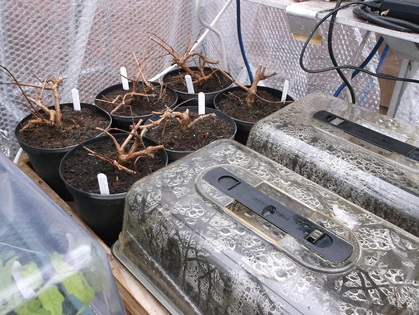
This picture shows the heated sand bed being used to start Begonia tubers in compost trays under the propagator covers and trying to kick start some Fuchsia's that seem reluctant to come out of their winter sleep. Once the first few leaves appear on them i will move them off the sand bed.
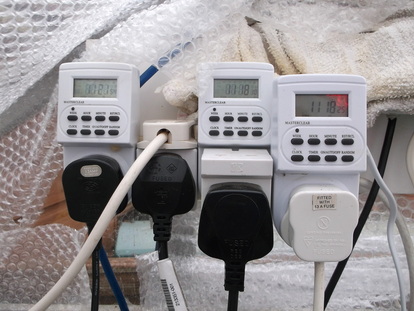
This picture shows the timers i use to control the electrical devices in the greenhouse.
Some of the timers are used to control the heating, a thermostatically controlled circulating/heating fan and LED lighting. I purchased additional timers over the winter and plan a major upgrade of the electrics over the Spring & Summer of 2015.
The timers cost £4-£6 each depending on when and where i am able to purchase them. They can have up to 10 programs per day and are very versatile.
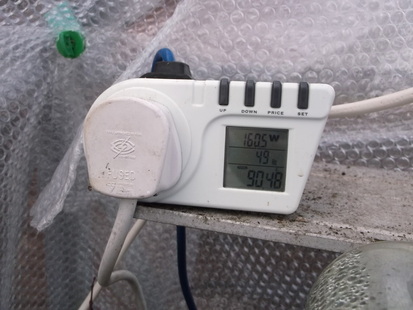
I keep track of all the power used in the greenhouse and the cost. As can be seen from the photograph, at the time it was taken the greenhouse was consuming 160.5W and the total cost to date was £90.48.
The cost of £90.48 covers the period from March 2014 until now so it covers one entire winter and almost two seed growing seasons.
The power meter also records details of the total power used (KWhr's) the mains frequency(Hz) and the maximum and minimum power levels recorded(Watts).
