Background
I recently noticed that there was a dripping noise coming from the back of the toilet at my mother's caravan. I found that there was a leak at the joint between the pan spigot and the pan connector. It was most likely that the rubber seals had failed in the pan connector. As is so often the case no sooner had i started the repairs than i found that there were other smaller problems that also had to be replaced. In this case the sealing of the overflow pipe and the rubber diaphragm of the inlet valve. Fortunately there was very little damage to the carpet and the floor below which is treated for protection against water damage. I have heard horror stories in the past when people discovered water leaks in caravans where the entire floor had to be replaced. I maintain a regular set of maintenance inspections for the plumbing and pipework as so much of it is exposed to severe weather variations over the year and i always take the view it is better to spend a little time finding problems while they are small before they become much bigger more difficult and expensive to repair.

There was very little wiggle room behind the toilet cistern to remove the old pan connector so i decided to dismantle the pan and cistern.
While doing this i discovered that the original cistern securing screws and washers had mostly rusted away. I used a pair of mole wrenches to remove the screws as there was no usable part of the screw head still present. I took a great deal of care not to shear the screws when getting them out.
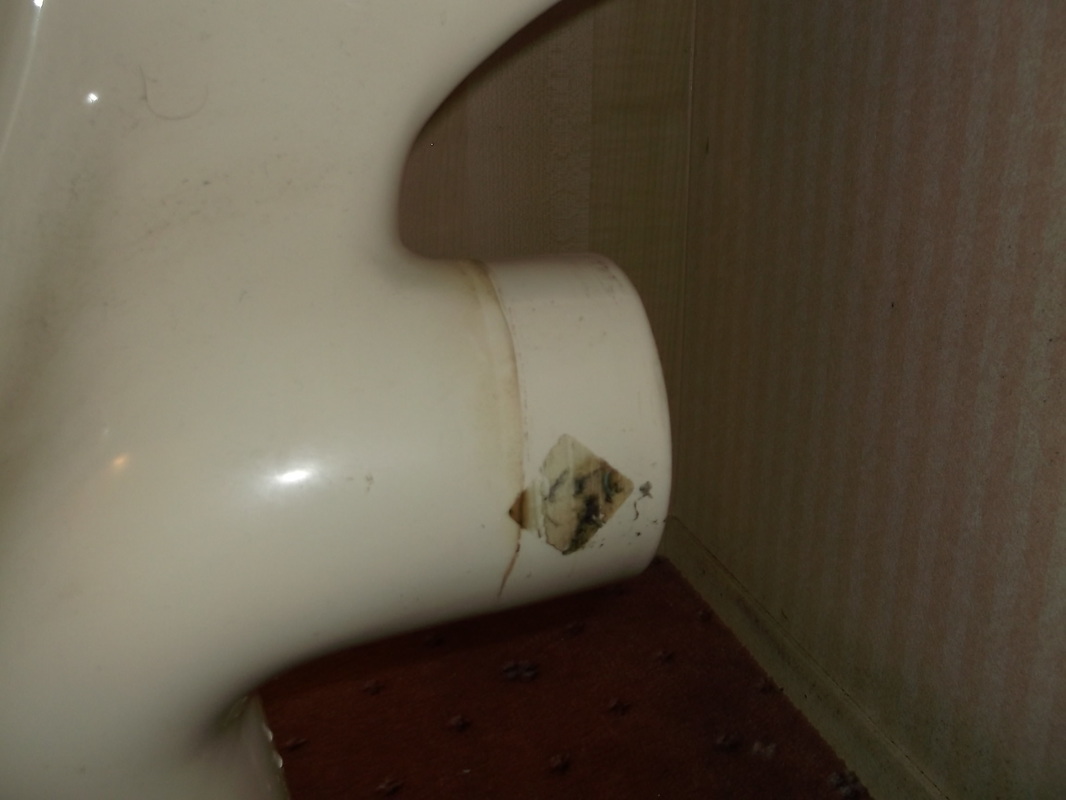
The screws securing the pan to the floor were in good condition and came out easily.
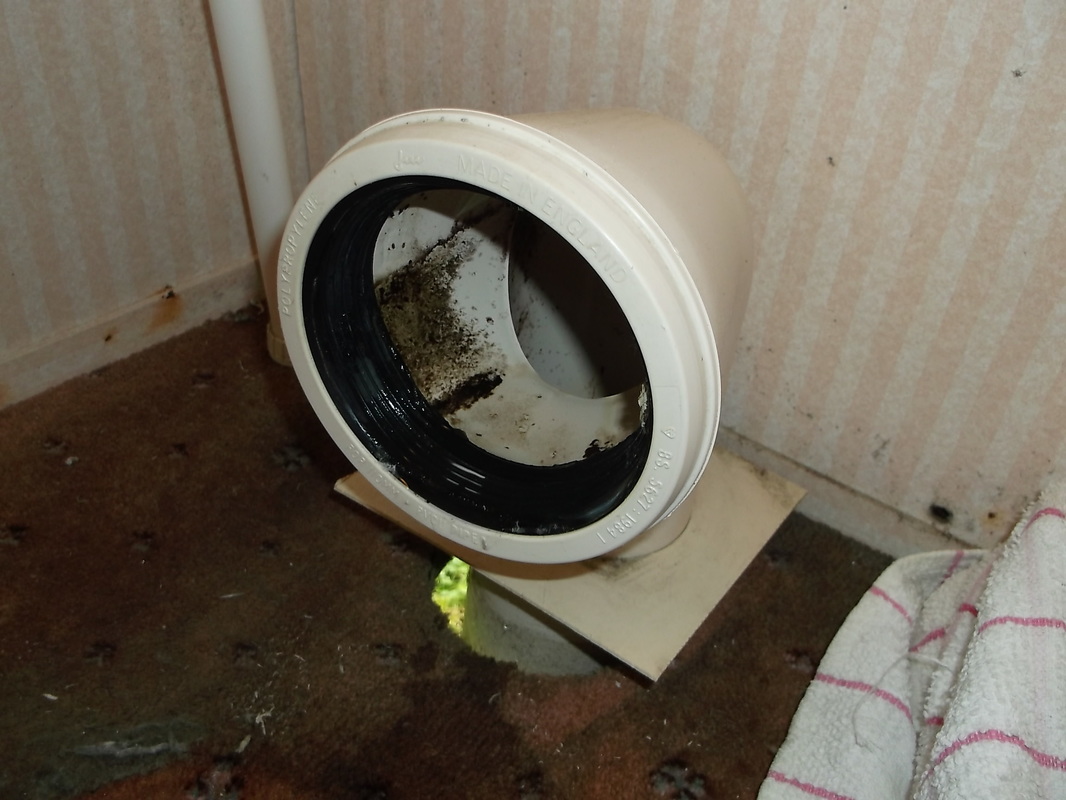
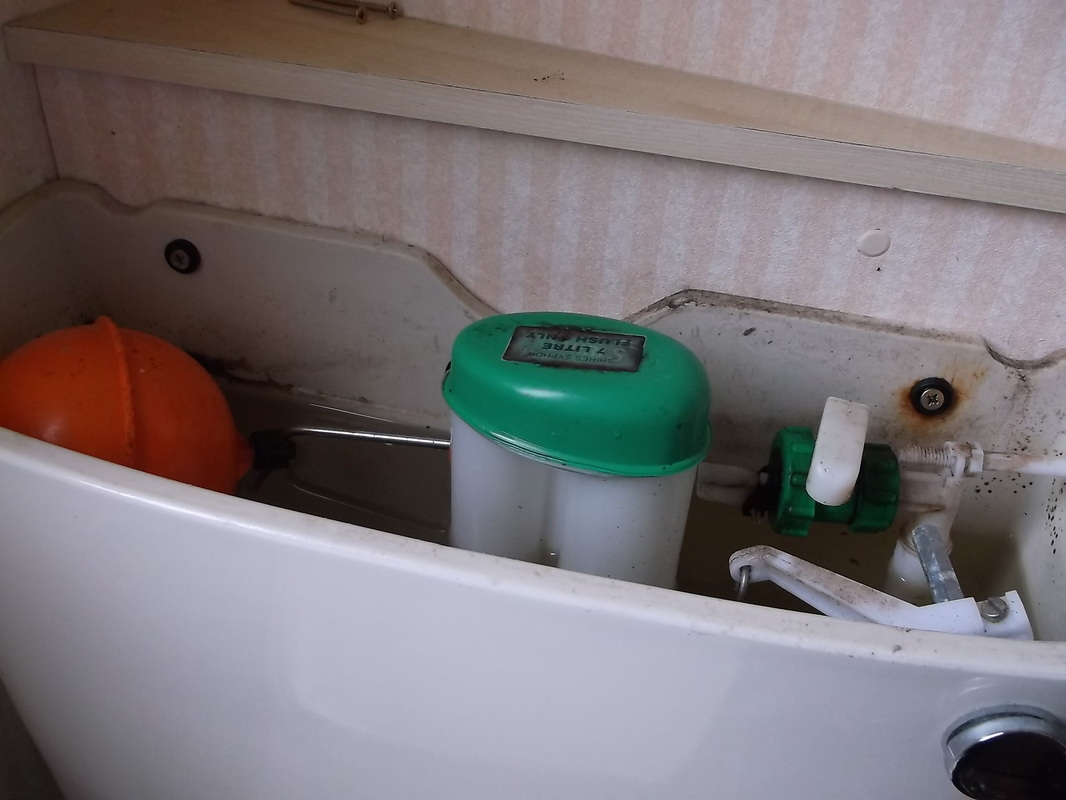
As the pan and cistern are coupled together they were moved away to clear access to the pan connector and the area behind the cistern. The cream coloured square panel is present to stop spiders and rodents using the pipe to access the caravan via the gap between the pipe and the floor. The fins on the black rubber seal were badly worn at the lower part of the connector.
|
This shows the pan spigot with the pan connector removed. When the pan was originally installed a label was left in place which bridged the pan connector seal. This would not help maintain the integrity of the seal over time! The label was removed and the spigot was cleaned up in preparation for the fitting of the new pan connector.
|
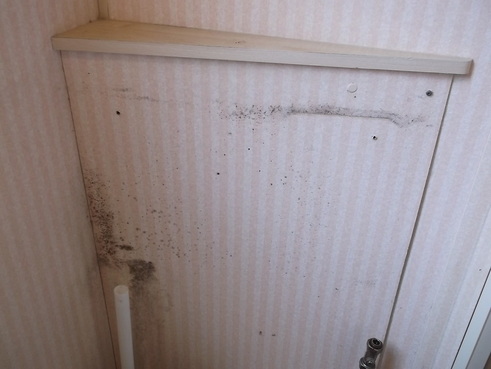
The removal of the cistern from the wall revealed some cosmetic damage to the wall behind that was not otherwise visible.
Initially i thought the mould around the area of the overflow pipe at the left of the picture was due to condensation over a period of time but after examining the underside of the cistern it was clear that there had been a very small leak from the seal where the overflow pipe connects to the cistern. This water had then run along the bottom of the cistern towards the wall and run down the wall causing the staining.
Anti mould spray was used to clean the wall and the vast majority of the mould and staining was removed.
As a result of this it was decided to replace both the pan connector and the overflow connector seal.
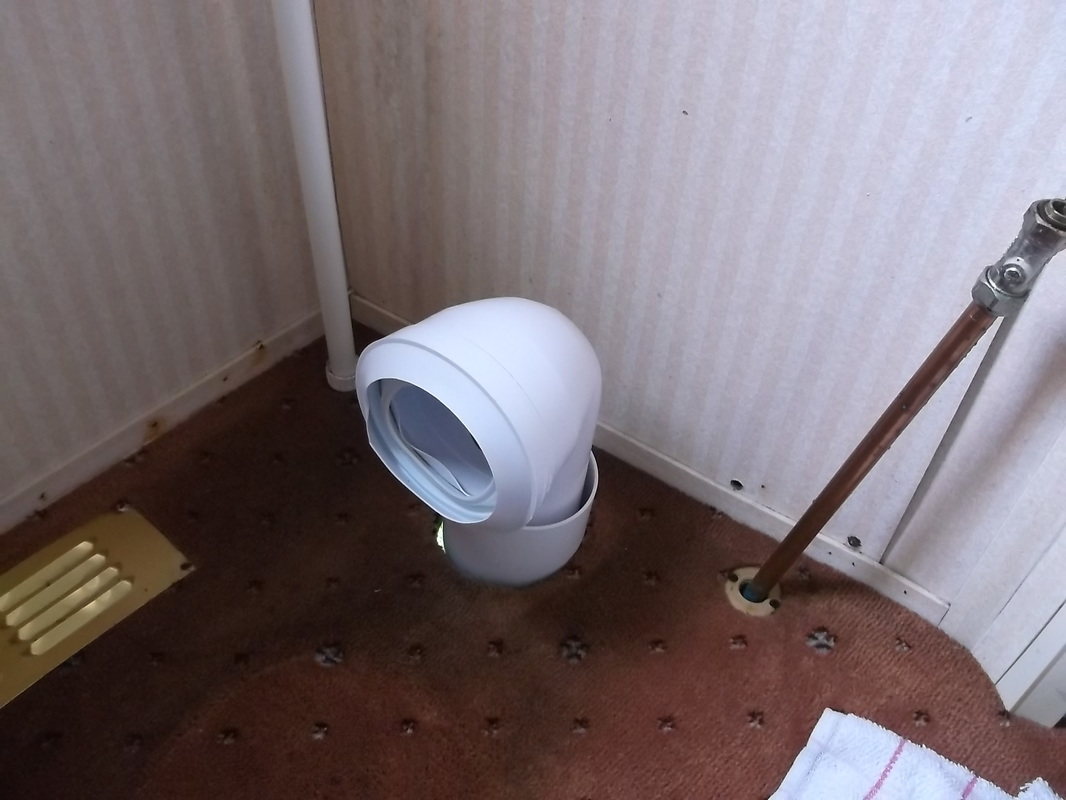
The new pan connector neck was not long enough to reach the soil stack below the caravan so an extension piece was installed and the pan connector was inserted into that. On this project and others involving plumbing i use McApline Plumbing parts. They are a little more expensive than the standard parts but they are of a higher quality and last much longer.
|
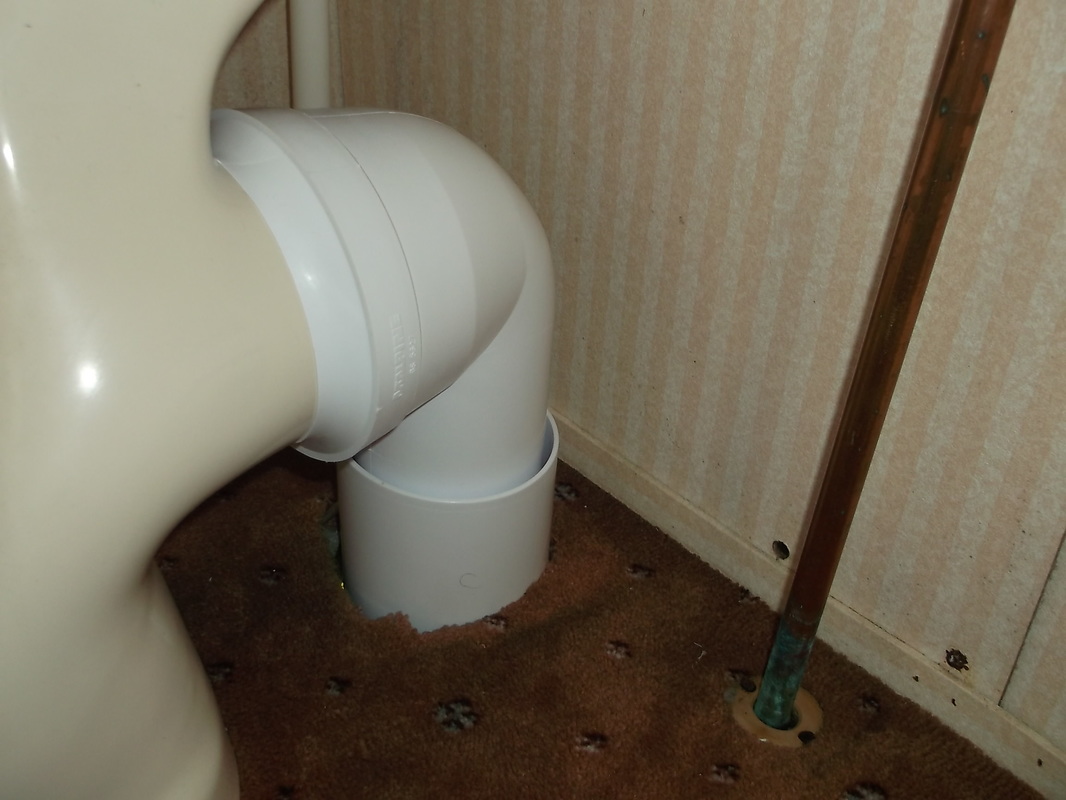
Here the outer seal of the pan connector and the top of the extension piece can be seen protruding through the floor. The McAlpine pan connectors used have two seals, an inner and outer seal both which provide a very tight seal. It can be a little tricky getting them on, a few careful test fittings helps, however they provide a good seal and cosmetic finish.
|
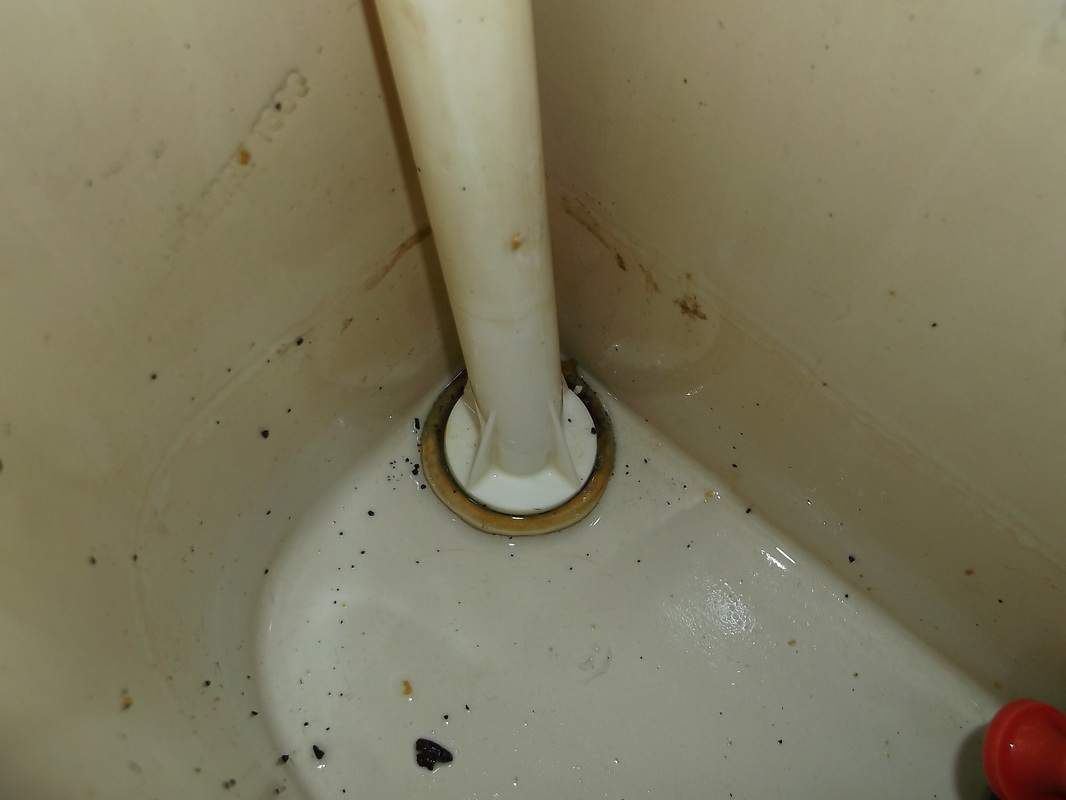
Here the sealing around the base of the overflow pipe in the cistern can be seen. A sealant and a rubber gasket were used to seal the connection. The over flow pipe was removed and the sealant was carefully scraped from the cistern surface. The black specks are the remains of the cistern securing screws which had corroded and fallen into the water.
|
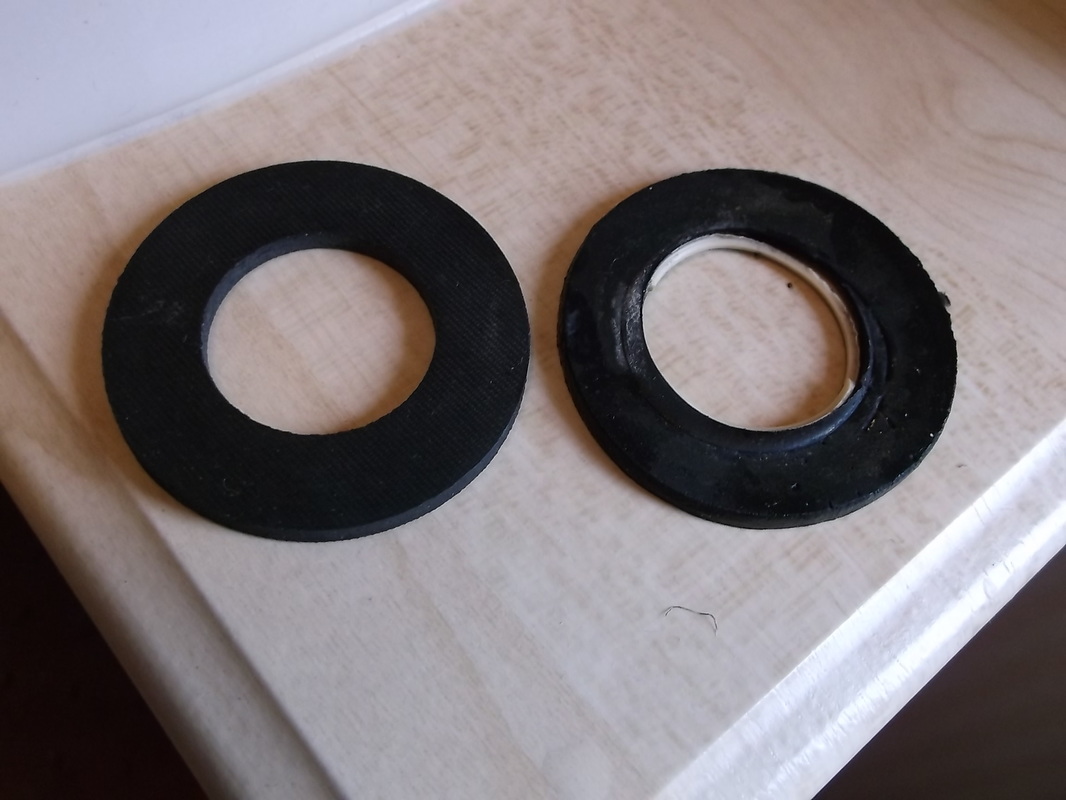
This shows the old seal on the right and the new one on the left. The old seal was badly distorted and about 60% of the thickness of the new one so tightening the securing nut would have little effect on the quality of the seal. Tightening would simply speed up the total failure of the seal.
|
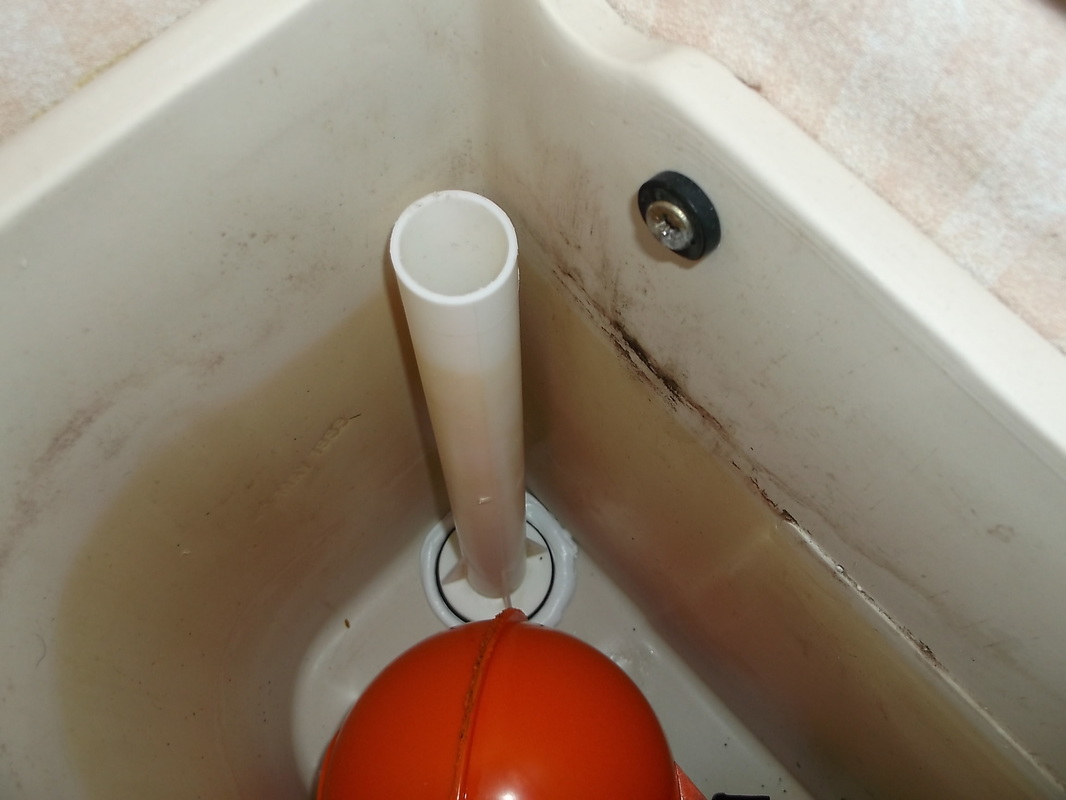
The overflow outlet can be seen here with the new washer and sealant installed. The sealant used was Soudal Fix All High Tack which was recently used to repair the external sealing of the caravan. This sealant was used here because it can be used in wet environments and remains flexible when cured. The new screws securing the cistern to the wall can also be seen.
|
The overflow pipe sealant was left to cure for about two hours and then tested. Both cistern securing screws were replaced because they had rusted away. It is not a good idea to secure sanitary ware in place directly with screws so i reused a couple of old tap washers that i had kept from tap repairs and used them here as washers to allow some flexing of the cistern without cracking or chipping.
|
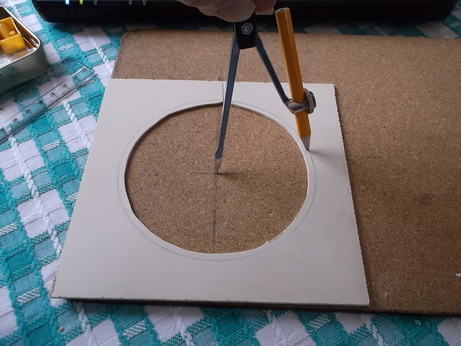
The plate which stops spiders, rodents etc entering the caravan in the clearance gap between the the pan connecting pipe and the floor had to be modified as i had to install an extension pipe which has a larger diameter than the neck of the original pan connector.
To do this i placed the plate onto a piece of cork which stops the plate sliding about. I then found the centre of the plate and marked it. A pair of compasses were used to mark the circumference of the new opening as shown in the photograph.
A craft knife was then used to carefully cut away the excess plastic to create the new hole.
