Background
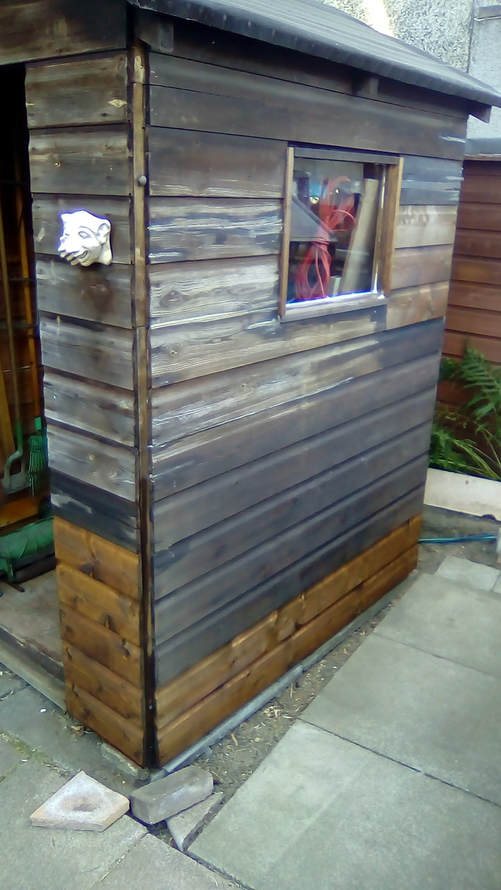
My father and a carpenter friend built a small garden shed over 50 years ago. I noticed in the past few years that it was not sitting as straight as it had been and could see some damage to the base at the rear. Over the winter of 2017-2018 the listing seemed to have become much more noticeable.
When i started to look at the damage it quickly became apparent that it was much more serious than i thought. The rear section of the frame had completely rotted away, the lower side frames were badly damaged and many of the lower external panels were damaged or rotted. There were also signs of considerable wood worm damage on the same areas. Initially i had hoped to be able to dismantle the side panels of the shed, repair them and put them back. This quickly proved to be impossible as in some areas there was little holding the lower parts of the shed together!
Fortunately i had cleared out the greenhouse and was able to move much of the contents of the shed into it. To examine the full extent of the damage to the shed i first had to remove the internal floor panels and then assess the extent of the repair work from there.
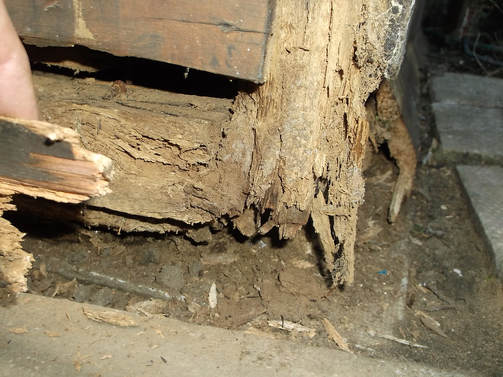
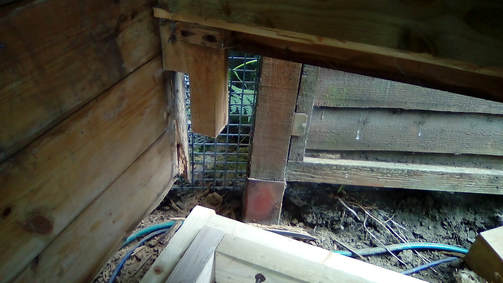
When i removed a couple of the lower cladding panels i was able to see that the extent of the damage was much greater than i had initially thought.
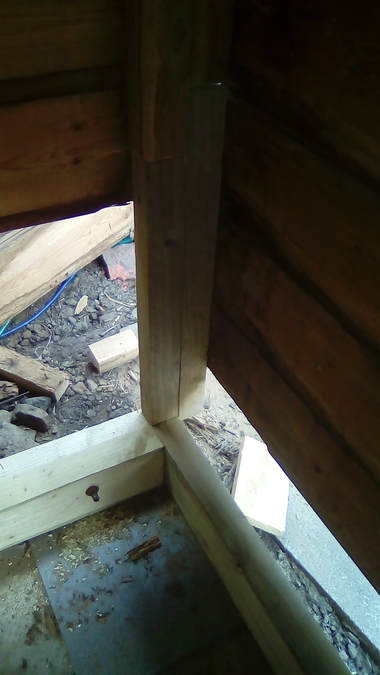
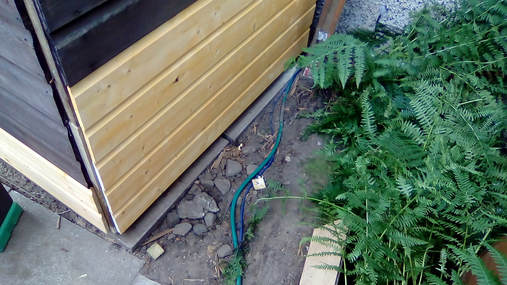
From this photograph, taken at the rear corner of the base, it is clear that the base, frame and vertical corner supports have rotted away and have turned to powder/dust. This did not bode well for what i would find under the shed and later i was to be proved right.
The root of the problem was that the shed base, made from concrete slabs had sunk or moved over time and was in effect lower than the surrounding ground. As a result, water, soil and debris from the surrounding ground flowed onto the shed and rotted it from below. As a result the shed was slowly tilting backwards and collapsing back onto itself.
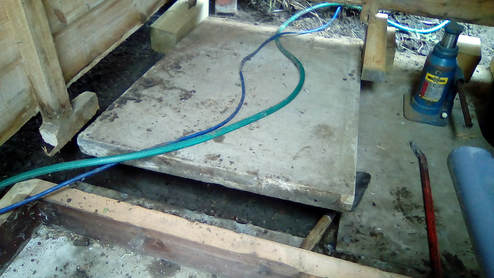
I cleared the majority of the contents of the shed into the greenhouse which had itself been cleared to prepare for this job. The floor of the shed was lifted to reveal the base. The floor was tongue and groove with concealed nail fixings which made removal tricky without doing too much damage to the wood.
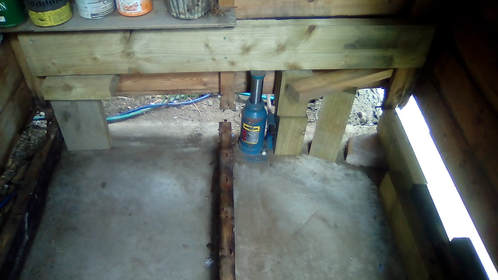
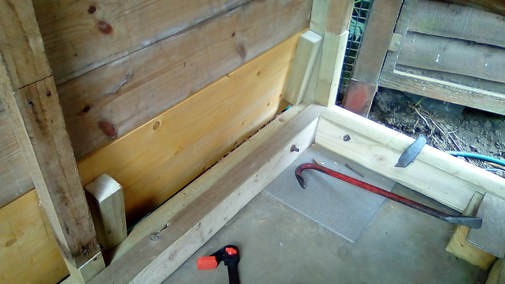
This picture shows the base of the shed after the floor was lifted and the majority of the rotted wood removed. the entire rear and much of the side of the base was gone.
In this picture, where clear space/light can be seen at the base is where solid wood should be!
As can be seen from the picture a large piece of 150 x 50mm wood was secured to the good wood of the frame in the shed and it was jacked up using a car 'bottle' jack. Large blocks of wood were used to prop the shed in place while the old rotted wood was removed. Fortunately the shed was of such a good construction 50 years ago that this type of operation could be carried out.
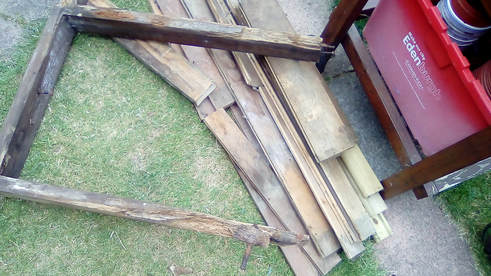
When i dismantled the shed i discovered that the base frame was made of two sections, a front and rear one. Much of the rear section had come into contact with the ground and as a result was rotted and what was not rotted was badly damaged and not worth salvaging.
Fortunately the front section was undamaged and could be left in place. I was able to salvage securing bolts that held the two sections together.
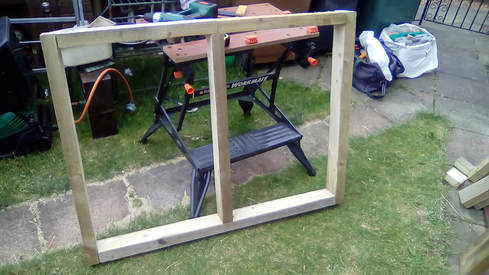
I had a 100 x 100 x 2400mm post left over from the scooter port and caravan decking projects a couple of years ago.
While repairing the shed i wanted to use up as much spare wood i had lying around to keep the cost down and to keep to the 'reduce, reuse, recycle' ethos
I was able to cut the post down into sections and together with other spare cuts create frame pieces for a new base frame.
Another problem i came across after removing the rotten base was that the slabs that the base sat on had shifted and tilted which meant that water ran onto it from the surrounding ground rather than off it.
From inside the shed with the shed supported on a car jack and wooden blocks i was able to lift the slabs, level and compact the ground and then re-lay the slabs.
The slabs are 900 x 600 x 50mm and very, very heavy. This was by far the most strenuous job to do as it was such a confined space.

After the slabs had been re-laid the new rear section of the base was installed and secured to the front section using the original salvaged bolts.
Some 50 x 47mm treated wood was purchased to act as new base rails for the rear and side sections of the shed. These were bolted to the frame using spare bolts that my father had kept since the shed was originally constructed.
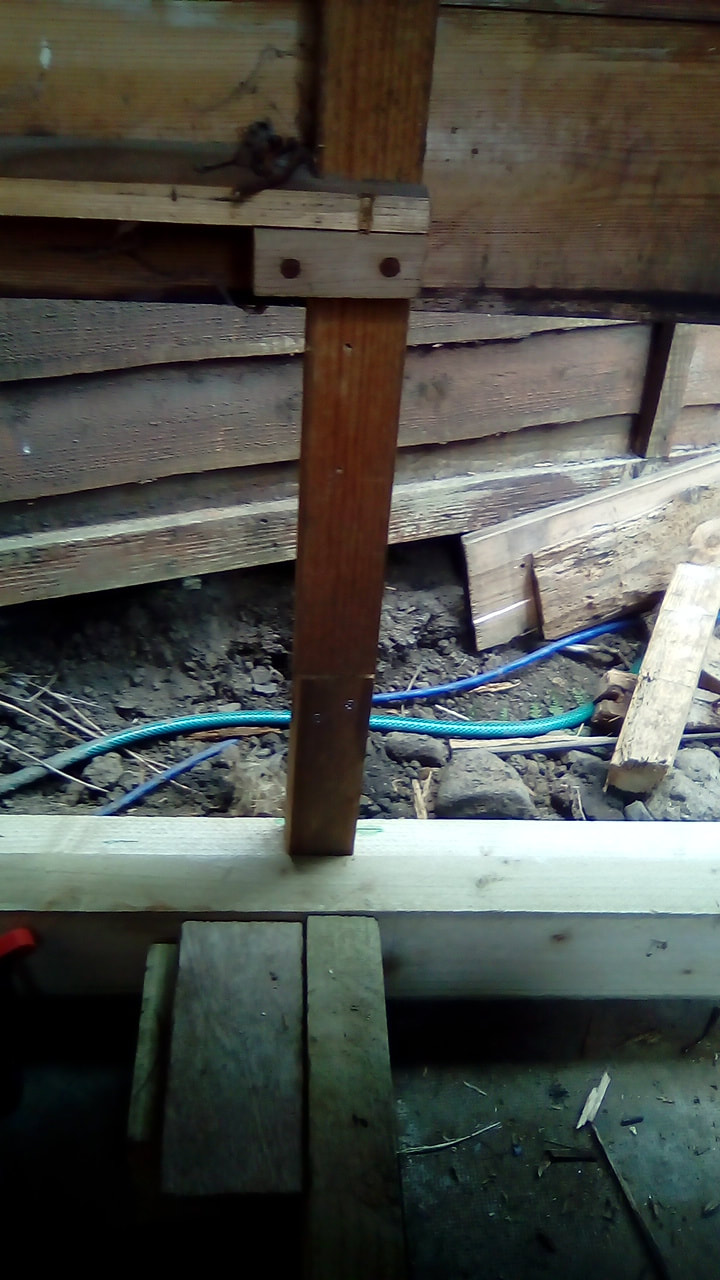
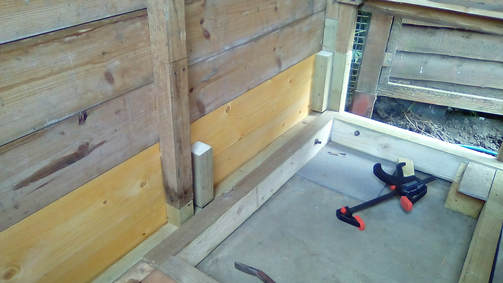
In this picture the corner of the base frame, the new base rails bolted to it and the remains of some of the rotted corner uprights can be seen. While the frame was being repaired i took the opportunity to insert some surplus door step tiles under the frame to ensure that it would always be clear of the ground. and that any water that got under the shed could clear away without coming into contact with the wood of the base.
Having installed the new base i started work on repairing the vertical uprights of the shed that had been damaged.
I used the car jack to set the height of the shed back to its original dimensions. I then used a type of oscillating plunge saw to cut away the rotted wood until by examining the end grain i could be sure i was back to good wood. I ensured that the two pieces of the inner and outer frame had a step/offset so that they could be secured together creating a stiff structure.
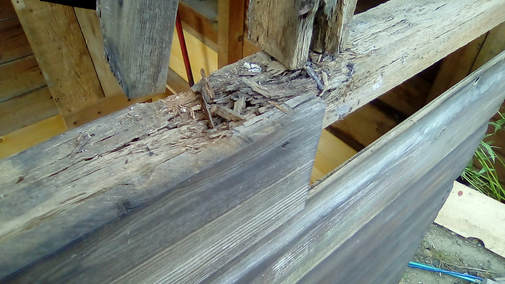
In this picture the rotted uprights have been cut back leaving the offset for the new wood to be installed.
I used the car jack to set the height of the shed back to its original dimensions. I then used a type of oscillating plunge saw to cut away the rotted wood until by examining the end grain i could be sure i was back to good wood. I ensured that the two pieces of the inner and outer frame had a step/offset so that they could be secured together creating a stiff structure.
In this picture the rotted uprights have been cut back leaving the offset for the new wood to be installed.
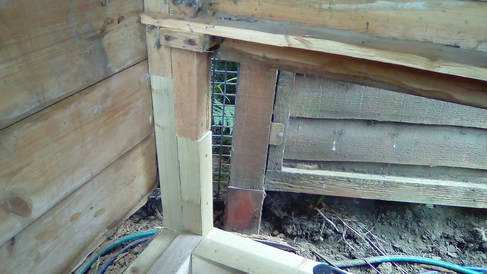
This picture shows the corner section with the new pieces of wood installed.
Each piece of wood is secured to the adjoining piece using decking screws creating a stiff secure structure.
The same procedure was carried out for the middle support and the opposite corner.
Middle rear wall support repaired. Only a small section had to be replaced.
|
Rear corner vertical upright repaired with new wood.
|

After the base and internal structure was repaired i was able to start on repairing the cladding.
This was a 'shiplap' type cladding and after some searching i was able to find a local supplier with wood of a very similar dimension.
I still had to allow for the fact that the original cladding had dried out over the past 50 years or so and had shrunk a little in some places.
In this picture the side cladding has been installed.
The most difficult section of cladding to repair was the one against the wall of the house.
To overcome the inability of having access to hammer in nails i assembled the replacement panel outside by attaching the cladding to two short battens at each end. I also attached a piece of batten approximately in the middle to act as a handle to manipulate the panel from inside the shed.
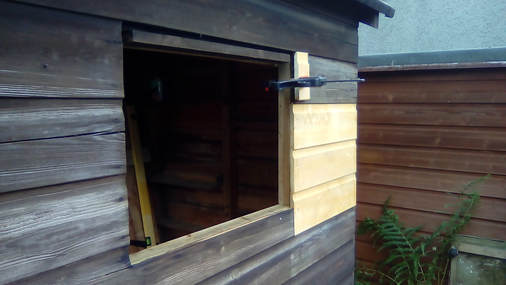
In this picture the replacement panel has been slid along the side of the shed beside the house wall and partially installed.
With the replacement panel approximately in place the 'handle' batten was used to slide it into its final position and hold it there while screws were used in the end battens to secure it to the frame of the shed.
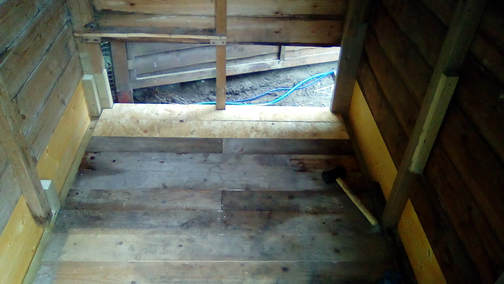
Having completed the repairs to the lower sides of the shed the floor was then re-installed.
Rather than use the concealed nail fixings that were originally used i secured each of the tongue and groove pieces in place with a stainless steel screw.
I decided to leave the installation of the rear cladding repair panels until after the floor was re-installed to allow as much light into the shed as possible while i was working.
I discovered that two of the rear most floor boards had been damaged by rot so these were replaced by a couple of pieces of external grade OSB that were left over from the scooter port project.
When i started to repair the rear cladding i found that i would have to replace more than i had originally estimated.
I found that the wood was damaged by rot at the tongue and groove section and at the ends. A couple of panels were also split which would allow water to enter if they were left in place. These had probably split due to the shed slowly collapsing on itself due to the rotting frame.
At this stage of the repairs i thought that i was nearing the end. I knew there was some damage to the window frame but had assumed that replacing the damaged parts would be all that was needed. However it quickly became clear that the damage was much greater than i had thought.(no change there then!)
I removed the window and surrounding frame and discovered that the lower frame section that also served as a shelf support inside was badly rotted. Fortunately i had a piece of wood to hand to replace this.
The entire window frame was replaced together with the shelf support which also formed part of the window frame.
The cladding around the window also had to be replaced as it was very dry and had split letting water in which in turn had caused rotting of the original shelf support and window frame.
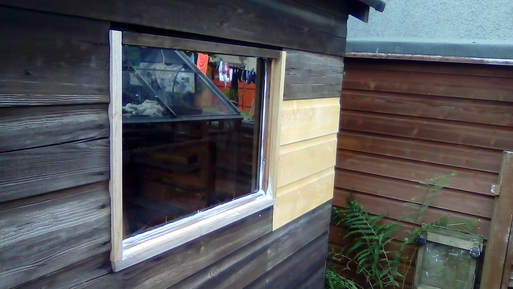
In this picture the window frame and cladding has been replaced.
The window was originally sealed with putty. This was removed and replaced by Soudal Fixall sealant/adhesive.
The window was originally sealed with putty. This was removed and replaced by Soudal Fixall sealant/adhesive.
With the majority of the structural and cladding repaired a creosote substitute 'Creocote' was used to protect the new wood.
The whole shed was then given two coats to protect it.
This picture was taken before the entire shed had been coated.
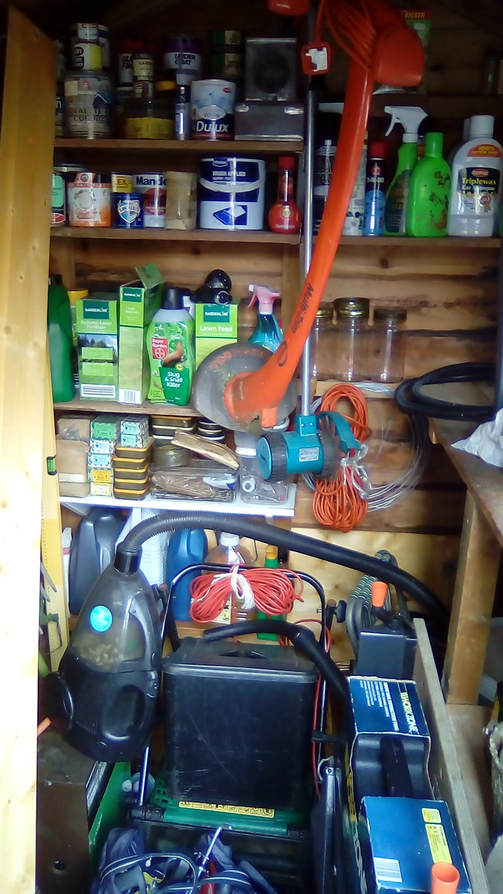
When the external work was completed, some new shelves were installed using wood that was found when the shed was being cleared for repair!
The original shelves were quite narrow but the new ones installed are at least twice the width.
The total cost of the wood purchased to repair the shed was GBP40. I also used screws, wood, brackets etc that were left over from previous projects so there is now less to store in the shed as it has been used in its construction.
The repairs took the best part of 5 days but it was very hot so i took my time not being accustomed to that kind of weather in Scotland!
This picture shows part of the inside of the shed after the shelves had been installed and all the items moved back in. I also took the opportunity to throw out items no longer of any use and to re-organize the storage in the shed.
It may seem like a lot of effort to save a 50 year old shed, but apart from the bottom 150-300mm of damaged wood the rest of the shed was in very good condition and well worth saving. I priced a replacement shed of similar quality and size at GBP550 so from my point of view it was well worth the time and effort.
