Background
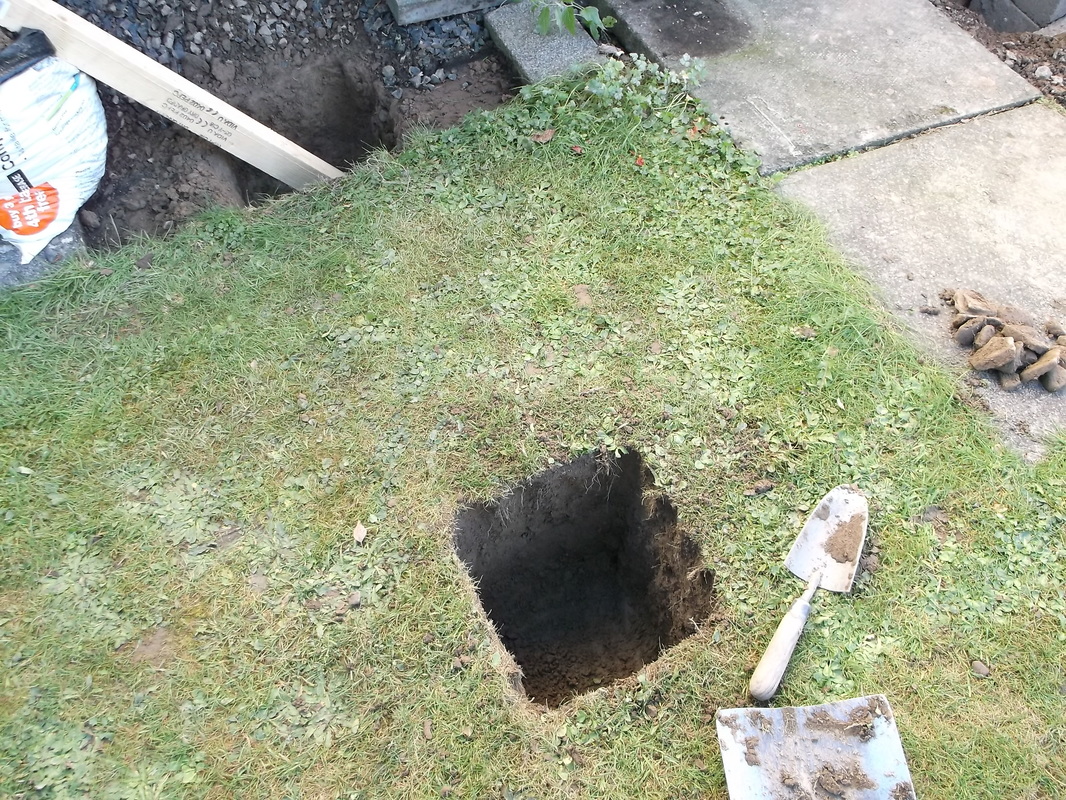
The first job in the construction process was to measure out the site and mark each of the bases for the frame. Each hole was then dug out to a size of 300mm x 300mm and to a depth of 400mm approximately. Bags of pre-mixed concrete were used to fill each hole after being mixed on plywood sheets to protect the grass and pathways.
The eight holes down the side of the caravan were completed over 4 days in October 2014. To avoid working in cold damp conditions and damaging the grass all work was stopped at the end of October towards the end of the season.
In April 2015 work was recommenced preparing the foundations for the section of decking at the front of the caravan.
The details of the work are recorded below.
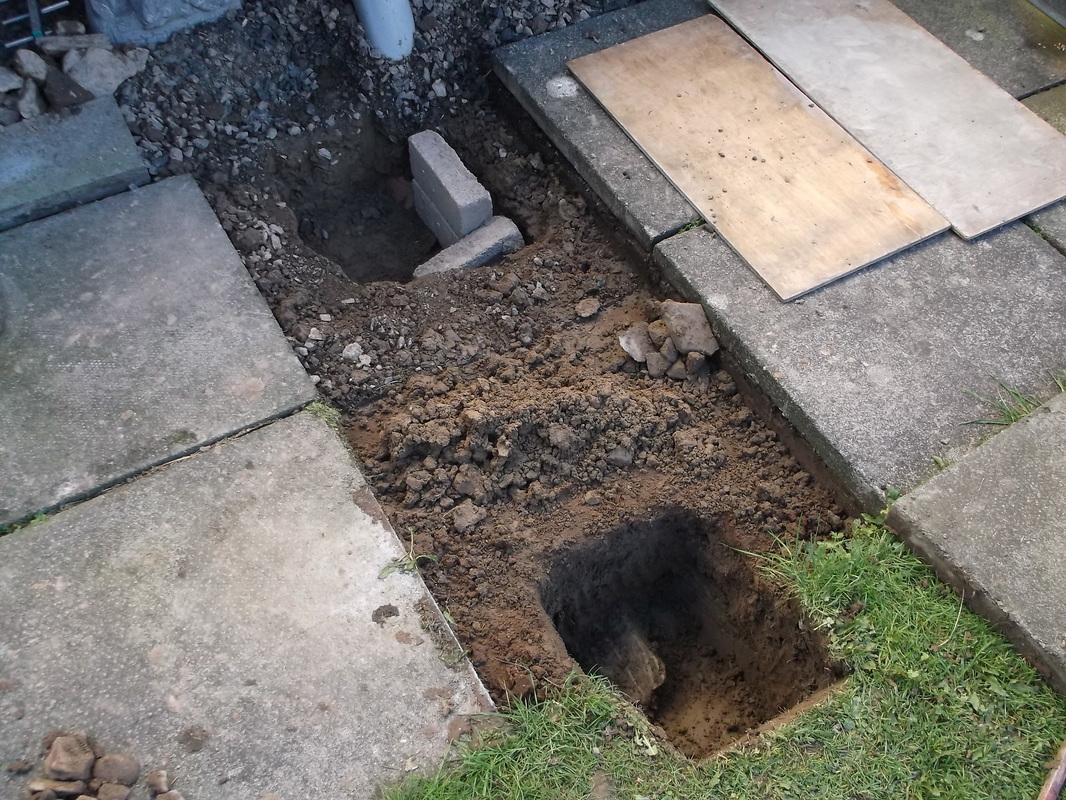
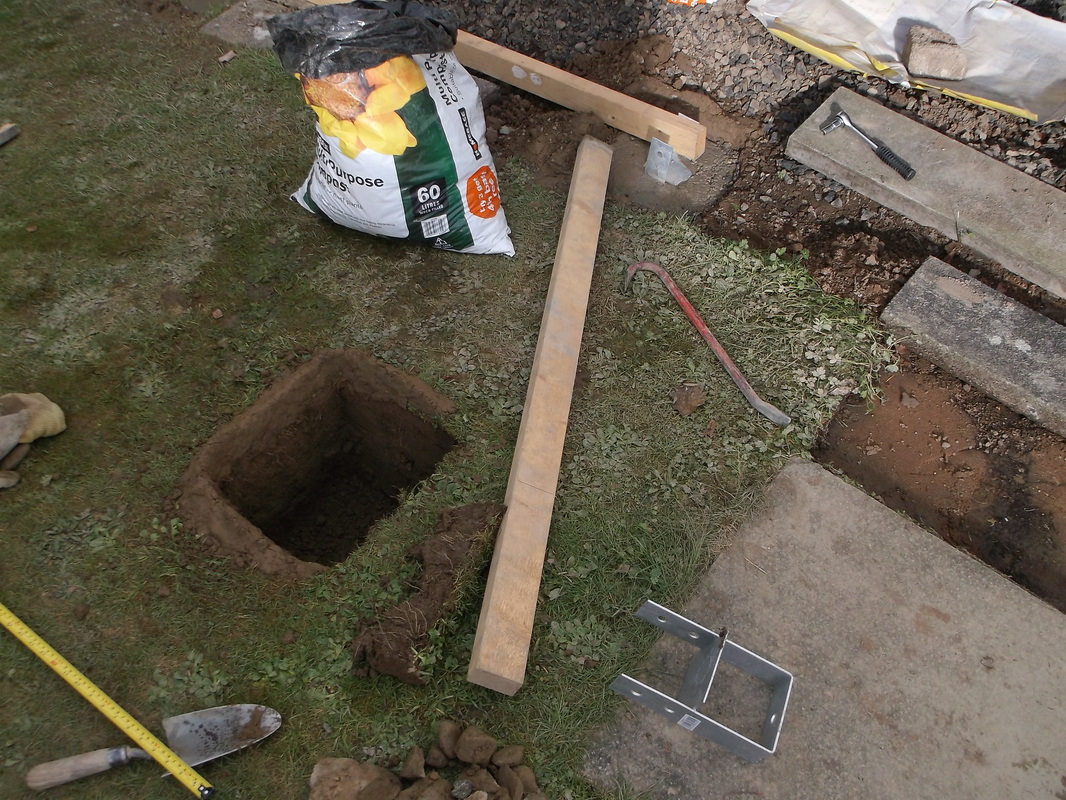
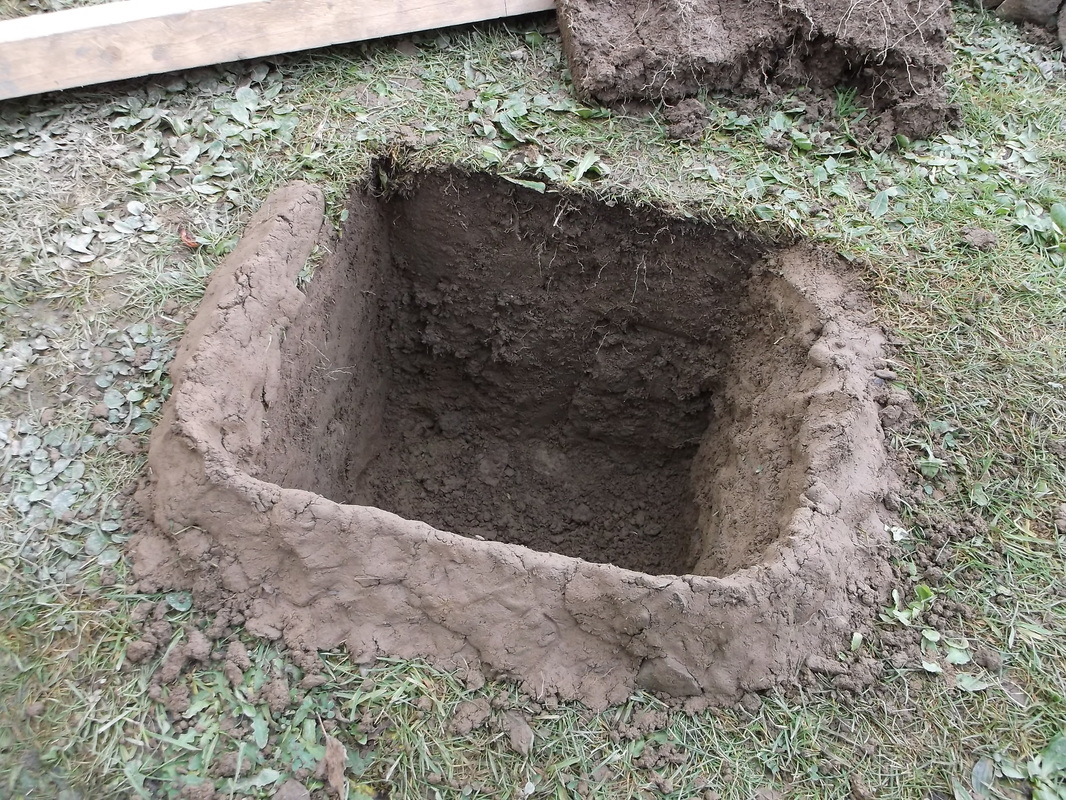
After preparing a set of plans, measuring out and marking the site the hard back breaking work got under way. Holes were dug approximately 350mm square and 350mm deep. They were then filled with concrete up to just above ground level. The galvanized ground supports were then forced down into the concrete ensuring that all air gaps were eliminated. This photograph shows the first two holes produced ready for the concrete.
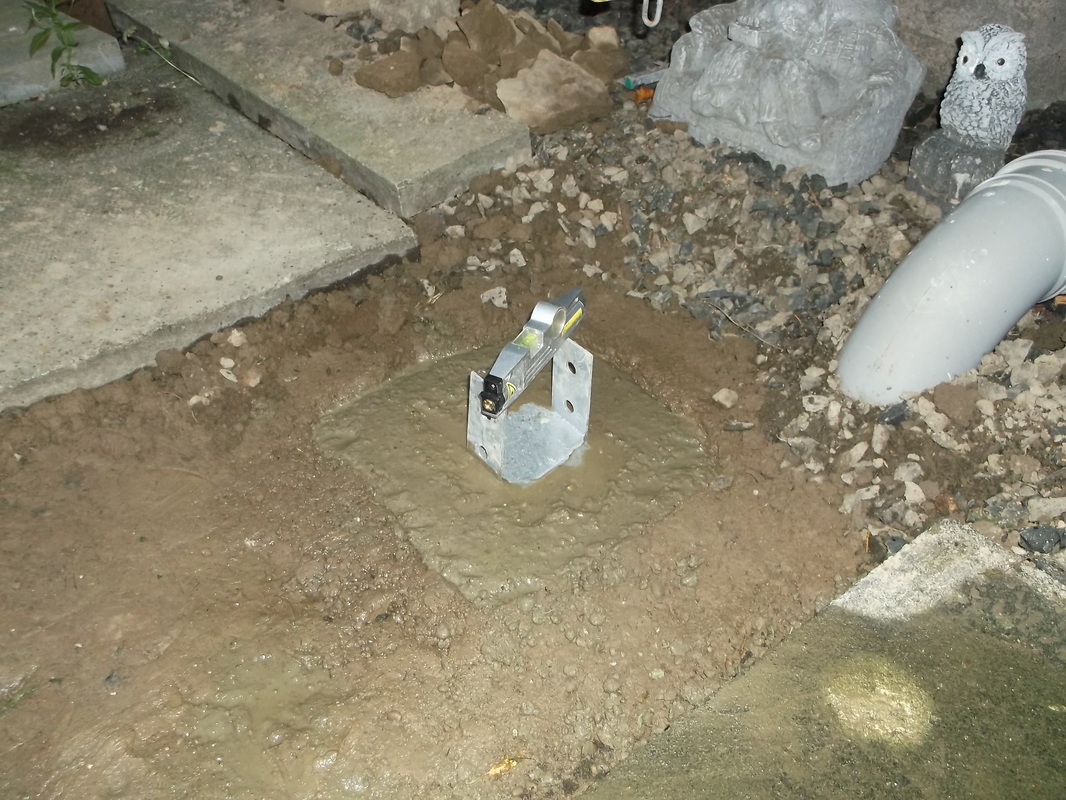
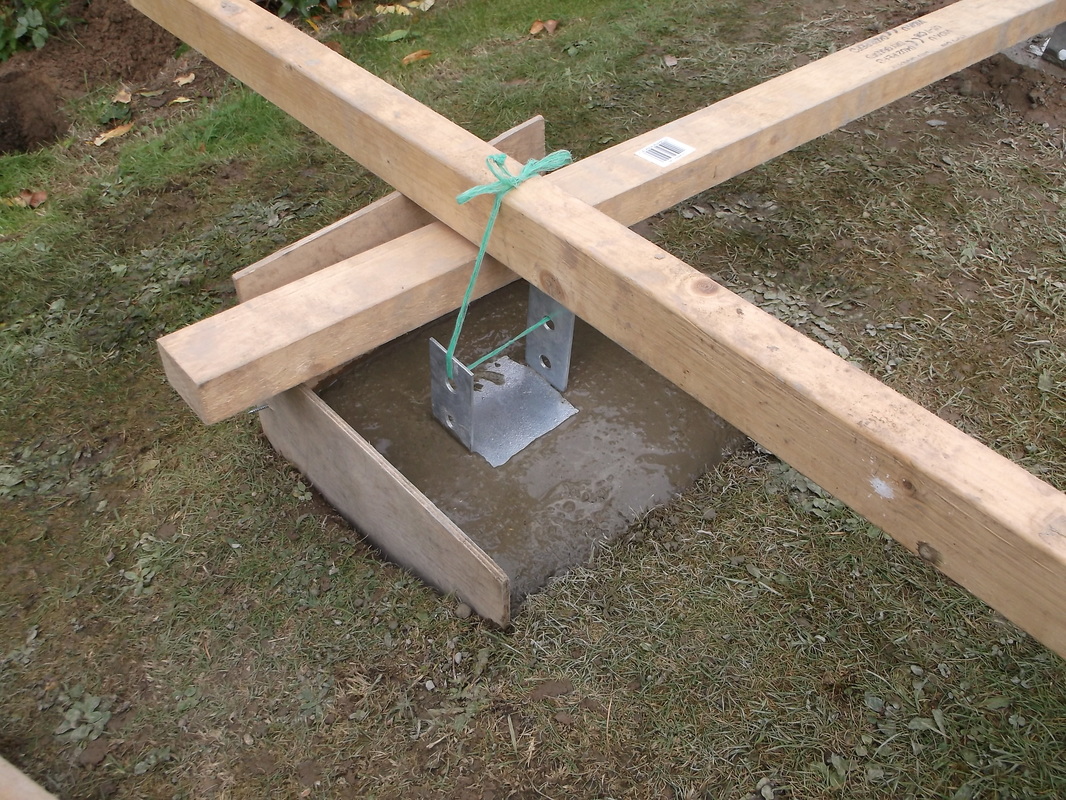
This shows the first metal support post set into position. A spirit level was used to ensure that the support was as close to level as possible.
Installing the third set of supports was a little trickier than the first two as the ground was on a 10-15 degree slope. After the hole was prepared and the support installed a wooden support was used,attached to the previous metal support to suspend the metal support in place ensuring it was set in a vertical position in the concrete.
This photograph shows the third set of holes after the one closest to the caravan had been finished. It can be seen at the top of the photograph. The second of the third pair of holes is about to be filled with concrete. The metal support that is inserted into the concrete can be seen in the foreground.
The third set of holes were on a significant slope so plywood formers were used to contain the concrete and provide a good cosmetic finish. Again a temporary set up of wooden poles was used to align the supports and set their position and orientation correctly.
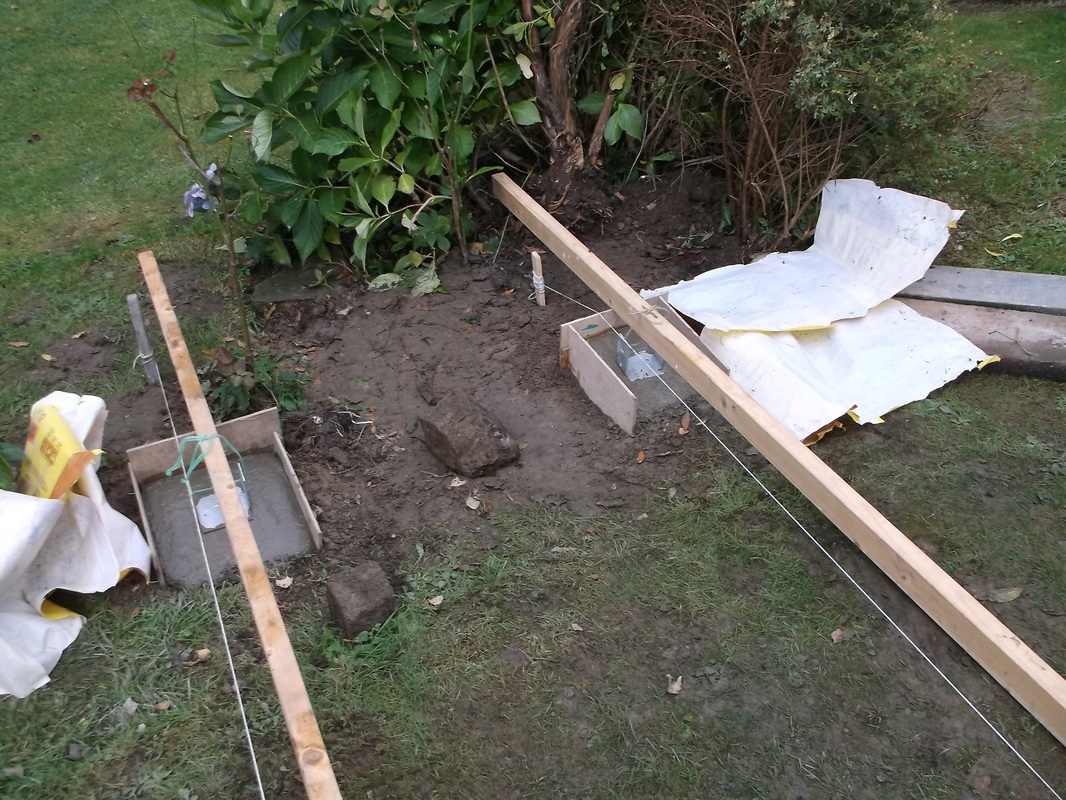
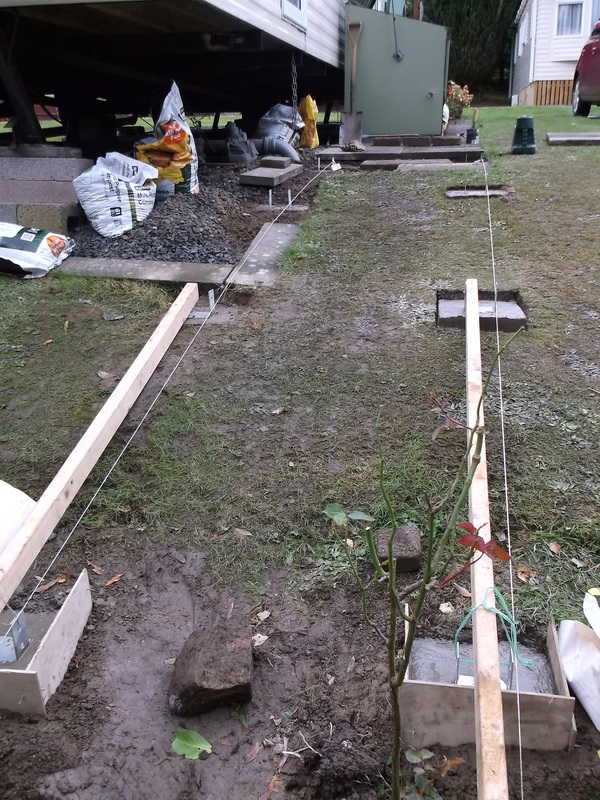
This photograph shows the last set of post bases completed waiting for the concrete to set. The wood and lengths of string were used to ensure that all four sets of post bases were correctly spaced and aligned.
The photograph to the right shows all four post bases lined up. Getting to this point, measuring the site, marking, digging and making the post bases took 4 days. They were long hard days in mid October 2014 but fortunately although damp the temperature was not cold for the time of the year and there was no wind. |
This photograph shows the second set of holes. These like the first set of two were on level ground so were relatively easy to prepare although spending around an hour preparing each hole is pretty back breaking work. All the soil removed was placed in bags and stored. It was planned to redistribute this around the flower plot at a later date.
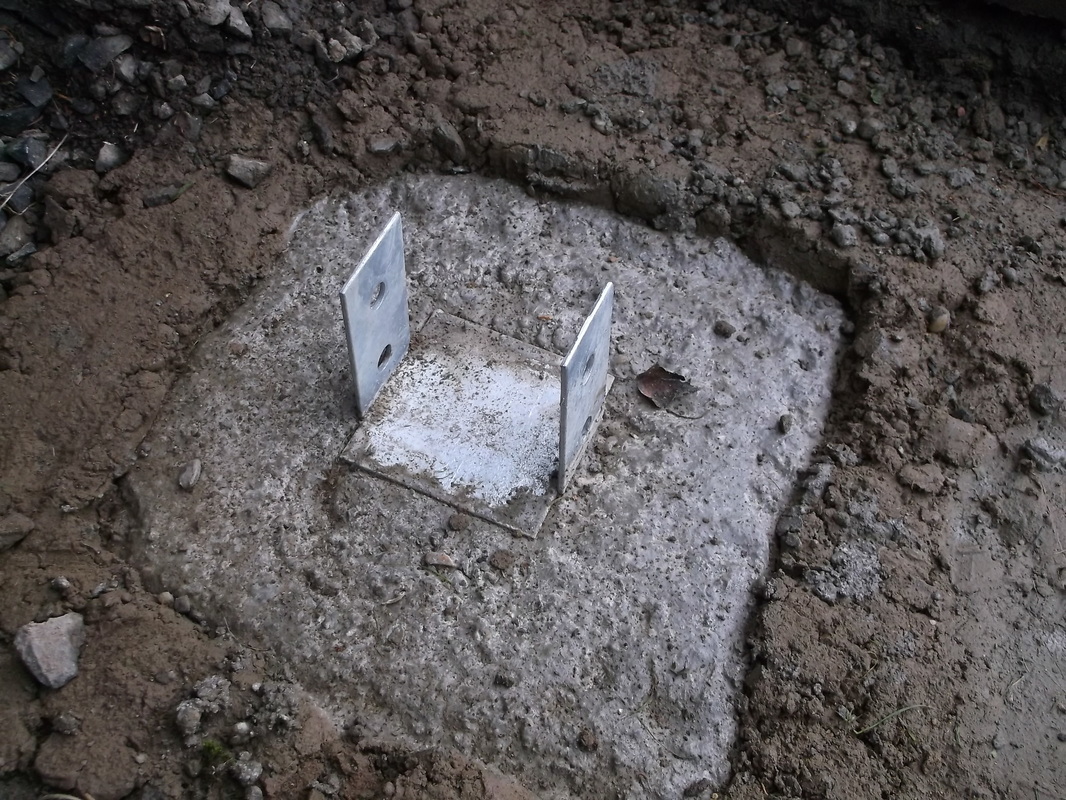
This photograph shows the first metal support post 24 hours after being installed and the concrete fully set. The results were pretty much as expected although i did find that the concrete seemed to shrink a little more than i expected resulting in the surface of the concrete being slightly below the ground level.
This photograph shows how the the third set of holes were prepared. Because the soil excavated was very 'clayish' in nature it was used to make the supporting walls of the hole ensuring that the concrete would be the correct depth. It worked quite well but in the later holes i decided to use plywood formers as the angle of the ground was steeper and the finish was better looking.
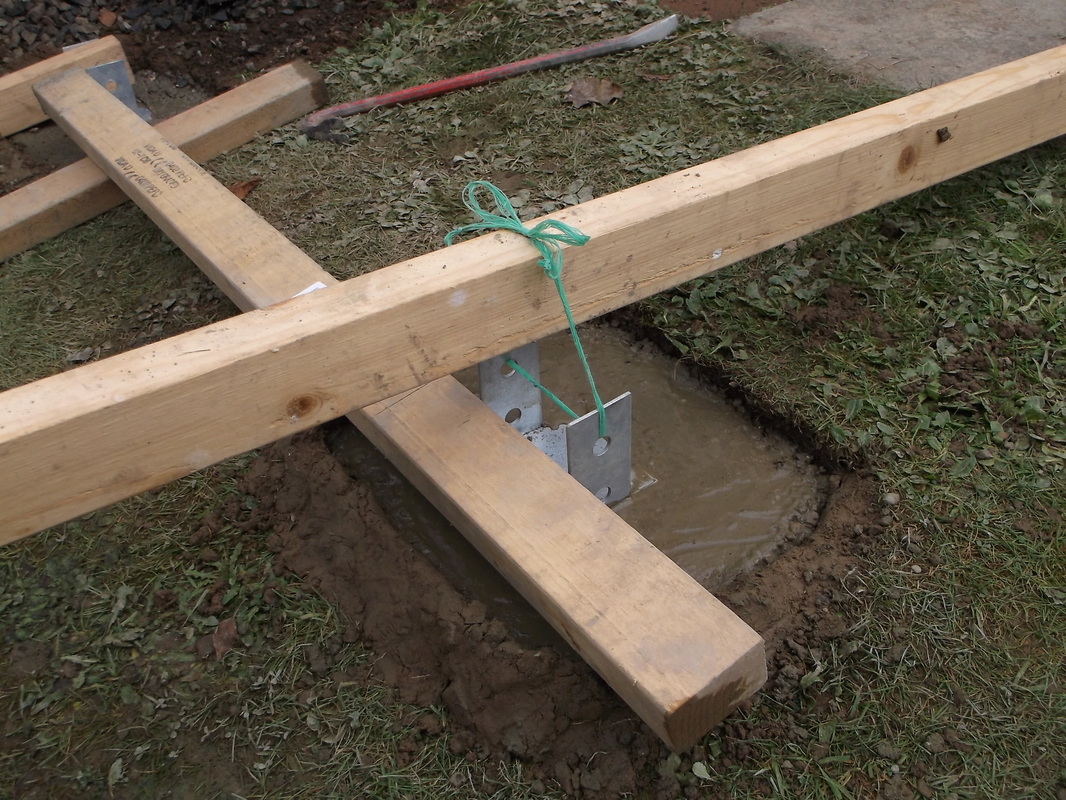
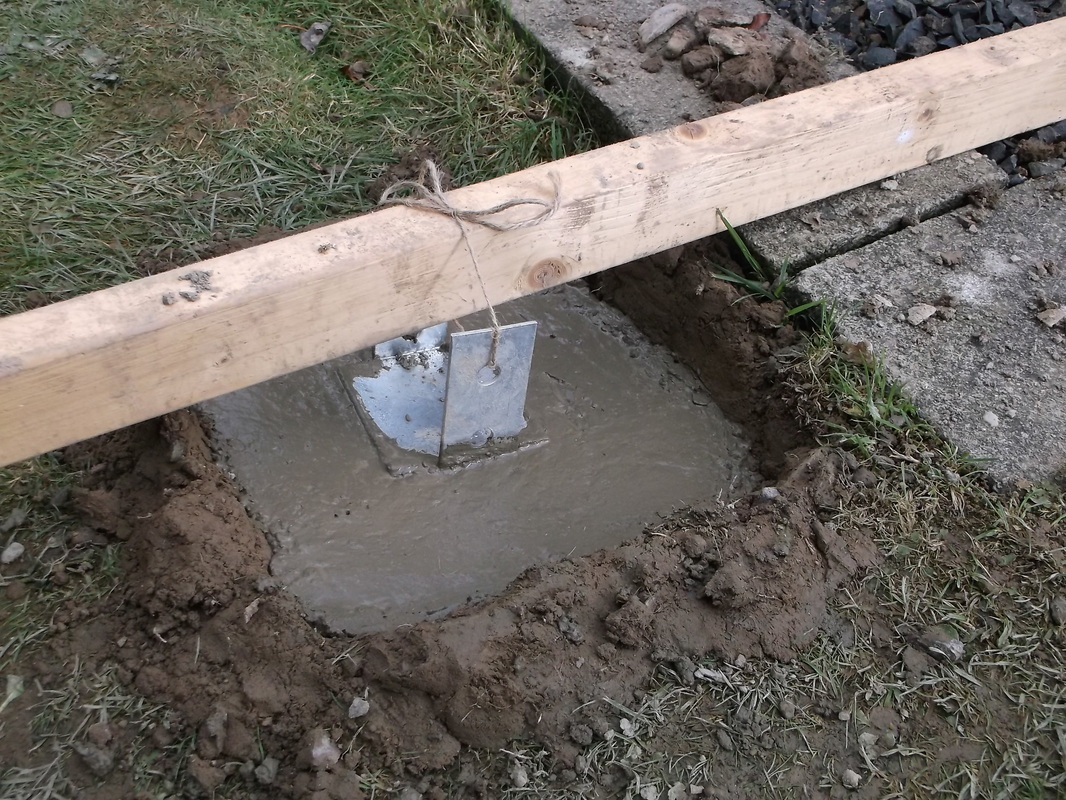
This photograph shows the second hole of the third pair filled and the support suspended in place. The arrangement of wooden supports ensures that the two supports are vertical, level and horizontally aligned with one another.
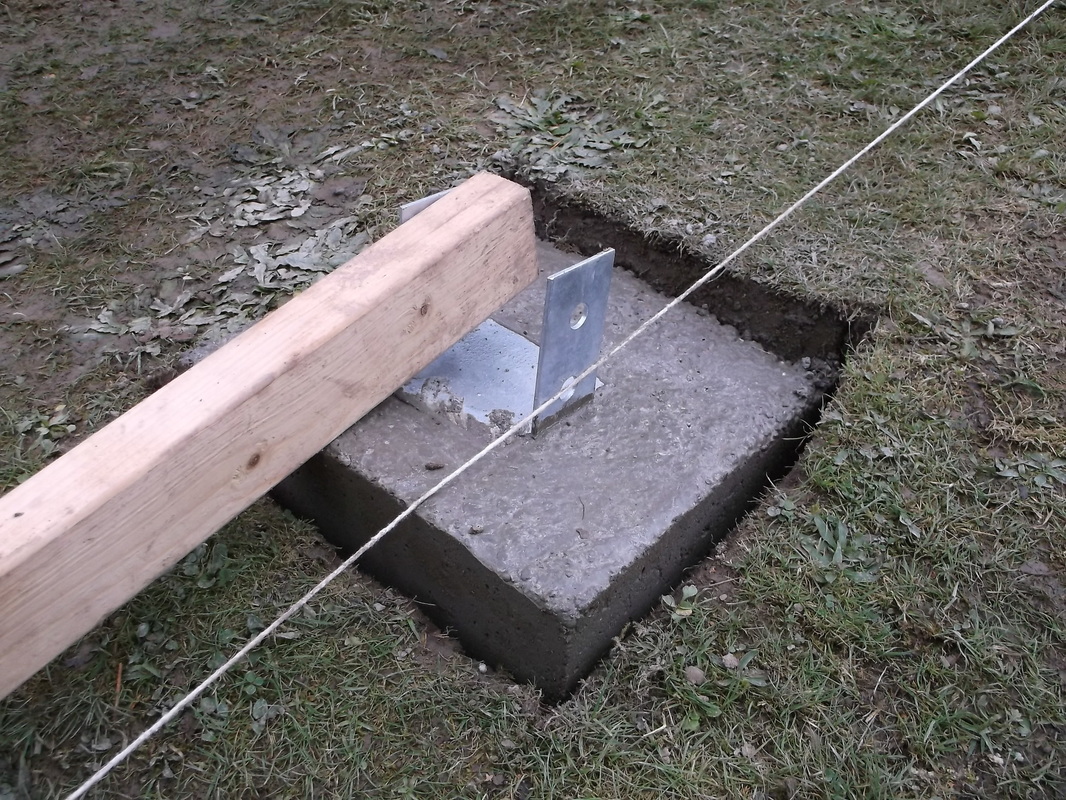
This photograph shows the finish achieved with the plywood formers after they were removed. The string in the photograph was used to ensure the final fourth pair of supports were in line with the previous three.
|

A week after the work was completed the grass had recovered. It was a little flat with all the walking but the small amount of rain had cleaned it up and made it look a lot better.
Because the post bases were exposed and in open ground next to the caravan i attached solar powered LED lights to the bases to mark them for any one who was walking around while it was dark.
All of the above work was completed in October 2014 as the weather was not good enough to complete all the work before the end of the season in November 2014.
April 2015... Work begins again on building the foundations.
In October 2014 the post bases for the section of decking that runs along the side of the caravan were installed. Work was stopped for the winter to minimise the possibility of badly damaging the grass and soil. As the weather has been very mild and dry for this time of year work was restarted as it would be great to complete the decking as soon as possible and get as much use as possible of it this year.
In October 2014 the post bases for the section of decking that runs along the side of the caravan were installed. Work was stopped for the winter to minimise the possibility of badly damaging the grass and soil. As the weather has been very mild and dry for this time of year work was restarted as it would be great to complete the decking as soon as possible and get as much use as possible of it this year.
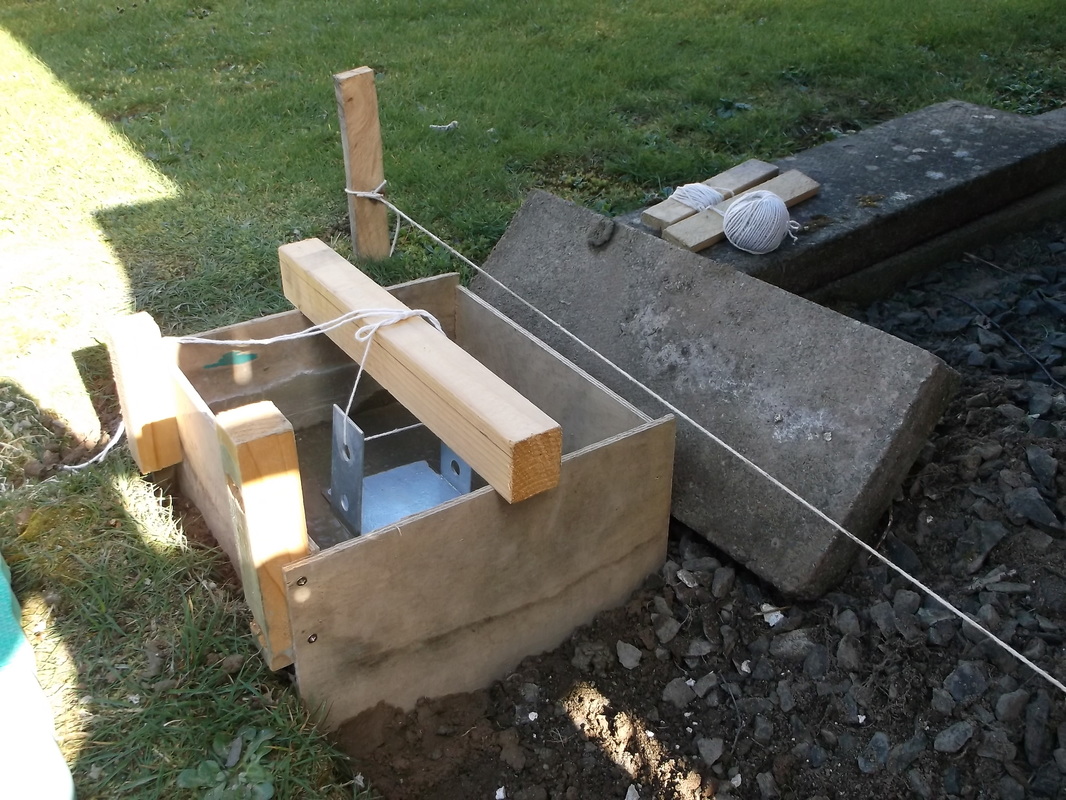
The foundations for the section of decking along the side of the caravan were laid in October 2014. The following pictures show the installation of the foundations for the section along the front of the caravan. The bases nearest to the caravan were set out first. The holes were dug and then the concrete was prepared and poured into the holes. The plywood formers were used to provide a good finish and to allow the top surface of the base to be above the surrounding ground level which will ensure the wooden posts are not in contact with the ground. |
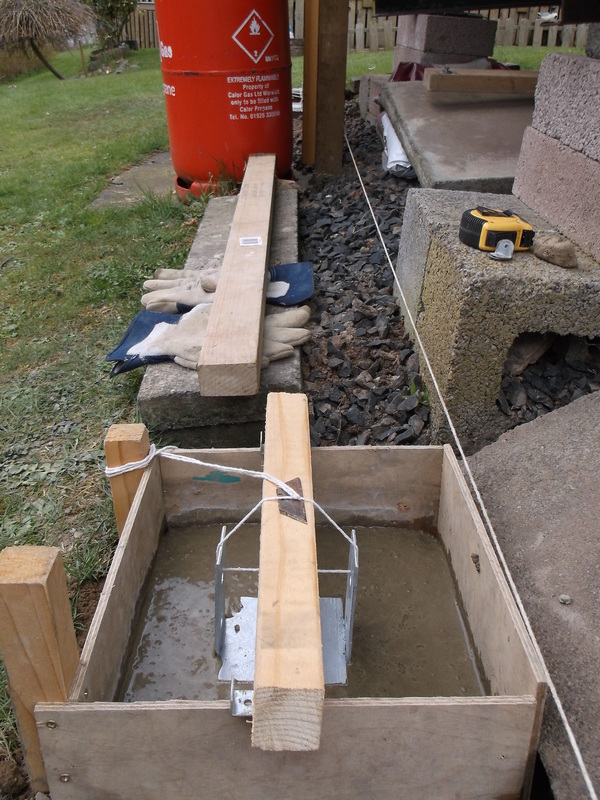
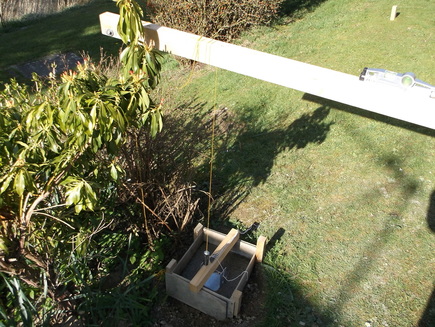
The plumb line was used to locate the centres of the inner corner bases by dropping the plumb line from the edge of the underside of the caravan. A piece of string was then used to line up the two points and ensure the metal bases that were to be set in the concrete were correctly aligned.
|
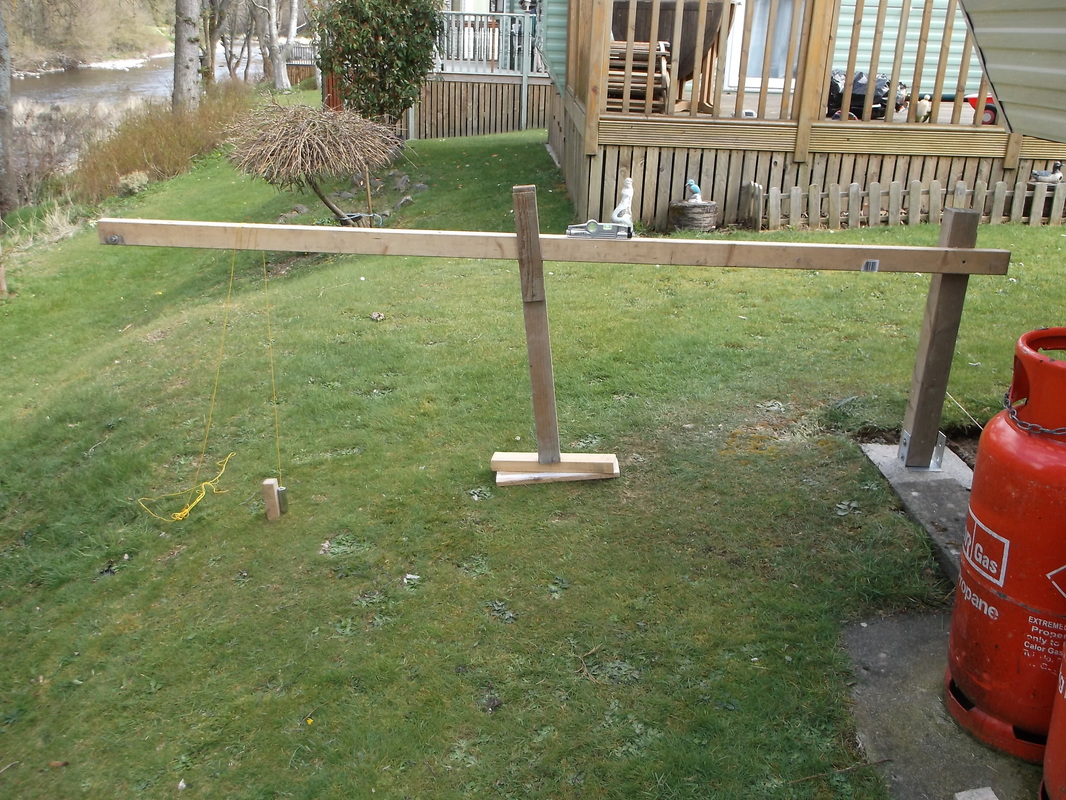
After the two corner posts nearest to the caravan were installed the other two corners were marked out using a simple wooden rig and plumb line as shown in these pictures.
The plumb line was used to locate the centre point of the hole for the post. |
The process was repeated for each of the outer corners. Unfortunately in this case the centre point of the base was in the middle of a small clump of Daffodils!. These were dug up and moved to a new location in the small garden plot.
|
The first outer corner was cast and left to dry overnight. As rain was forecast it was covered with polythene.
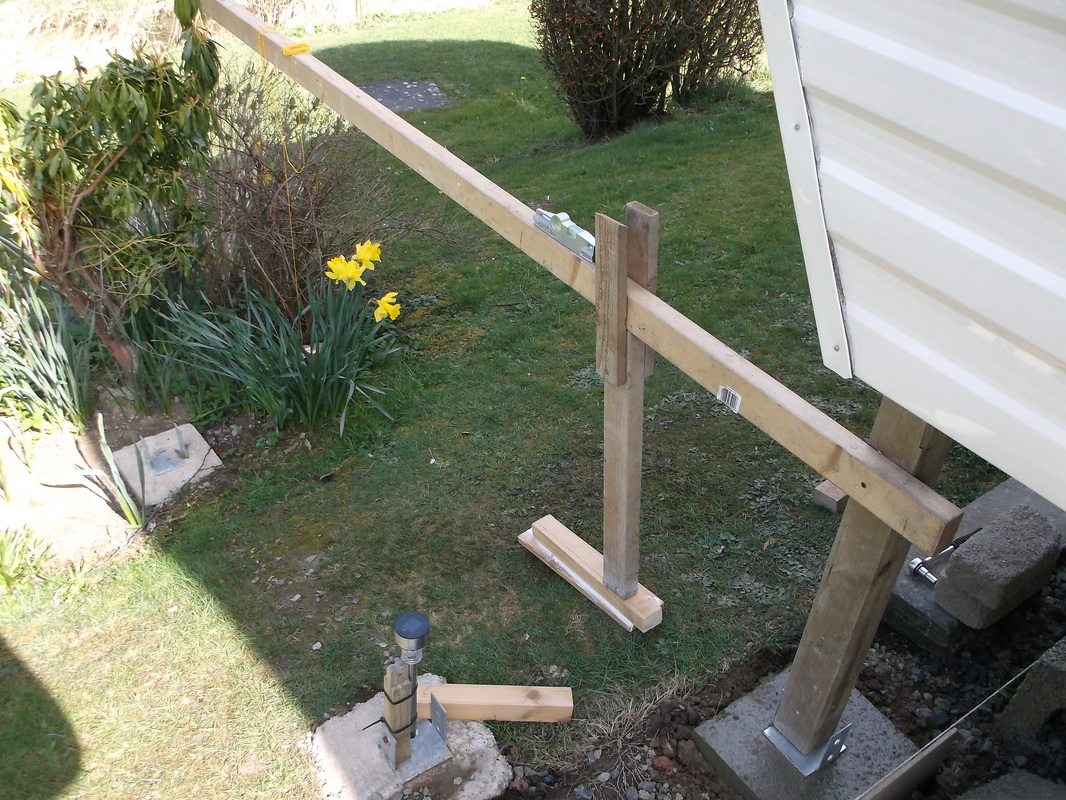
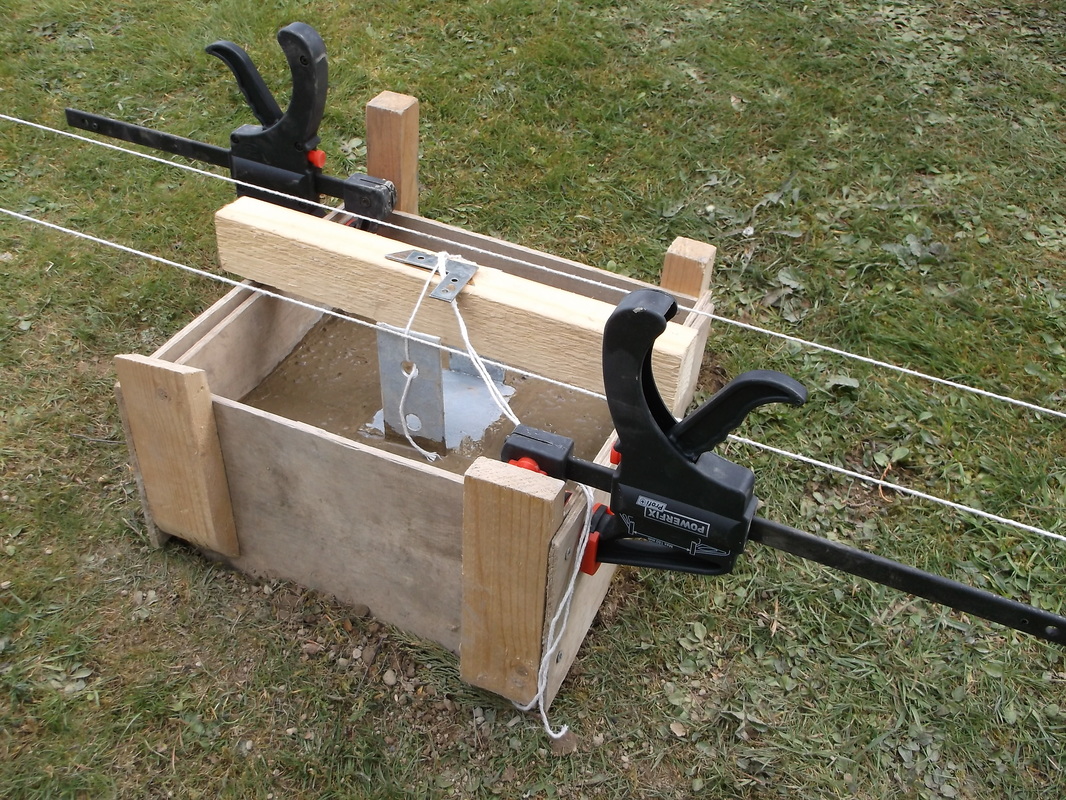
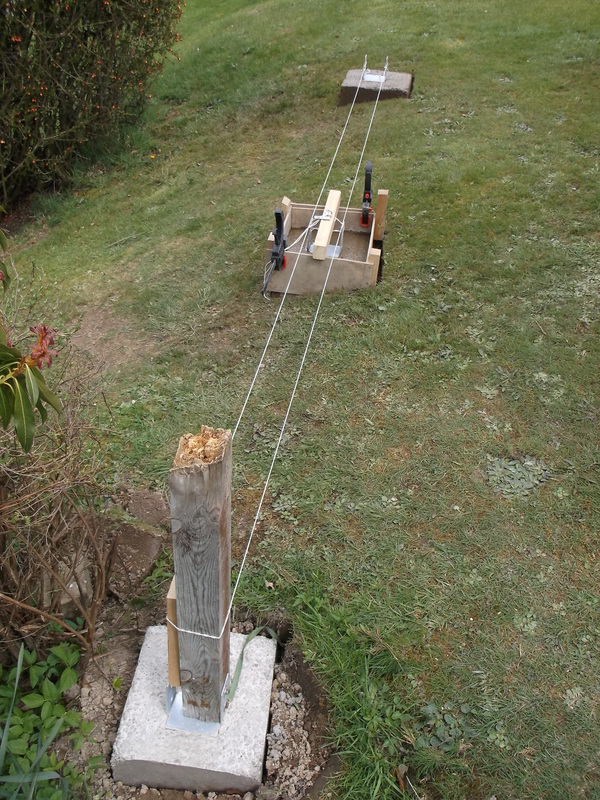
This pictures shows the plywood formers in place with the plumb line rig set up to ensure that the metal base was correctly positioned and aligned.
After the two corners were cast the middle post hole was marked, dug out and the concrete poured in.
As this post was cast on quite a steep slope the plywood formers were doubled up and clamps used to hold the two layers in place. There was a good 6-7 inches of concrete above the grass level which exerted quite a force on the plywood trying to push it outwards. The string was used to line up the metal bases of the two corner bases and ensure the middle metal base was aligned with these. |
|
At this stage thirteen of the fourteen post bases had been installed. Unfortunately the fourteenth needed to be installed in the middle of where the gas cylinders currently stand! , so these need to be moved to a new location.
Moving The Gas Cylinders
The gas cylinders need to be moved so that the foundation for the last post base can be installed. In any case the gas cylinders would have to be moved as they cannot be located under the decking. A new location has to be chosen for the cylinders, a base prepared, new gas pipes installed and the cylinders moved.
