Background : Propagator Thermostat Repair

My uncle is a keen gardener and purchased a high specification propagator a couple of years ago. He intended to over-winter tender plants and bring on cuttings using the propagator. Unfortunately just a few months after the guarantee expired the thermostat module failed. It reported that the temperature in mid November in the propagator was 28C. As the desired temperature was set to 15C this was somewhat surprising as the unit was not sitting in direct sunlight neither was the temperature probe. Simply sticking your hand in the propagator revealed the temperature was no where near 28C. As the control unit still appeared to be working i assumed that the problem probably lay with the sensor that looked very like a short rod thermistor. After identifying the value of the thermistor it would be easy to get a replacement, or so i thought. Read on for the details.
While i took the unit away to see if it could be repaired my uncle contacted the manufacturer to report the problem and to see if they could replace or repair it. He was informed by the support department that as the device was out of guarantee even only by a few weeks it could not be replaced under guarantee. He could however purchase the new improved thermostat model for around £50. My uncle said that he found this a somewhat unsatisfactory response given the original cost of the propagator and particularly as he was now expected to pay an additional £50 for the replacement. A few hours later my uncle received a phone call from the company offering a replacement thermostat for the reduced price of £10. A good result in the end. Meanwhile i decided to try to repair the faulty unit as i did not like the idea of disposing of a perfectly good piece of equipment as the company had suggested that only required a few hours of effort and some components to repair. So much for the companies 'green' credentials.
While i took the unit away to see if it could be repaired my uncle contacted the manufacturer to report the problem and to see if they could replace or repair it. He was informed by the support department that as the device was out of guarantee even only by a few weeks it could not be replaced under guarantee. He could however purchase the new improved thermostat model for around £50. My uncle said that he found this a somewhat unsatisfactory response given the original cost of the propagator and particularly as he was now expected to pay an additional £50 for the replacement. A few hours later my uncle received a phone call from the company offering a replacement thermostat for the reduced price of £10. A good result in the end. Meanwhile i decided to try to repair the faulty unit as i did not like the idea of disposing of a perfectly good piece of equipment as the company had suggested that only required a few hours of effort and some components to repair. So much for the companies 'green' credentials.
I took the unit home and set it up on the bench. I cut off the old sensor and using a digital multimeter measured it's resistance. It measured about 5 Kilo-Ohm. The room temperature was about 20C. The body of the sensor was badly corroded which was not a good sign. I had some bead thermistors to hand from other projects. I connected each in turn to the original thermistor cable and checked the reading on the thermostat. The device that produced the nearest reading to the current temperature was selected as the replacement type. Thermistors are usually specified as having a defined resistance at 25C. In this case the device needed was found to be 10Kilo-Ohm at 25C. All i had to do was find a replacement, order it, pay for it wait for it to be delivered and then fit it. I was quite shocked to find how much UK and European suppliers want for these devices. Typically £10-15 per device plus tax and postage and packing. I searched EBay and found a supplier in Hong Kong charging £3.99 for 5 devices including postage and packing!
I waited for the devices to arrive which took 12 days but then there was no great rush. I fitted one device to the thermostat using terminal block and ran a few tests comparing the temperature readings against another known working digital thermometer. The device was a very good match. I soldered the new device in place and double insulated using two layers of heat shrink sleeve. It was then re-tested over a number of days in varying environments again comparing the temperatures on the two devices.
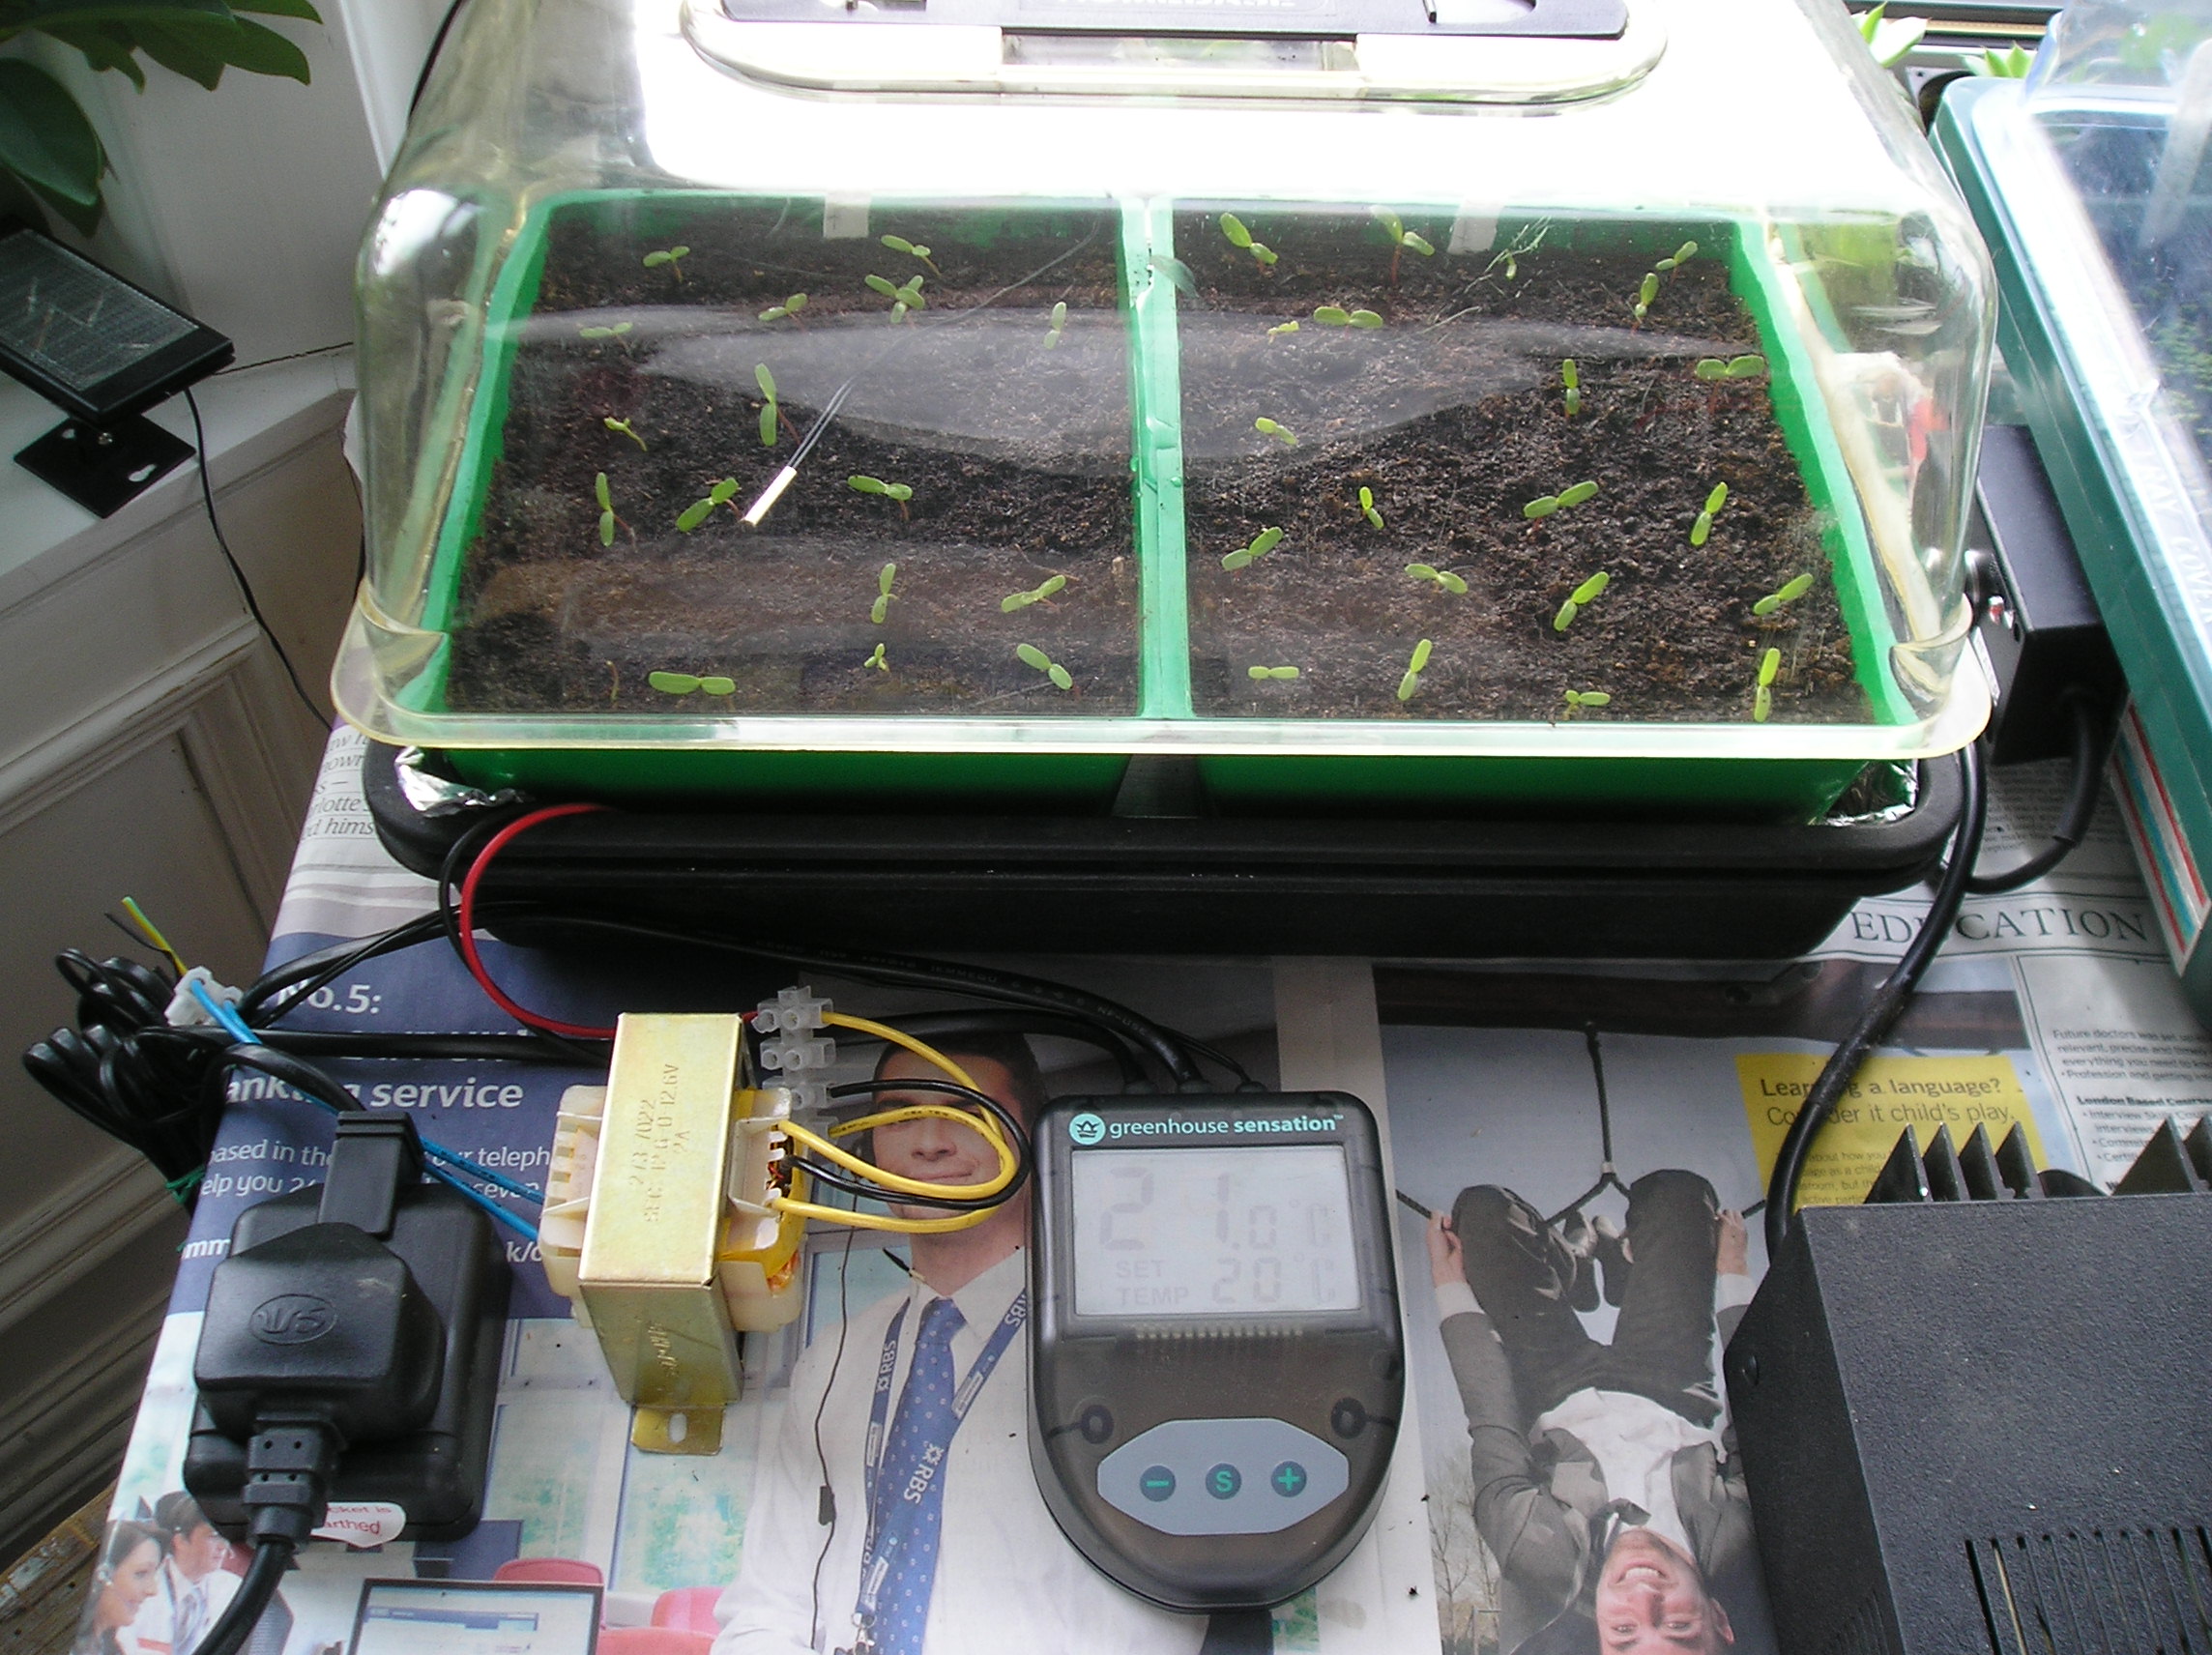 Thermostat tested connected to home made propagator.
As a final test i decided to verify the thermostats operation using a home made propagator that i have been developing. I disconnected the control unit i have been developing and connected up the thermostat as detailed below:
The home made propagator consists of a standard unheated propagator(seed tray plus transparent plastic cover), foil bubble wrap lining to provide insulation and reflect heat away from the base, a 300mm x 200mm x 3mm thick aluminium sheet and 2 x 10 ohm aluminium clad wire wound resistors mounted on the underside of the aluminium sheet.(Follow this link for more details of the home made propagator.)
The thermostat output is connected to a mains lead which in turn is connected to a transformer. This reduces the mains from 230V AC to 12VAC. The 12V AC output of the transformer is connected to the two aluminium clad wire wound resistors mounted on the underside of the aluminium plate. The transformer is used in this test to reduce the mains voltage to a safe level in the areas where i would be working. I did not want to have mains voltage wires exposed or near metal parts to avoid the possibility of electric shock.
The temperature probe is placed on the top of the compost to monitor the temperature.The probe can be seen in the picture above.
The temperature was set to 20C and left for a few days to allow the French Marigold seeds to germinate. As the propagator was mounted in a sunny south facing window the measured temperature and the set value could vary quite widely. In the photographs on this page the set vale was 20C and the measure value 21C.
As can be seen from the photographs the seeds successfully germinated in a few days! I went on to germinate further French Marigold, Dahlia and Salvia seedlings during the testing. A separate thermometer and probe was used to compare and verify the operation of the repaired thermostat. this was omitted from the photographs for clarity.
In summary, for the sake of a few tens of pence for a new sensor and a few hours work a device that would have been thrown away has now been put to good use. After the testing was completed the repaired thermostat was returned to my Uncle who put it to good use controlling a heated sand bed that i set up for him while he used the new replacement thermostat to control his propagator.
