Background
Since i put details of the repairs i did to a previous rechargeable toothbrush on this website i have had a number of requests via this website and email asking me to repair similar models. Unfortunately the requests came from other countries where the postage and packing made it uneconomic for me to repair the toothbrush. A friend living locally had a Braun toothbrush that had stopped holding its charge so i said as there were no postage and packing charges involved i would see if it could be repaired.
When i dismantled the toothbrush i found that one of the enamelled copper wires which are part of the charging system was broken. I did not know if it was already broken before disassembly if it it happened when i was carrying out the disassembly. When the battery was removed its voltage was less than 0.5V and there was a white powdery material around the positive terminal. A sure sign of a dead battery.
When i dismantled the toothbrush i found that one of the enamelled copper wires which are part of the charging system was broken. I did not know if it was already broken before disassembly if it it happened when i was carrying out the disassembly. When the battery was removed its voltage was less than 0.5V and there was a white powdery material around the positive terminal. A sure sign of a dead battery.
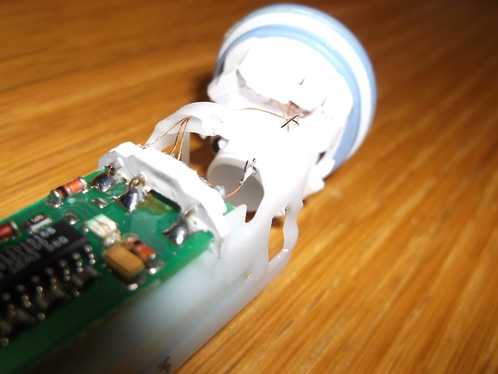
I carefully removed the internals of the toothbrush using the plastic stub on the charging unit.
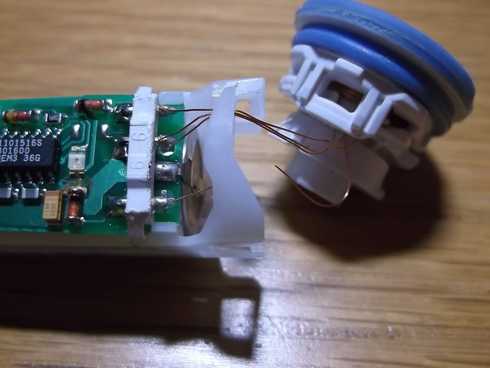
At this point i discovered that one of the wires connecting the charging coil to the printed circuit board had broken as can be seen in this photograph.
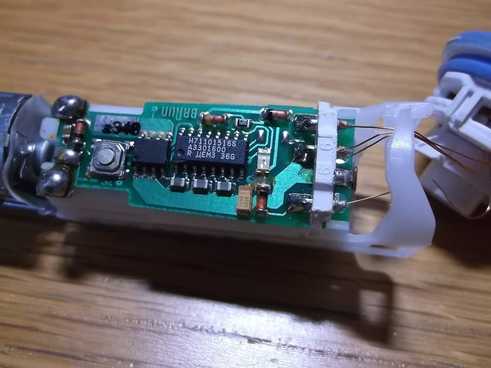
To get the battery out the motor and gearbox unit had to be de-soldered from the printed circuit board. This required de-soldering the two large blobs of solder that can be seen in the left of the picture and removing the motor solder tags.
This allowed the white plastic body and printed circuit board assembly to be removed giving better access to the battery solder tags.
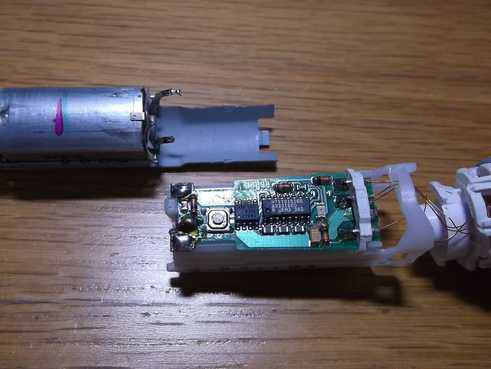
This picture shows the white plastic body, printed circuit board and battery assembly desoldered from the motor and the rest of the toothbrush.
The battery solder tags are in the middle of the PCB at each end of the circuit board.
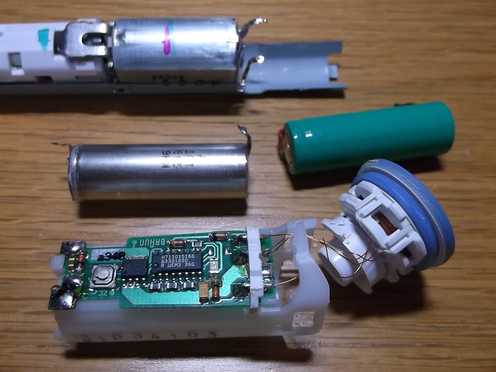
The replacement 1.2V Ni-MH 1500mAh battery was ordered on line. The battery looks to be an AA size but is in fact a 4/5 AA size.
The old battery is on the left and a slight white powdery coating can be seen at the positive terminal.
The new battery(green) is on the left.
The solder tags of the new battery had to be trimmed to fit the openings in the white plastic body.
The battery tags were then soldered to the PCB.
Both ends of the enamelled copper wire heated using a soldering iron to burn off some of the enamelling. This allowed the ends of the wire to be tinned with solder.
The two ends of the wire were carefully positioned as close as possible and then soldered. This took a few attempts before a successful join was achieved.
The toothbrush was tested before it was reassembled. The toothbrush was then reassembled and tested again.
Before reassembly all the internal parts were cleaned.
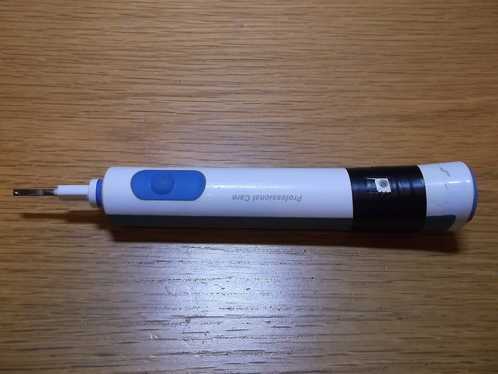
The black tape was already on the body of the toothbrush as my friend had dropped it a couple of years ago and cracked the casing. The small area of black tape removed shows the LED which indicates when the toothbrush is charging when on the charging unit.
