Background
My friend has a washing machine that at the time of writing in February 2016 is 29 years old! It has performed well over the years and has given her no trouble. She would like to keep it as she finds the modern machines with all their electronic controls very intimidating. The machine had developed a leak which she discovered when she moved it to do some Spring cleaning. The leak had been going on for some time but fortunately had not done a great deal of damage to the floor. My friend was keen to try to repair the machine if it was not too expensive to repair so i thought it was at least worth having a look to see if it could be saved from the scrap yard.
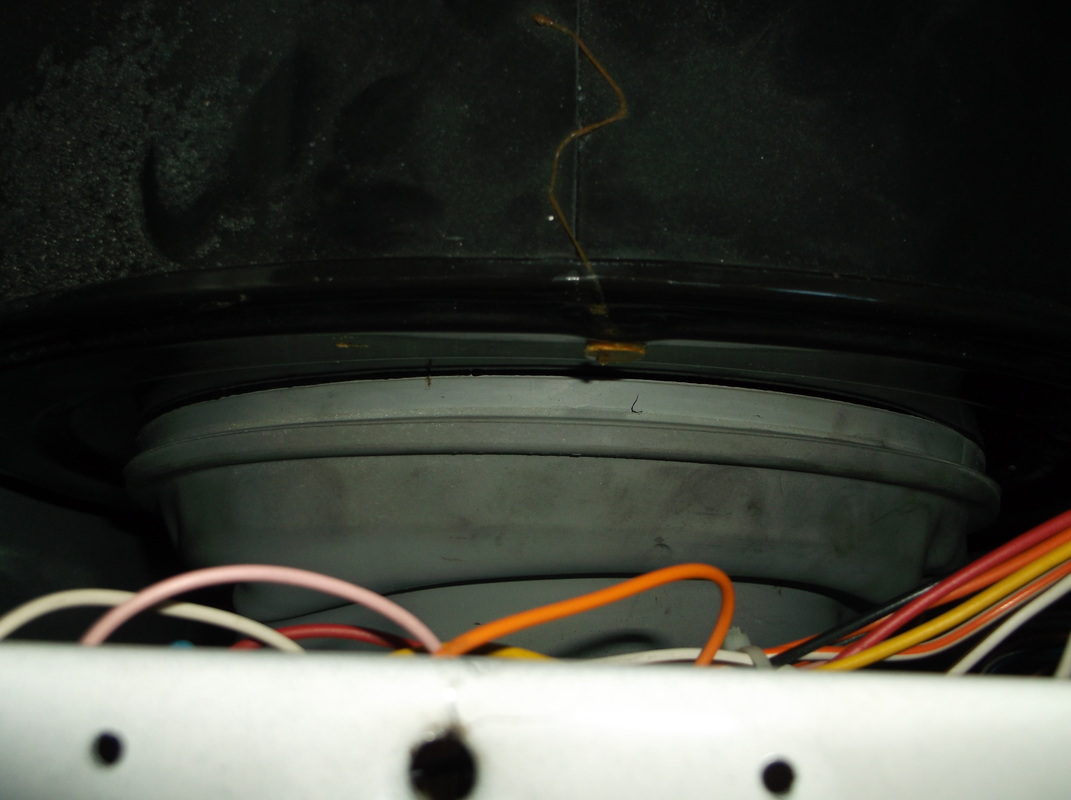
First thing was to see if there was any evidence of the source of the leak on the underside of the machine so it was turned over onto its back. Immediately it could be seen that there was water staining on the concrete counter weight. The water marks indicated that the water was coming from above the concrete block so the source could not be seen. I tried removing the concrete block but although the bolts could be removed the block would not come out of the opening in the base.
I took the top of the machine off to see if there was any other way of seeing the source of the leak. Immediately i could see staining on the side of the outer drum where the soap dispenser connected to it.
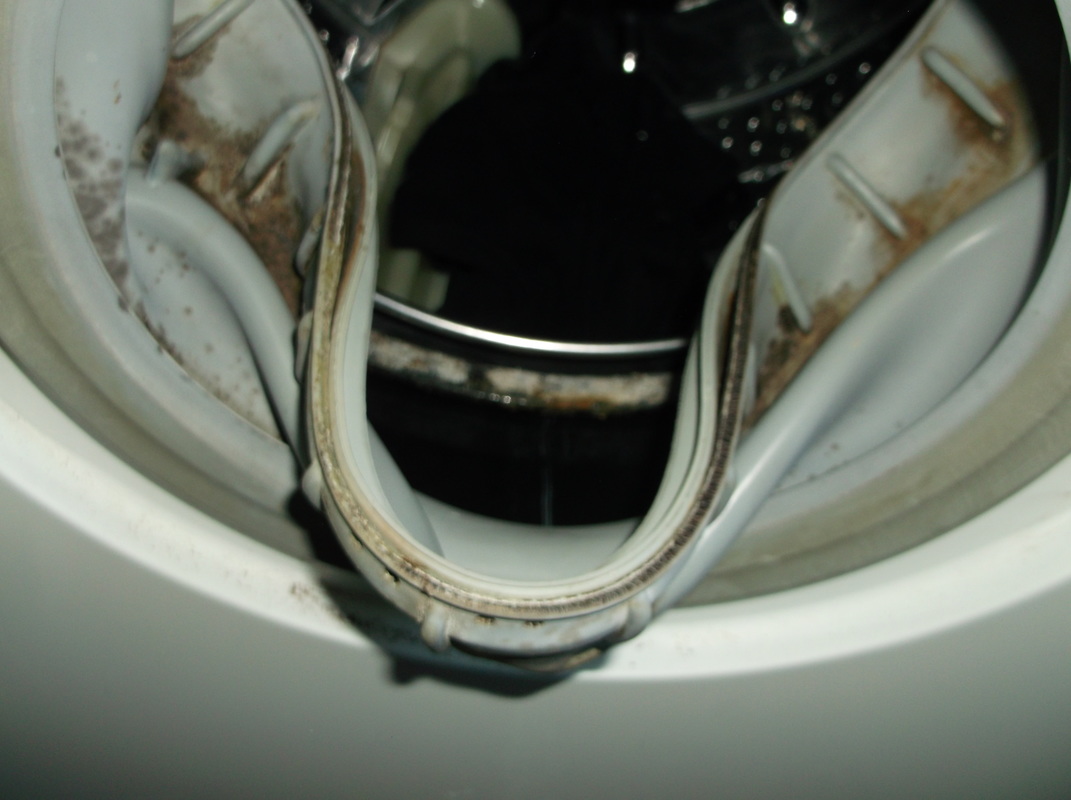
I examined the door seal and it was not in the best of condition. It was discolored and marked at the bottom but there were no holes or splits . What ever else needed replaced i thought the first thing should be the door seal. The door seal was held in place by a plastic clip which is concealed behind the rubber seal and was carefully removed.
First thing was to see if there was any evidence of the source of the leak on the underside of the machine so it was turned over onto its back. Immediately it could be seen that there was water staining on the concrete counter weight. The water marks indicated that the water was coming from above the concrete block so the source could not be seen. I tried removing the concrete block but although the bolts could be removed the block would not come out of the opening in the base.
I took the top of the machine off to see if there was any other way of seeing the source of the leak. Immediately i could see staining on the side of the outer drum where the soap dispenser connected to it.
I examined the door seal and it was not in the best of condition. It was discolored and marked at the bottom but there were no holes or splits . What ever else needed replaced i thought the first thing should be the door seal. The door seal was held in place by a plastic clip which is concealed behind the rubber seal and was carefully removed.

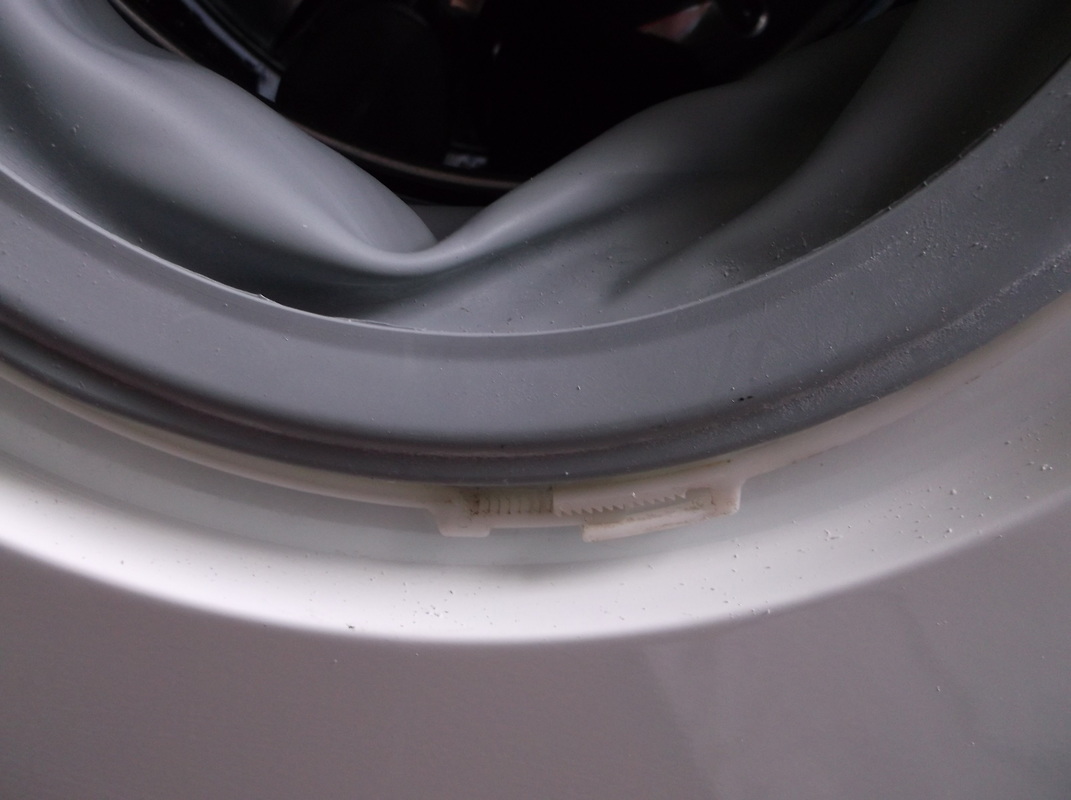
Door to drum seal plastic retaining clip.
The door seal was held in place with a plastic ratchet clip which had to be carefully removed as research on obtaining a replacement showed that they could be quite expensive.
|
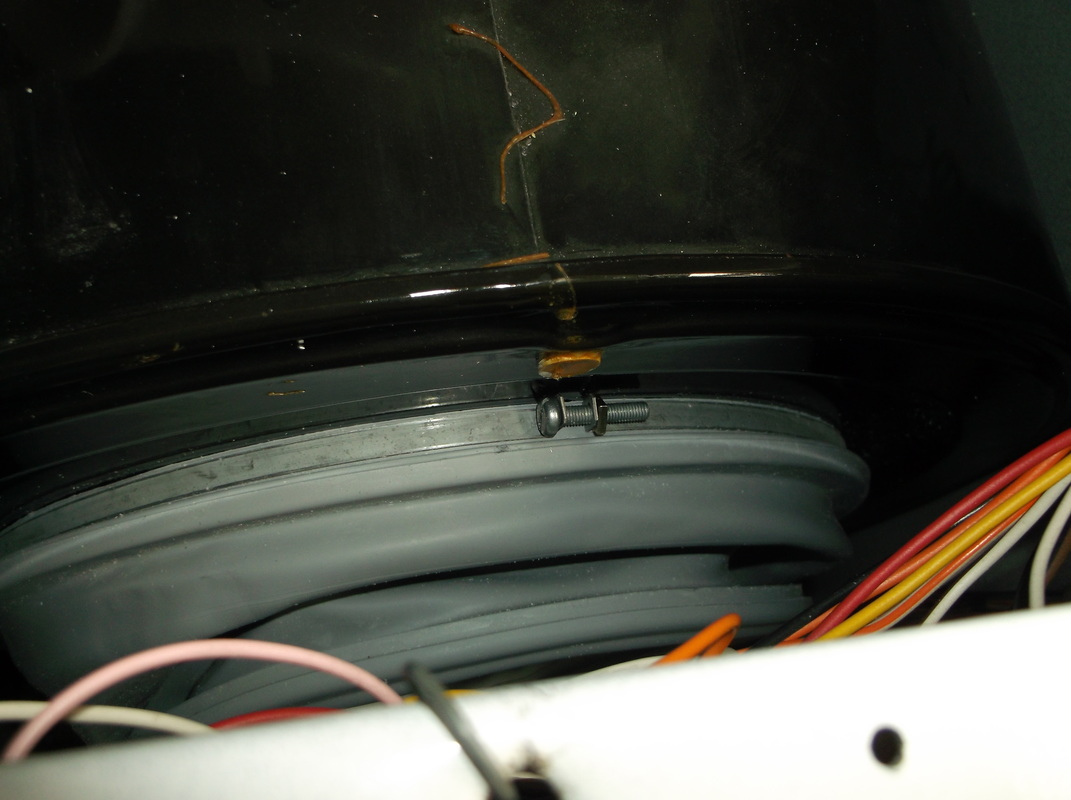
Drum rubber seal retaining clamp.
The steel band securing the rubber seal to the tub was carefully removed and stored.
|
Drum to door rubber seal partially removed showing cracking and perishing.
Once the inner and outer securing clamps were removed the rubber seal was peeled off the front panel of the machine and the edge of the tub.

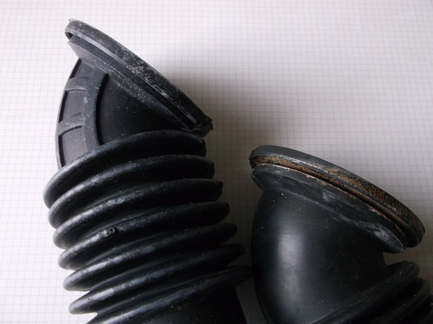
Old dispenser hose showing leakage.
When the work top had been removed from the washing machine the dispenser hose which transfers water and washing powder from the dispenser drawer to the tub could be seen. It was obvious that water had been leaking from this as well as from the door seal. |
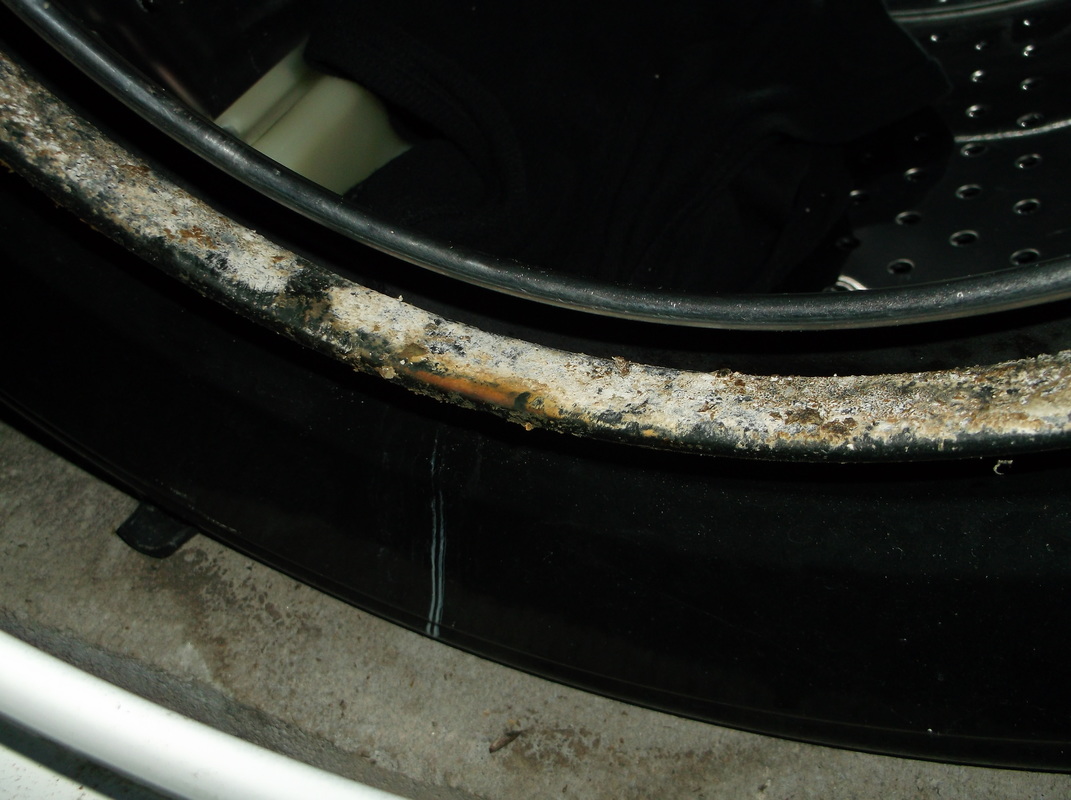
Drum edge after seal removal showing trapped debris.
With the seal removed the source of the leak could be seen. The rubber seal was so worn and there was so much debris trapped between the seal and the tub edge that water had been trickling out , running down the tub onto the concrete counter weight below and then onto the floor.
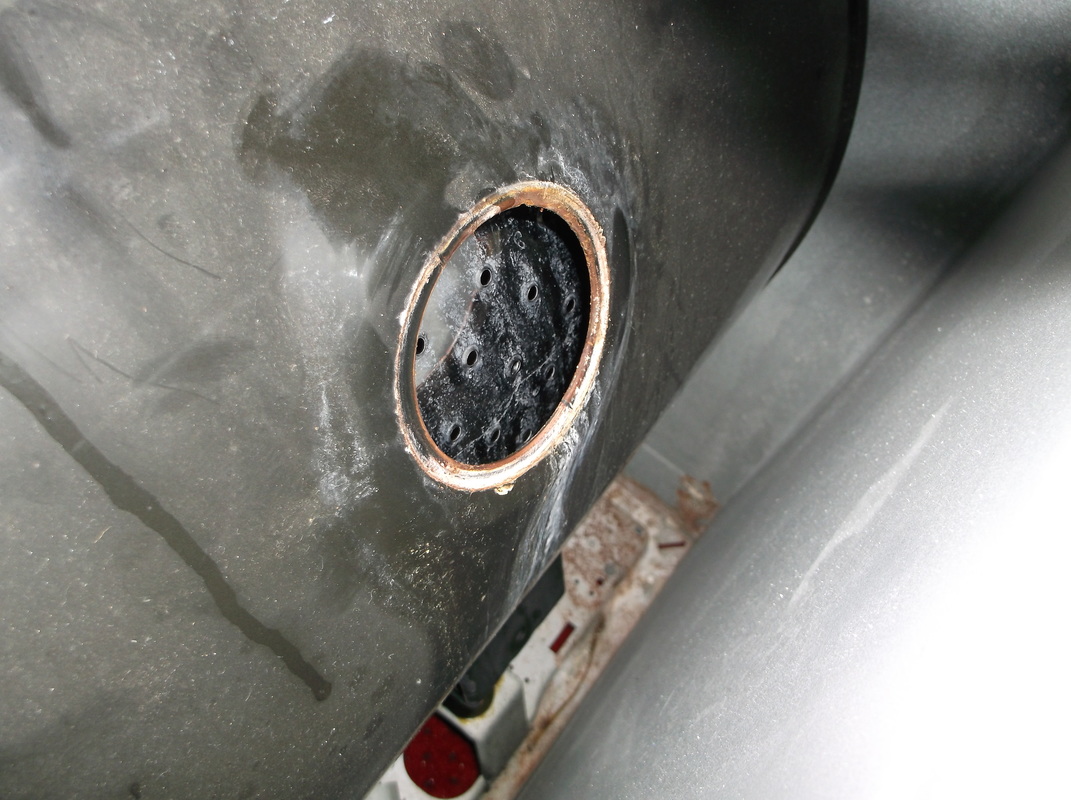
Old dispenser hose removed showing leakage and damage to entrance.
To remove the dispenser hose the dispenser drawer had to be removed first. While the drawer itself was removed it was cleaned of all the soap debris. The entry hole to the tub can be seen here. The white debris around the hole clearly shows that water and soap had been leaking from the tub down onto the concrete counter weight and onto the floor.
|

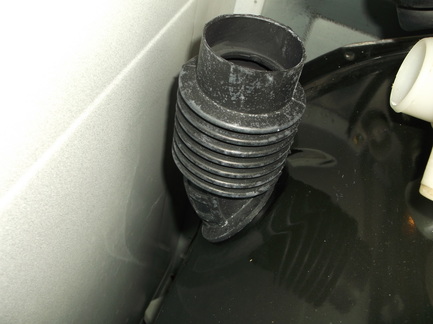
Although the main body of the hose was in good condition, there were no signs of perishing or splits on the part of the hose that connected to the tub and it was in good condition. The section that went inside the tub was perished and no longer a good tight fit. The gap between the two flanges of the hose also seemed to be too large.
The internet and in particular EBay proved to be a good source of replacement parts. Due to the age of the machine it was impossible to obtain genuine Hoover spares as the spare part stocks of these have mostly long since been sold although i did find that there were original parts available for this machine although they were not the ones i needed to replace!
The parts were ordered on line and were delivered in a couple of days.
The parts were ordered on line and were delivered in a couple of days.
In this picture, on the left the new part is shown together with the old one on the right.
The difference in the size of the rubber flange gaps on the old and new part can be clearly seen.
In this picture the new dispenser hose has been fitted.
When the old hose was removed there was some damage to the metal of the tub and some rusting. This was cleaned up and some metal restoring paint was carefully applied to the inner and outer edges of the opening and allowed to dry for 24 hours before fitting the new hose.
As soon as the new hose was fitted it was clear just how worn the old part had been. The old part could be rotated in position on the tub however the new part could not be rotated which indicated that the new part was a much tighter fit.
The soap dispenser tray was re-attached to the hose and the securing clip tightened.
When the old door seal was removed there was some damage to the paintwork and metal of the tub. This was cleaned up and metal restoring paint was applied and allowed to dry for 24 hours.
The new door seal was carefully mounted onto the edge of the tub and the metal securing band was installed and tightened. |
The front part of the door seal was passed through the front panel of the machine and carefully teased onto the mounting lip on the front.The plastic securing clip was then installed and the ratchet clip was carefully closed up using a large pair of mole wrenches.
|
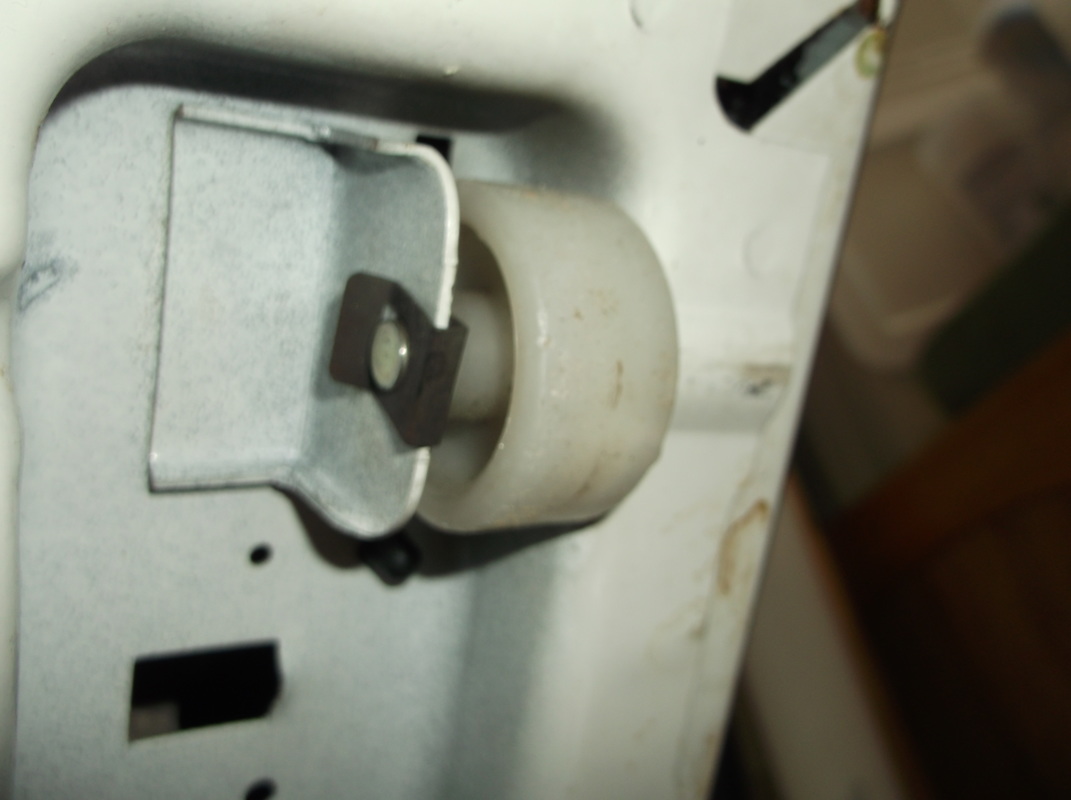
While inspecting the machine for the source of the leaks i noticed that one of the wheel spindles was not secured in place as the clip was missing. I priced replacements and they would have cost GBP10 for a pack of 10! I only needed 1 so decided that i would have to find an alternative.
|
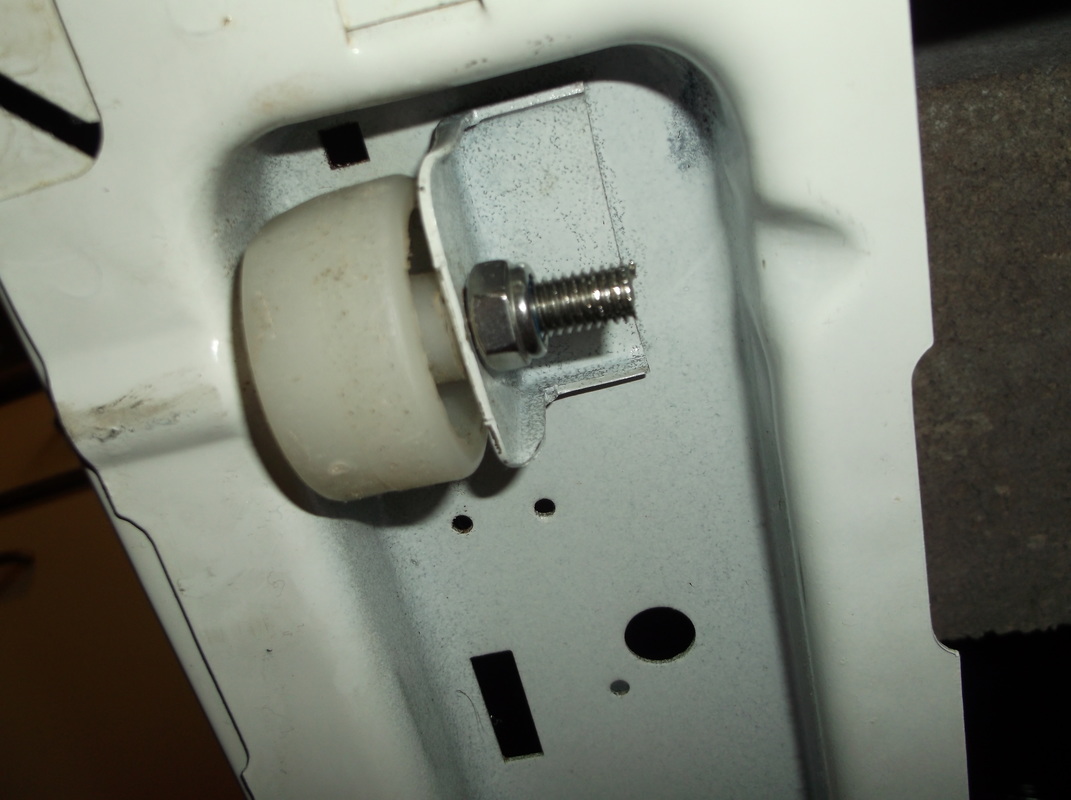
I had some M8 stainless steel threaded rod left over from another project so i used an off-cut of that together with a couple of nyloc stainless steel M8 nuts to hold the wheel in place. The second nut is hidden inside the frame of the washing machine.
|
While testing the machine i had noticed that there was a terrible squeaking and whining noise coming from it when it was on a spin cycle. It was either the motor bearings, drum bearings or the drive belt. I checked the motor bearings and these seemed to be smooth and had no play in them. The drum bearings seemed smooth and again there was no play of the drum within the tub.
I ordered a replacement belt on EBAY and this was delivered at the same time as the dispenser hose and the door seal.
I ordered a replacement belt on EBAY and this was delivered at the same time as the dispenser hose and the door seal.
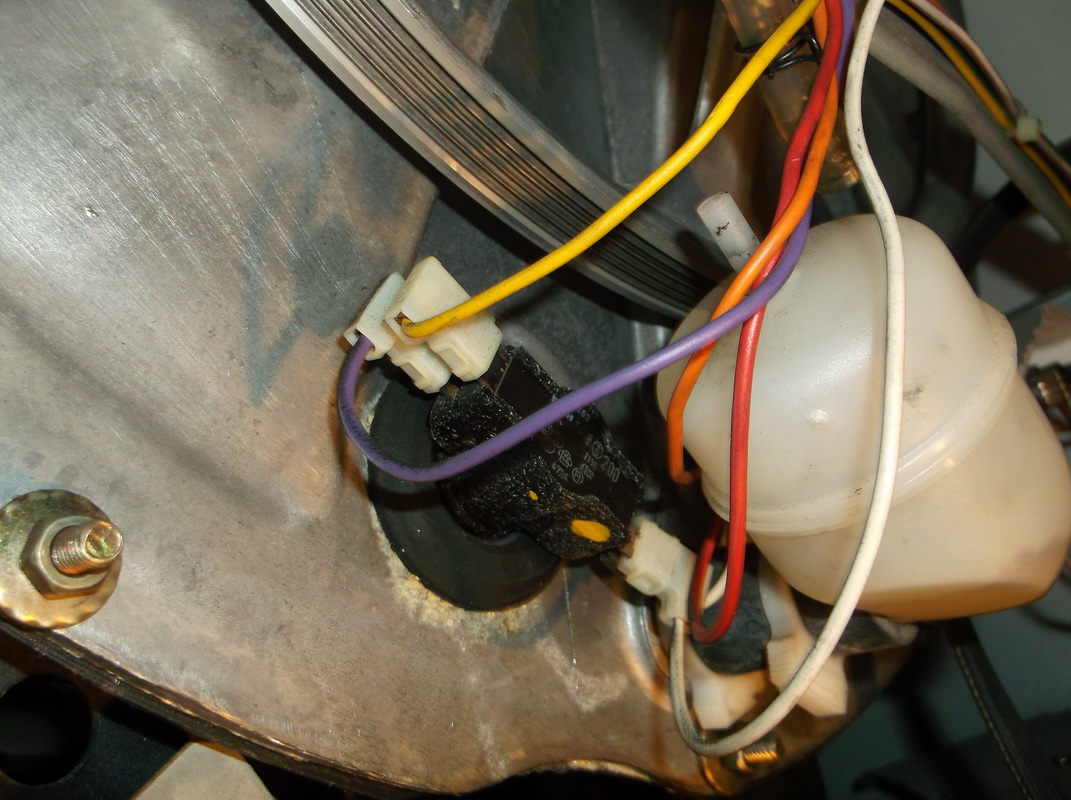
To remove the old belt and install the new one a few components needed to be removed. The pressure sensor tube was removed from the pressure sensing bottle and the electrical connectors were removed from both thermostats.(one is hidden behind the white plastic bottle). The belt was then slipped out after being removed from the motor pulley and the drum pulley.
|
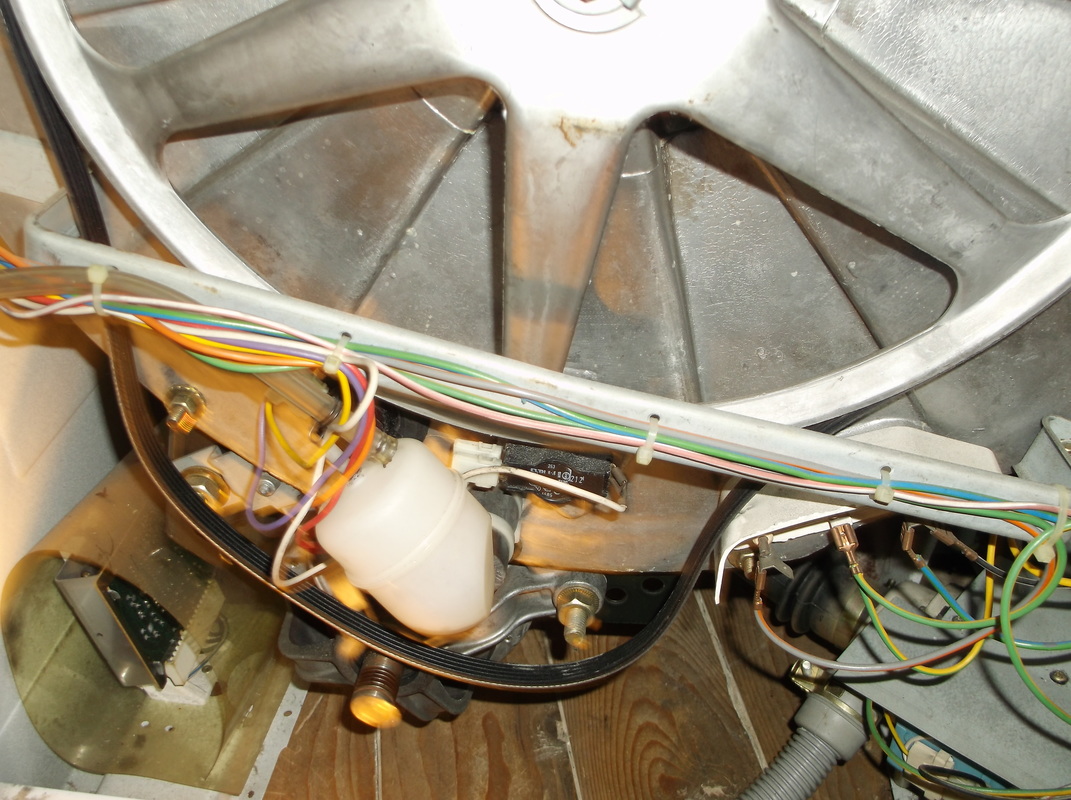
The new replacement belt was slipped in to position and put onto the motor pulley and then fed as far around the large drum pulley until it would go no further. The drum pulley was then slowly rotated while gently pushing the belt onto the pulley. This caused the belt to stretch slightly causing it to 'self align' on the 'v-grooves' of the drum pulley.
|
The parts replaced were,Soap Dispenser hose, Door Seal and the Drive Belt. The total replacement cost of these was GBP29. I decided to replace one of the inlet hoses as it was no longer flexible. This cost GBP5 bringing the total repair cost to £34. Although this together with the effort of getting the machine out and back in place might seem quite high it compares very favorably against the cost of a comparable new machine which would be GBP350-GBP400. If a Service Engineer had been used the call out cost alone would have been GBP70 plus the cost of parts and labour which would bring the estimated repair cost to approximately GBP200. The total time it took me to repair the machine was 4-5 hours. This comprised of 2 hours to remove the machine and locate the problems, 0.5 hour to repair the damaged paintwork and 2 hours to install the new parts and test the machine.
The most satisfying part of the job was knowing that having carried out the repairs another machine has been saved from the scrap yard and there is a good possibility that the machine will continue to give good service and will see in its 30th Birthday in September 2017.....hopefully not tempting fate by saying this!.
