Background
The inside of door bottle retaining bar in the fridge at my Mother's caravan recently broke. The fridge is over 25 years old but is in excellent condition and works perfectly. I looked up various spare parts websites but the only component still available for this model was the evaporator door. There were only really two options, replace the fridge or try to repair the bottle retaining bar. I did not feel it was reasonable to replace a fridge that was working perfectly so i decided to try to repair the bar. The repair had to meet a few simple requirements. It must be functional and reliable and look attractive. It must not attract the users eye for all the wrong reasons, e.g. large jutting bolts, excessive use of glue or silicone sealants and it must be washable, corrosion proof and hygienic. I would like to emphasise that this small project was not about repairing the bottle bar but much more about saving a perfectly useable fridge that should have at least another few years use in it.
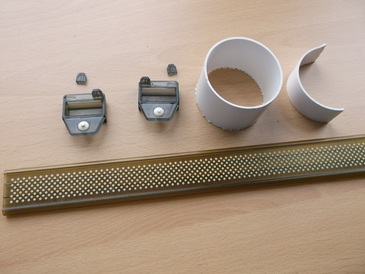
I decided to use plastic brackets to repair the bar as i could not locate small stainless steel brackets of the right size. Plastic brackets of the right size were not readily available either. I decided to use a remould-able plastic part and reshape it to what i required. Ideal for this job is plastic drain pipes. I had a few off cuts so i cut a section to the required width then cut it in half. I then used a hot air gun(paint stripper gun) and used this to soften the plastic just enough to reshape it. When it was soft enough i placed it inside the end bracket of the door bar so that it would take up its shape then carefully shaped the plastic into a right angle.
A couple of the locating tabs had also broken off the end brackets to i glued these back into place using hard plastic glue.
A couple of the locating tabs had also broken off the end brackets to i glued these back into place using hard plastic glue.
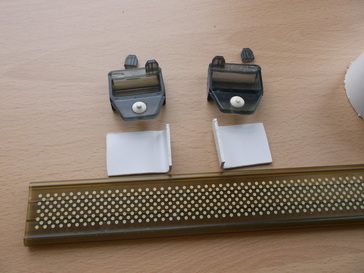
After the white pieces of plastic had been roughly shaped i used the hot air gun to refine the shape in particular getting a right angle at the correct position.
A craft knife and file were then used to finalise the shape and dimensions.
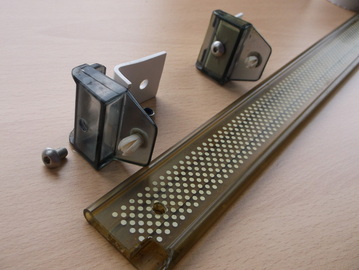
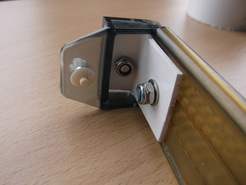
In this picture both of the brackets have been drilled and one has been assembled ready to be attached to the bottle bar.
The second bracket can be seen with the holes drilled and the securing nuts and bolts ready to be installed.
The parts used were:
The second bracket can be seen with the holes drilled and the securing nuts and bolts ready to be installed.
The parts used were:
- 2 x M5 Hex button bolt, stainless steel.
- 2 x M5 Nyloc nut , stainless steel.
- 2 x M5 washer, stainless steel
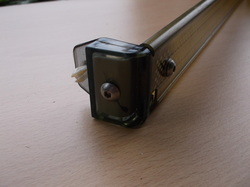
These two pictures show the end bracket reassembled to the bottle bar from both the inside and outside of the bracket. The fitting and assembly of all the parts can easily be seen. |
|
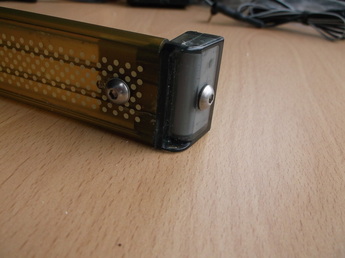
As can be seen from this picture, the final repaired assembled bottle bar provides a neat clean finish.
