Mini-Crosser Tyre Replacement
Background
My mother has been using her Minicrosser Cabin scooter since the summer of 2016 and has covered over 750 miles getting around the local area and often a little further afield. I noticed during the winter of 2019/2020 that the front tyres were getting a little worn and in early spring 2020 i noticed that the tread was completely gone on the central section of the tyre.
It was clearly time for a new set of front tyres. The original tyres were puncture proof, meaning tubeless. These proved a little difficult to source, however i did eventually find a couple of sources in the UK which did actually have them in stock. They took just a few days to arrive so it was time to get them fitted , ready for a new season.
It was clearly time for a new set of front tyres. The original tyres were puncture proof, meaning tubeless. These proved a little difficult to source, however i did eventually find a couple of sources in the UK which did actually have them in stock. They took just a few days to arrive so it was time to get them fitted , ready for a new season.
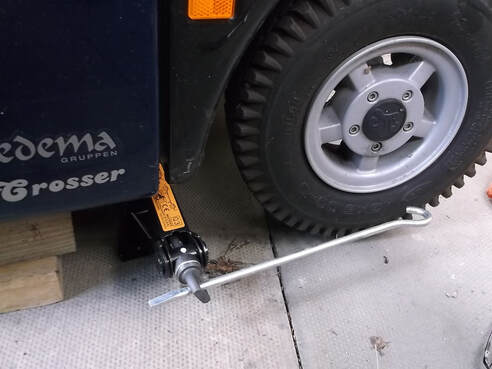
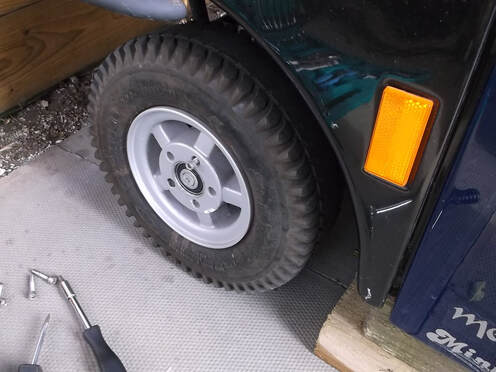 Scooter supported on wooden blocks to allow wheel to be removed.
The first step was to loosen off the wheel nuts. The wheels were secured to the hub with round head hex socket bolts.
As these were recessed into the body of the wheel i was particularly careful to use a good fitting hex bit so as not to damage the head while getting the bolts out.
To get maximum leverage the wheel nuts were loosened off while the scooter was on the ground and the brake applied.
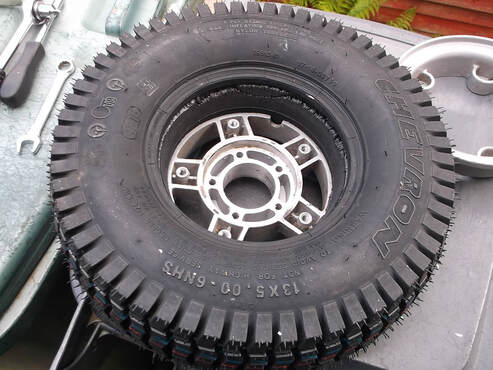
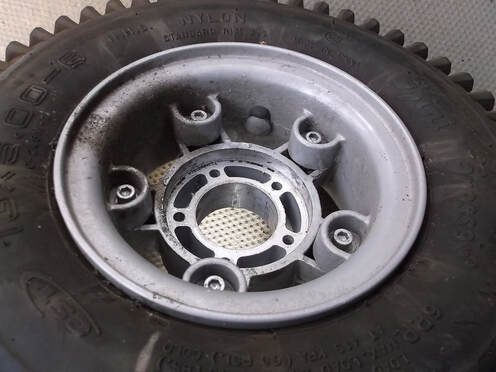 Wheel removed showing two piece, split wheel construction and securing screws.
The wheels are made of what appears to be aluminium painted grey.
The wheels are made of two halves held together with five round head hex socket bolts. Again these were carefully removed using a good fitting hex bit.
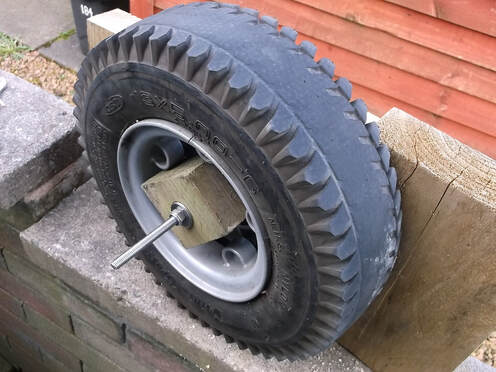 Tyre in make shift jig to separate the tyre from the two halves of the wheel.
I knew it would be difficult to separate the two halves of the wheel without damaging the rims so after a couple of unsuccessful attempts with a crow/wrecking bar i decided to put together a simple jig that would work in the same way as hub or bearing puller.
The jig was made of a some off cuts of wood from the Scooter Port project and the Caravan Decking project. together with some M8 stainless steel studding washers and nuts.
The wooden blocks studding and wheel were arranged so that when the nuts were tightened it had the effect of pulling one side of the wheel out of the tyre.
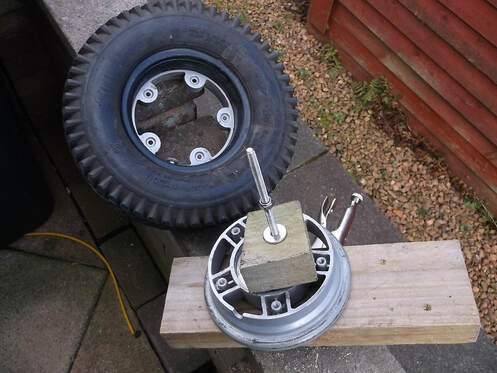 Tyre in make shift jig with first half of wheel removed.
This picture shows the first half of the wheel removed from the tyre while still attached to the jig.
The second half of the wheel was removed from the tyre using a long screw driver on the inside of the rim to gradually lever it out.
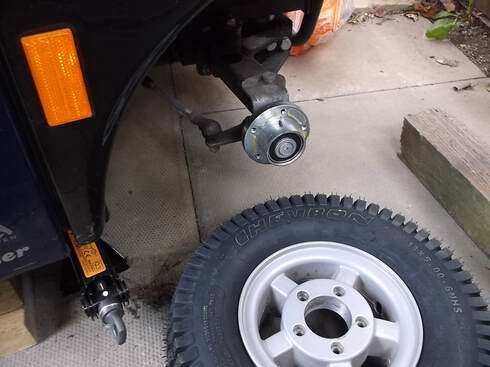
 The first new wheel installed and attached to scooter.
To ensure the maximum stability and minimise any damage to the underside of the scooter the wheels were removed using the following procedure ;
1. The brake was applied and the rear wheels chocked.
2. The wheel nuts were loosened.
3. The scooter was raised using the scissor jack.
4. Wooden blocks were placed under the chassis ensuring no cables were crushed
5. The jack was lowered so that the chassis was resting on the wooden blocks and the wheels were clear of the ground.
6. The wheel nuts were fully loosened, removed and the wheel un-mounted from the wheel hub.
 The new Tyre with the first half of the rims installed.
One half of the wheel was pushed into the tyre using some washing up liquid as a lubricant.
The second half was then pushed into the other side, again using washing up liquid as a lubricant.
Although the two halves did not meet they were close enough to allow the securing bolts to be inserted a few turns. The bolts were then gradually tightened in sequence to pull the two halves of the wheel together.
 The new Tyre installed with the two halves of the rims secured.
This picture shows a new tyre installed on the re-assembled wheel.
The wheels have slight corrosion in some areas, probably due to the rock salt used on the roads in winter. The wheels will have to be refurbished sometime in the near future to prevent it getting much worse.
 The new Tyre installed and ready to be reattached to the scooter.
A simple scissor car jack was used to lift and lower the scooter while the wheels were being removed and refitted.
Here the wheel is about to be refitted to the scooter after the new tyre was fitted.
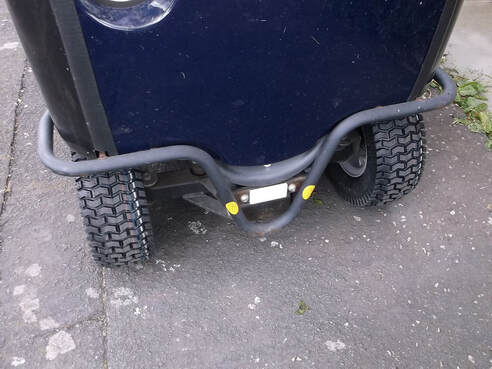 The scooter with its two new Tyres installed and ready to go.
In this picture the new tyres have been fitted and the scooter should be ready for another 800 miles or so!
