Background
In 2015 i built decking for my mum's caravan. My cousin and his wife had some garden furniture which they no longer wanted and very kindly donated it to my mum. It was generally in good condition so was used for the latter half of last summer(2015) and stored under cover to protect it from the worst of the wet winter weather. I decided to perform a major refurbishment rather than simply sand down and re-coat with varnish to deal with the cosmetic problems. By refurbishment i mean dismantling the furniture and repairing joints, screws, bolts etc where required, sand down, varnish and re-assemble. Past experience with this type of furniture has shown that the joints are never maintained and as a result get damaged. People are not prepared to make the effort or pay a skilled person to repair the furniture and as a result a perfectly usable chair is destroyed because one or more of the joints has been allowed to fail. They seem to have forgotten that prevention of a problem is better than having to cure it! Fortunately this set of furniture had been maintained and only a few joints needed major work.
Below are the some photographs and details of repairs carried out on the various pieces of garden furniture.
1. High Back chair. Part of the garden table and chairs set.
2. Arm chair Type 1. Originally part of the fixed table and chair set. Now converted into a separate table and two arm chairs.
3. Arm chair Type 2. Part of the garden table and chairs set.
4. Table & Legs. Part of the garden table and chairs set.
High Back Chair
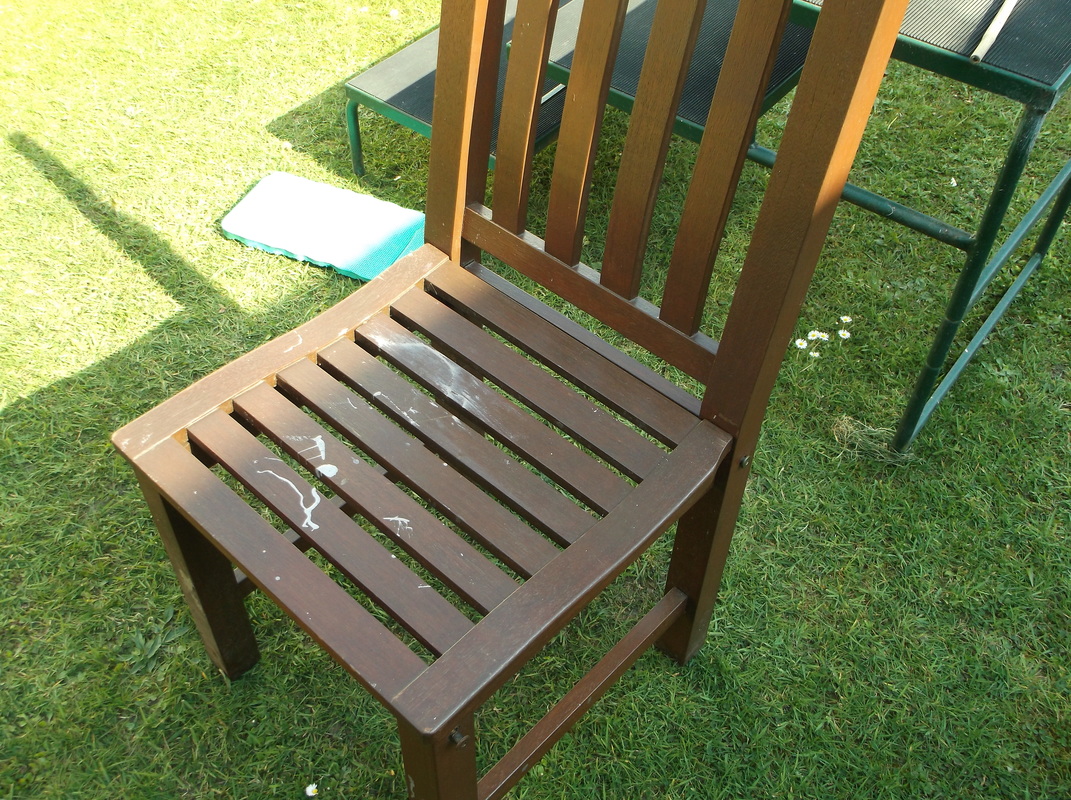
This shows one of the high back chairs before refurbishment work was started. Some sort of silver paint had been spilled on it. The chair was dismantled into its various parts(see later pictures) 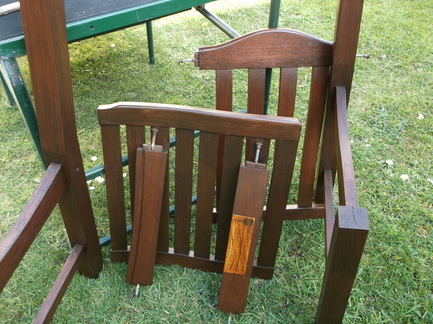
This picture shows the high back chair dismantles with all the parts prepared and varnished ready to be re-assembled.
|
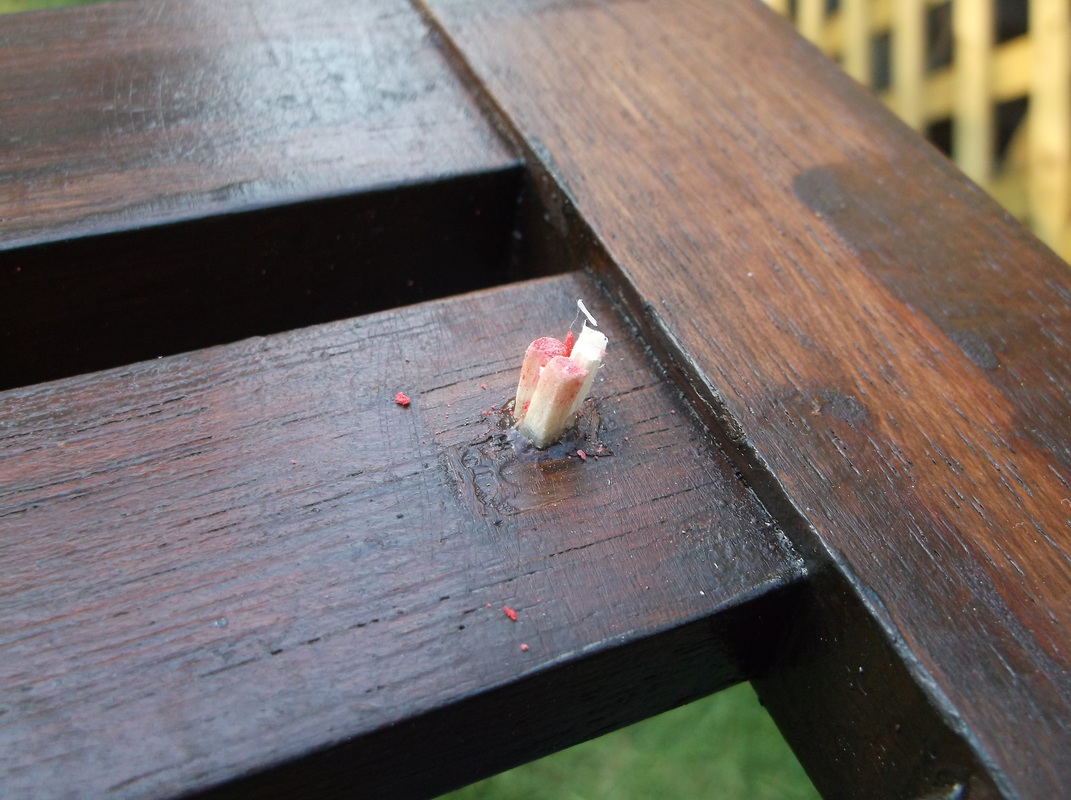
When the chairs were dismantled some of the screws securing the seat panel in place were spinning due to over tightening over the years. The threads in the wood had been stripped. The holes were cleaned out, waterproof glue applied, short lengths of match stick wood inserted and allowed to dry. The excess wood was cut off and a new pilot hole drilled
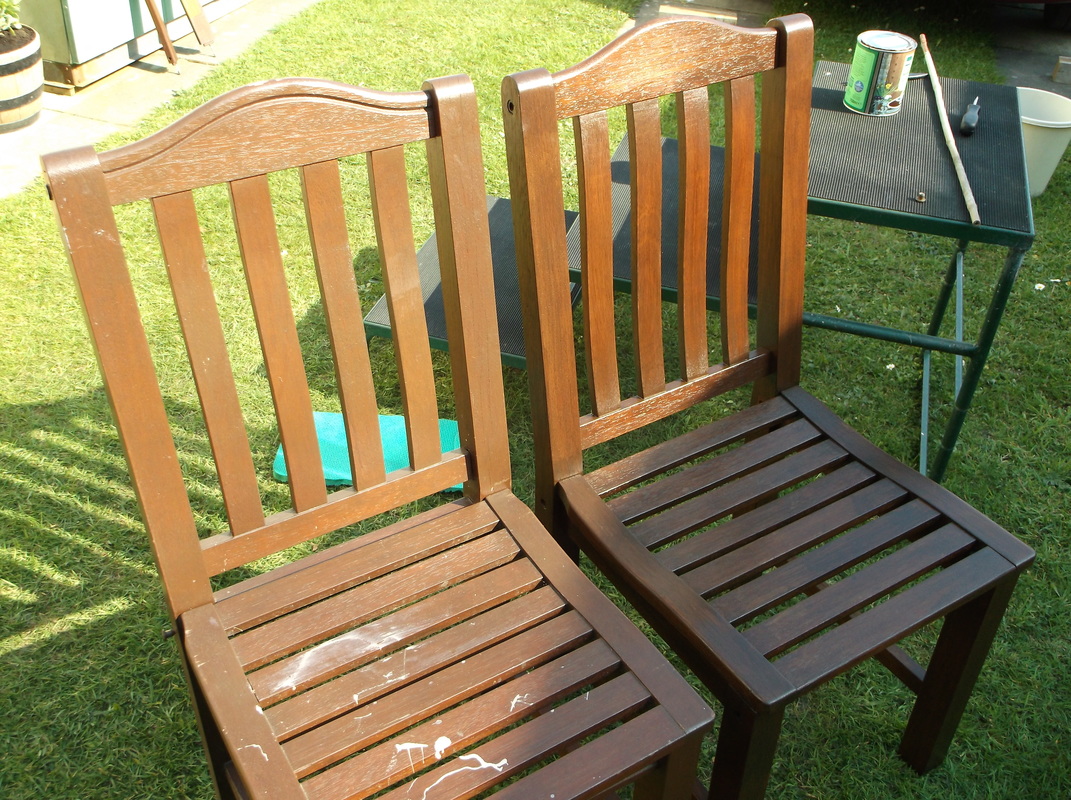
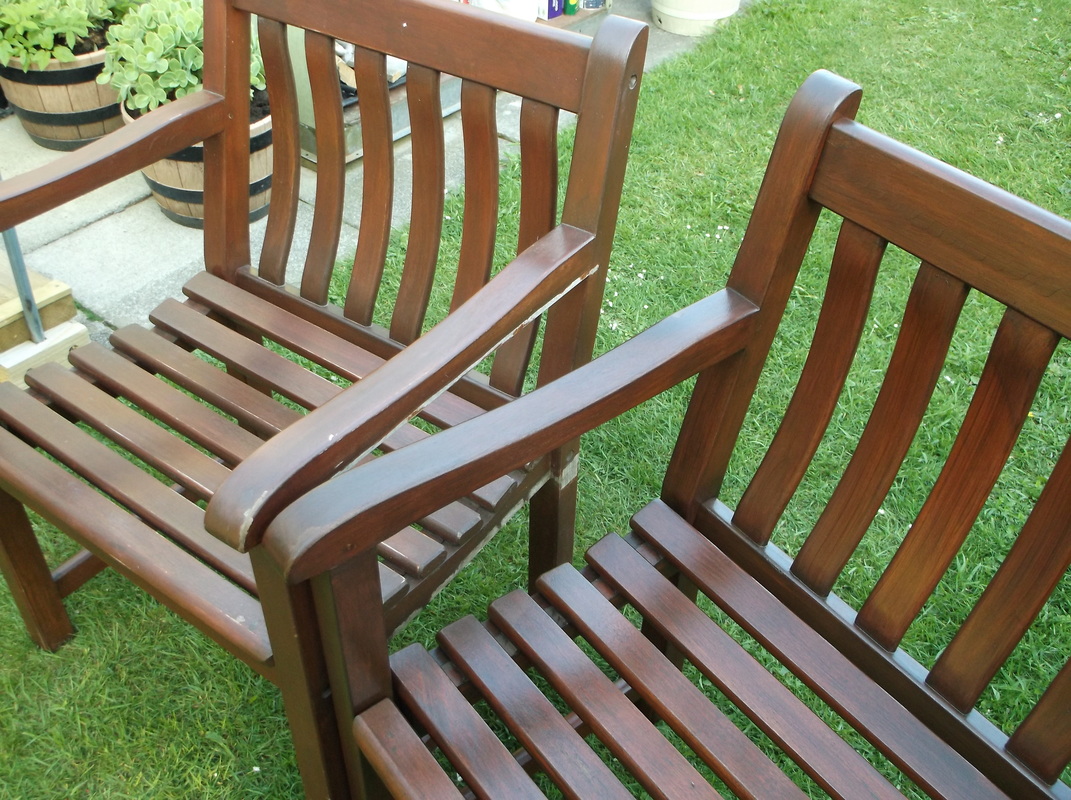
In this picture one chair on the left is shown before refurbishment and the other on the right after the refurbishment was completed. There was some damage to the joints of the chair on the right which had to be dis-assembled and repaired.
|
Armchair Type 1
These armchairs were originally connected together with a table between them. The chair on the left has not been refurbished, the chair on the right has. The surfaces were generally sound with no damage to the wood. There were bare wood areas as can be seen on the sides of the arms and seat panel where the table originally connected.
|
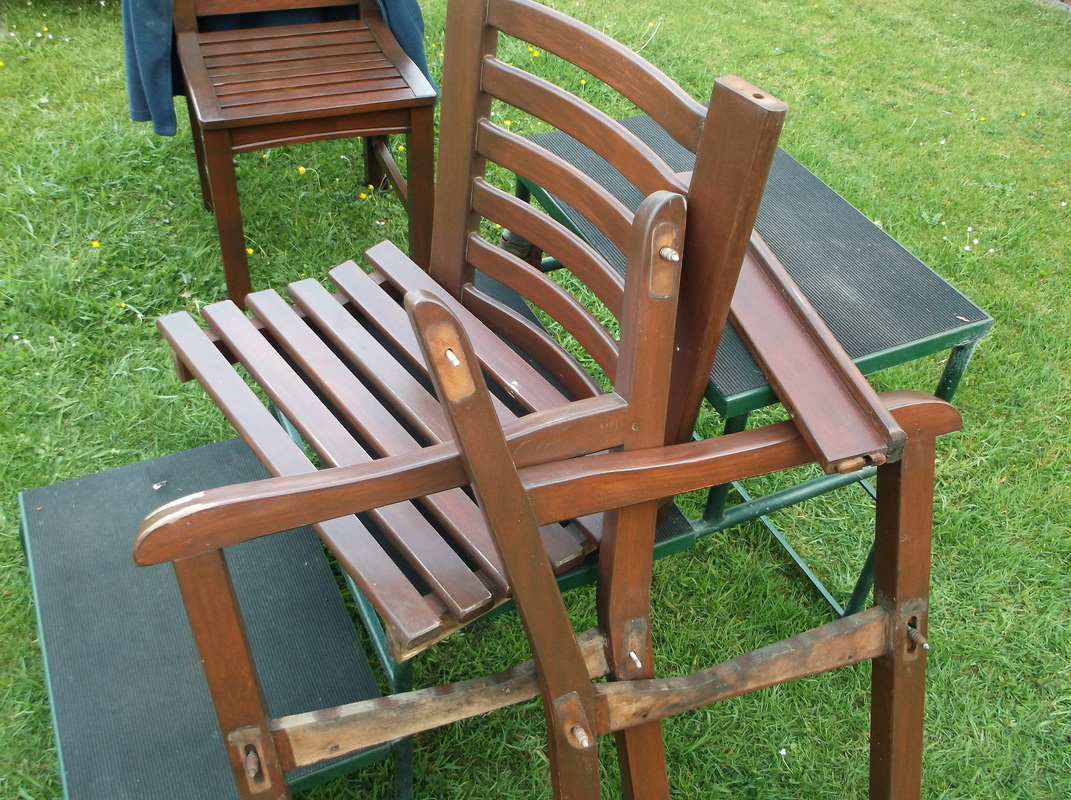
Here the armchair has been dismantled into its constituent parts ready to be cleaned and sanded and then varnished. All the bolt holes and joints were inspected and found to be sound.
|

Here the bare areas of the joints and where the seat panel connected can be seen. Although the seats were maintained over the years they were never dismantled so these areas have no protection and dirt and water got into the joints causing discolouration but thankfully no major damage.
|
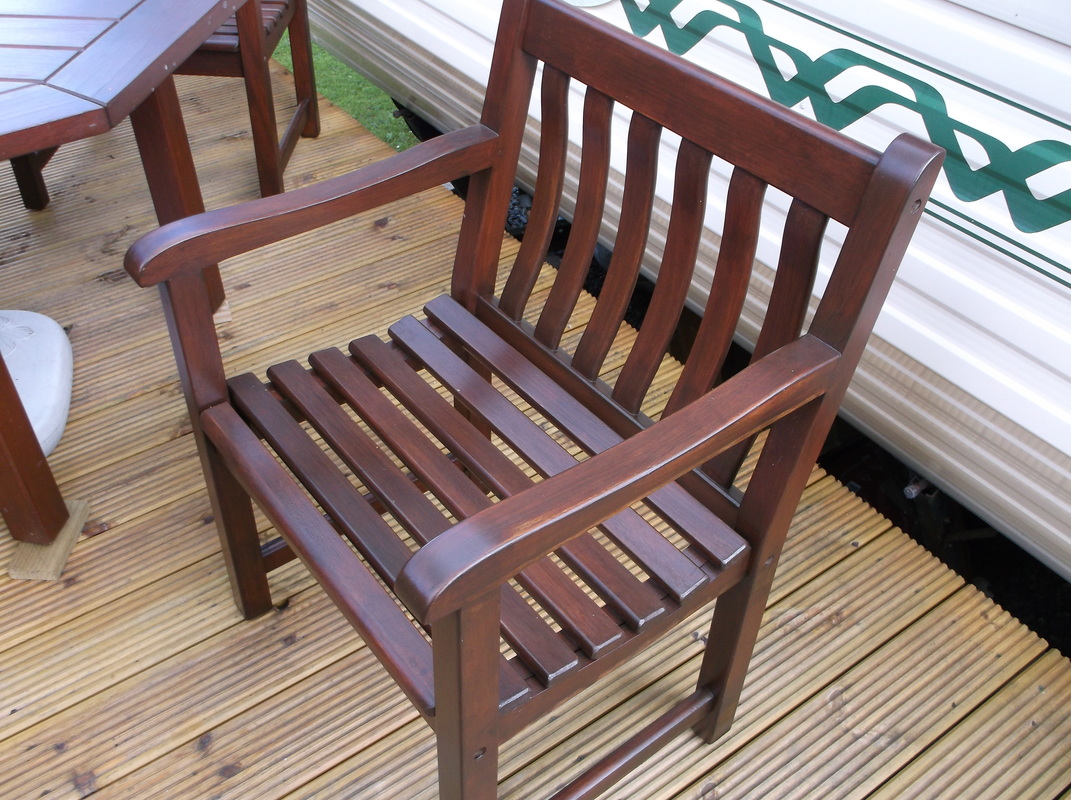
This photograph shows the results of the refurbishment after the joints had been repaired, the various parts varnished and re-assembled. Hopefully these will now give many more years of good service with just minimal annual maintenance.
|
Arm Chair Type 2
This type of armchair came with the large table. These had been out in the open more than the other types so had a bit more damage to the joints and wood surfaces.
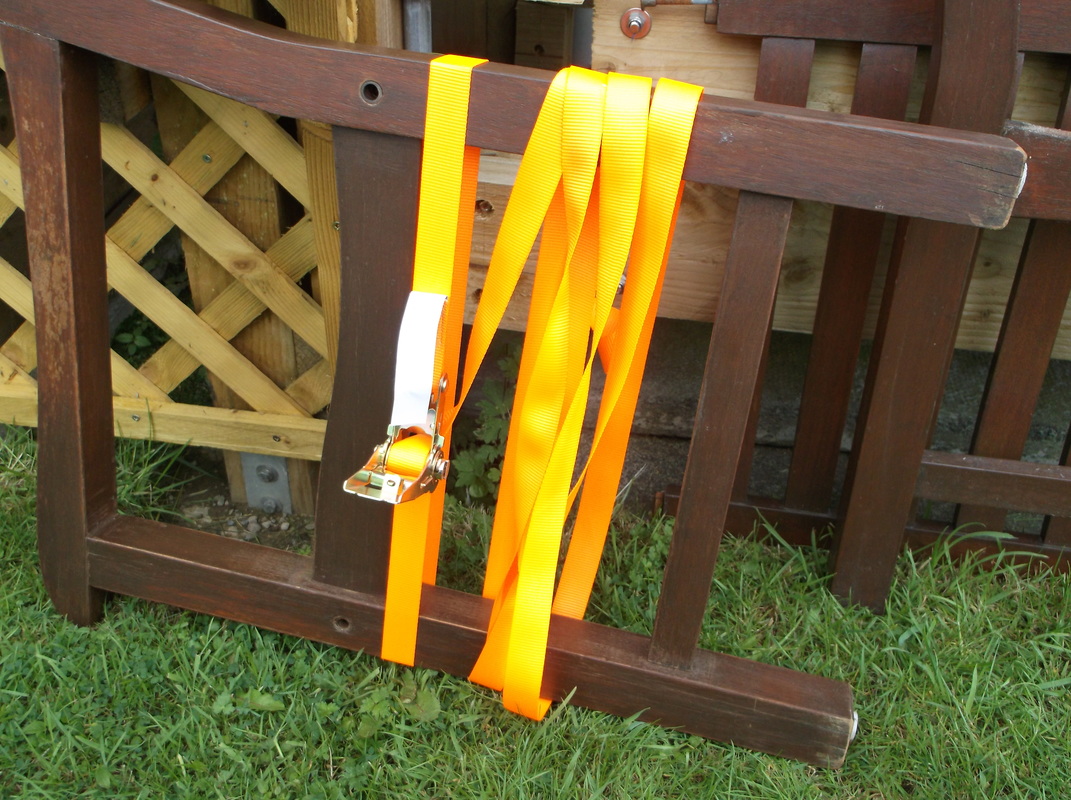
After all the joints were cleaned up, waterproof wood glue was applied to both parts of each joint. Each side of the chair was then quickly re-assembled using a rubber mallet to ensure the joints were fully closed. A ratchet strap was used to hold the joint in place while the wood glue dried.
|
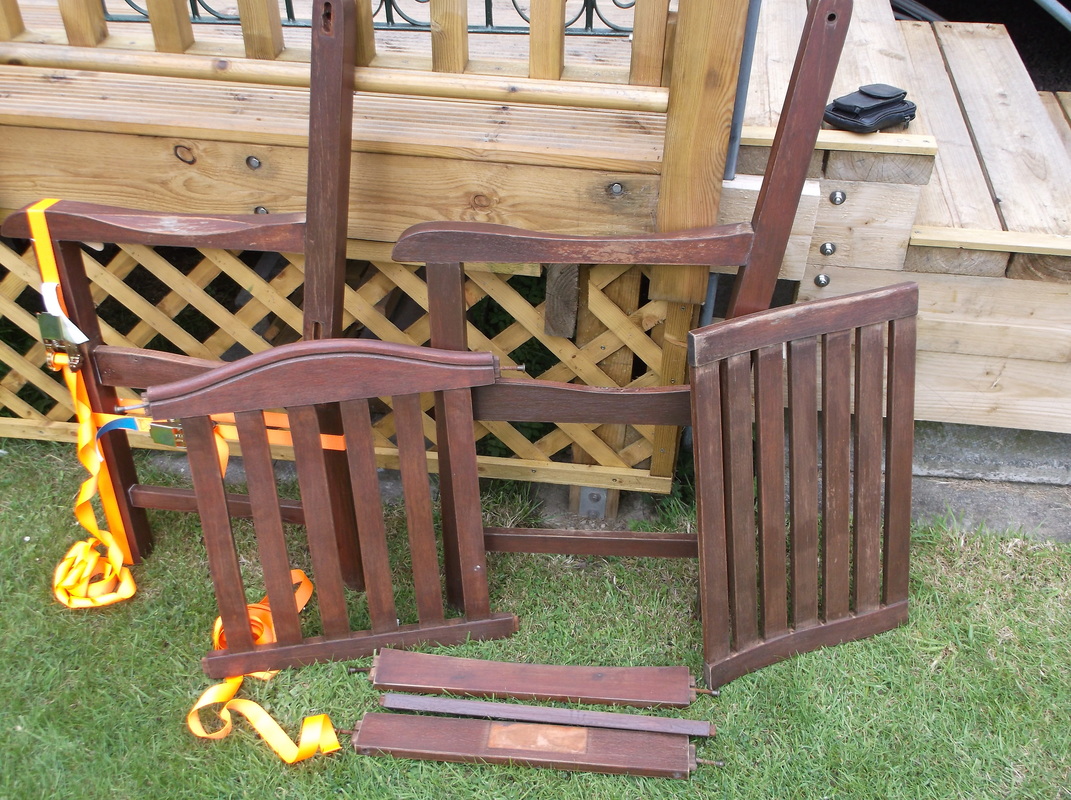
The chair dismantled fairly easily but it was obvious that there was some damage to the joints on each of the sides that would have to be repaired to stop any further deterioration and prevent irreparable damage. In this photograph the joints of one side of the chair has been repaired. The second side required a little more work on the joints and two ratchet straps were used to ensure that the joints were secure and square.
|
Update:28th June 2016.
Work has begun on refurbishing the table and this page will be updated soon....
Work has begun on refurbishing the table and this page will be updated soon....
