Background
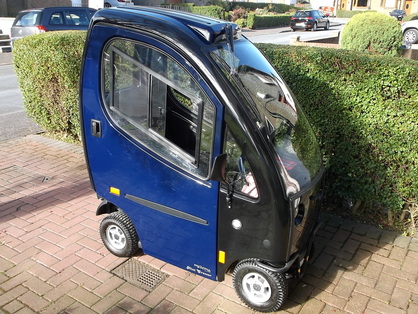 Medema Mini Crosser Cabin.
In late 2015 my mother decided to reduce the amount of driving she did and purchased an electric scooter. It is more like a small electric car as it is fully enclosed,has windscreen wipers ,full road going lights and indicators. It even has it's own registration plate! She intends to use it to get around locally rather than use the car.
The manufacturer of the scooter recommends that it is stored in doors or under cover away from bad weather and direct strong sunlight. It is not possible to get the scooter around the back of the house so we have decided to build a drive in within the garden with a miniature car porch/canopy to protect the scooter. This will make it easy to get in and out and convenient to use. It does mean losing part of the garden but this simply means that we will have to re-think how it is planted and maintained and may even present a few opportunities to innovate!
The manufacturer of the scooter recommends that it is stored in doors or under cover away from bad weather and direct strong sunlight. It is not possible to get the scooter around the back of the house so we have decided to build a drive in within the garden with a miniature car porch/canopy to protect the scooter. This will make it easy to get in and out and convenient to use. It does mean losing part of the garden but this simply means that we will have to re-think how it is planted and maintained and may even present a few opportunities to innovate!
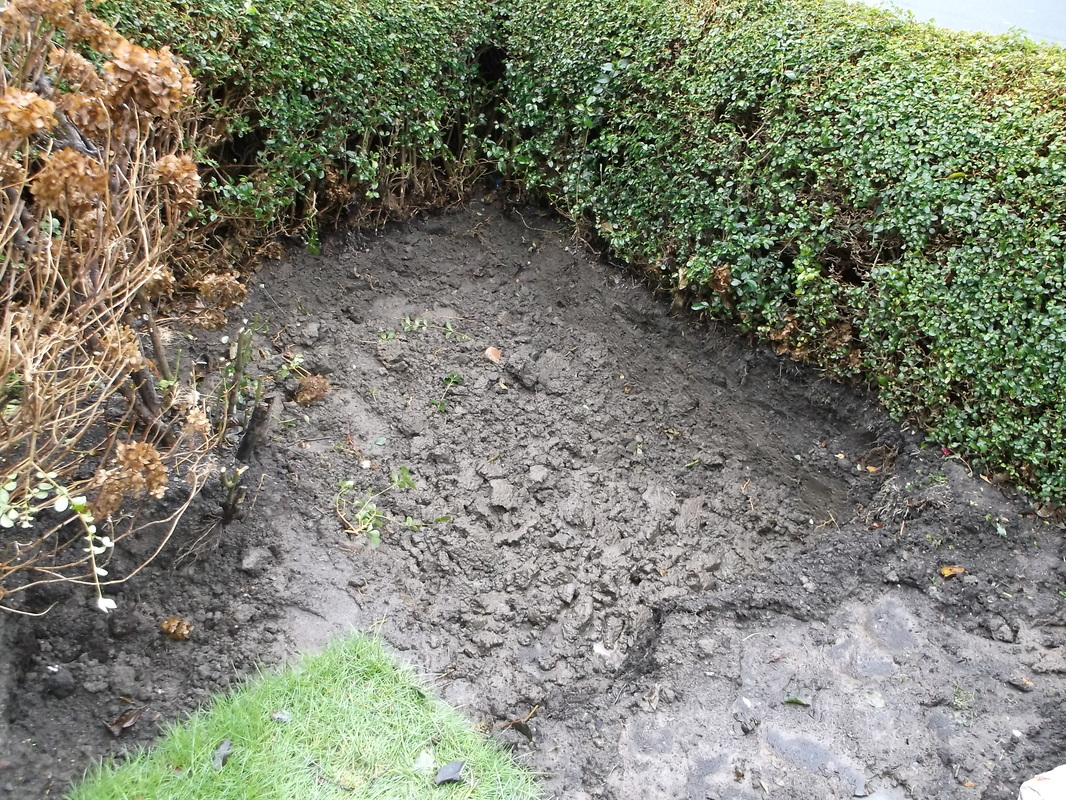
Starting the excavation of the drive way in January 2016.
The rose bush was removed maintaining as much of the root structure as possible. The soil was then removed to lower the area to street level on the other side of the hedge. This meant removing around 18" of soil. The initial work was started in January 2016 in a short period of reasonable weather however this did not last long.

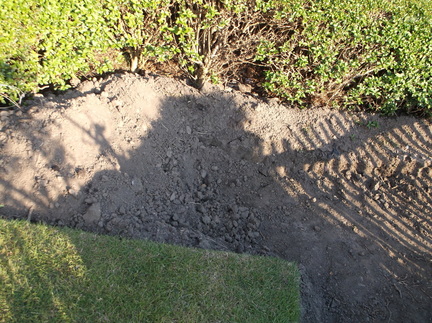
Further soil excavation and hedge removal started.
When the weather picked up in late spring the work restarted. More soil was removed and a section of hedge was removed. This was easier than expected as sometimes the root can be very deep and thick. The hedge was removed carefully to avoid damaging the remaining sections.

Excavation of gate posts reveals original metal posts from late 1930's.
With these types of construction projects i never get a great deal of luck and this one was no different. As soon as i started digging the first foundation for the gate/canopy support i hit a metal spike. This was the remains of a metal fence that was cut down during the early stages of World War II to be recycled for the war effort! I thought it would take a long, long time to get out but in the end it was just under an hour, but a tough one at that!
Hydrangea bush removed and further soil excavated.
This shows the upper part of what will be the driveway. Sadly the Hydrangea had to be removed however i advertised it and it went to a good new home. I was so pleased that i did not have to destroy it by cutting it down into bits. The root ball did put up a good fight before i was able to get it out.
|
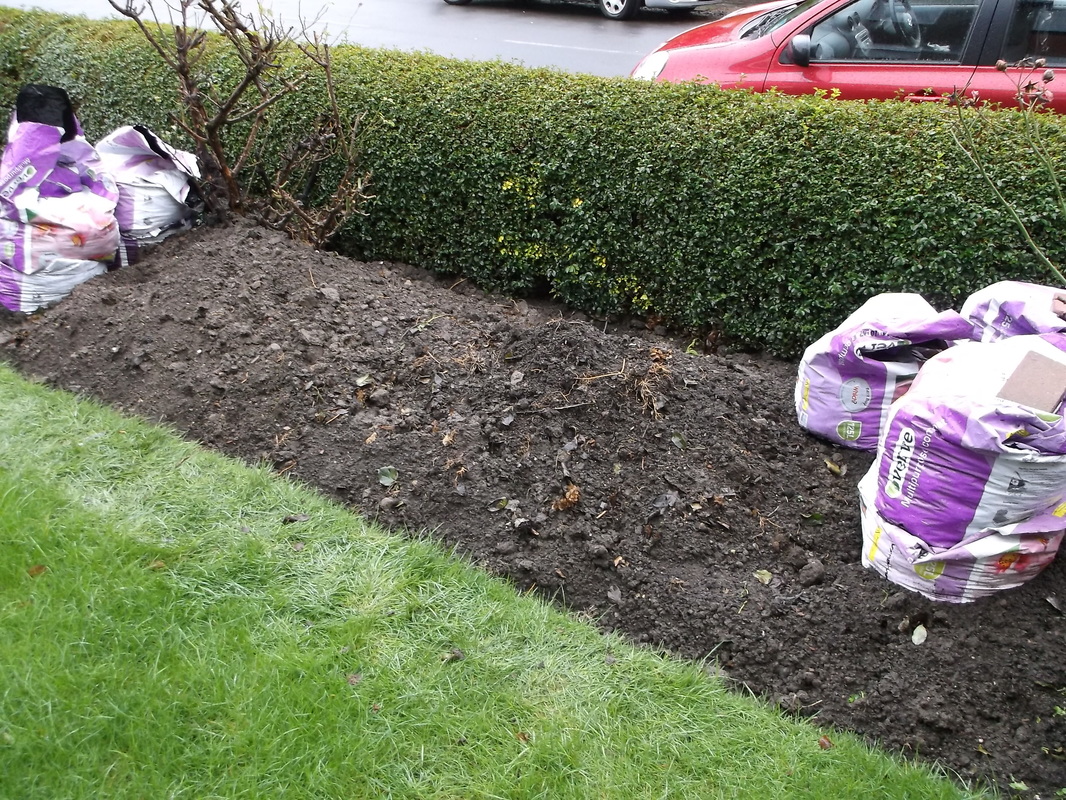
Top soil moved to flower bed, sub soil bagged up for recycling.
The good top soil was piled onto the adjacent flower bed and will be re-used. The lower quality sub-soil was bagged up and will be taken for recycling if it cannot be re-used locally. The rose bush removed was planted into this raised area to try to save it for re-use later.
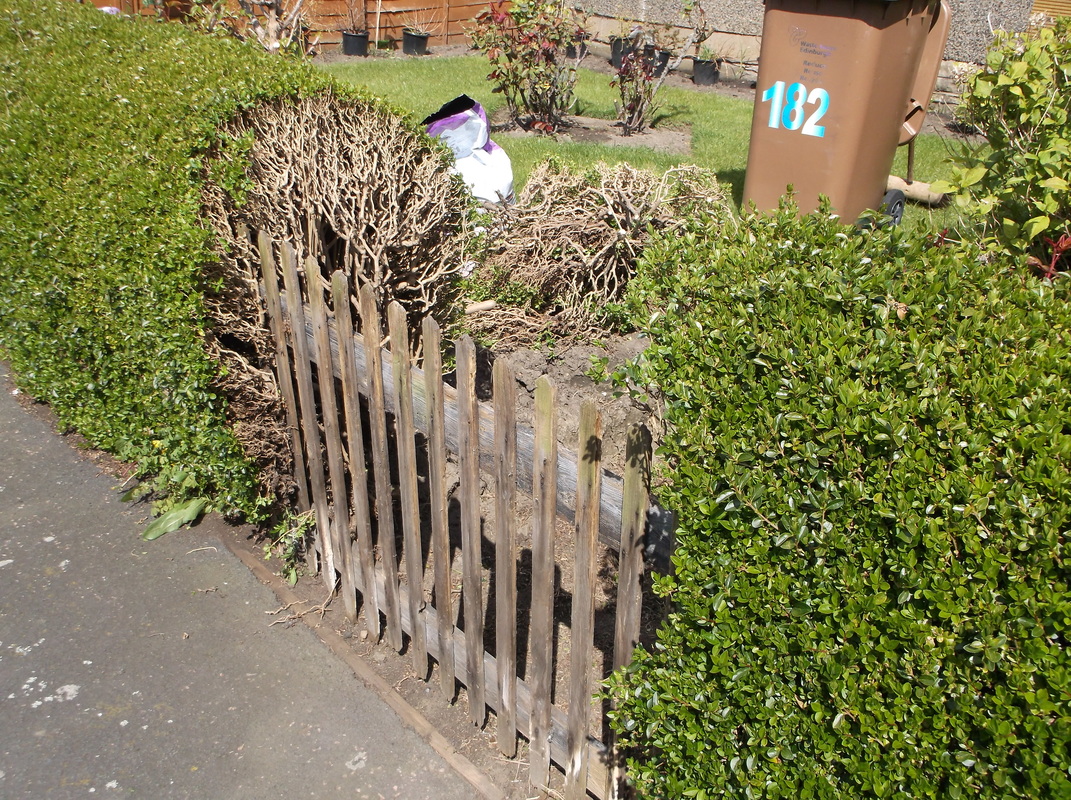
Hedge removal exposing the 55 year old fence beneath!
As the soil has been removed around the root area, these sections of hedge were watered and fed regularly to minimise the risk of damage. The fence was originally installed over 50 years ago and it is at least 30 years since most of it saw day light!
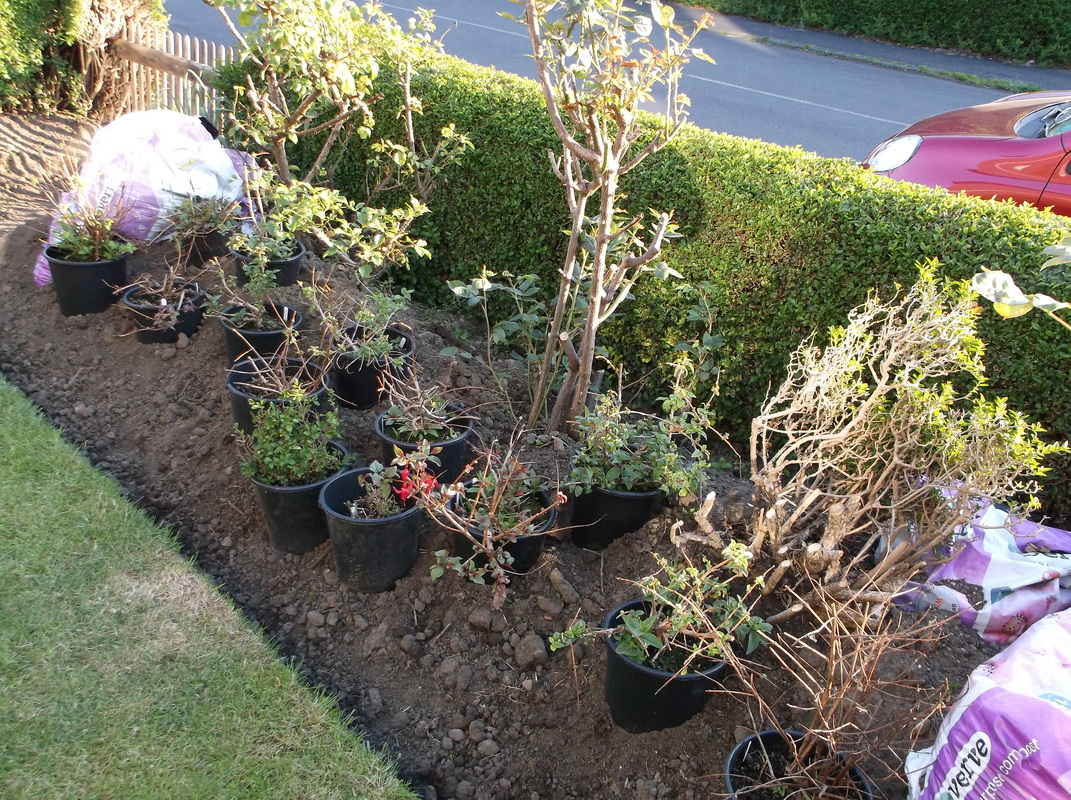
Rose bushes temporarily resited along with spare hedge section salvaged.
The garden would be a bit of a building site for most of the Spring and early Summer so i decided to use the current mound of surplus soil as a feature and store and develop plants here as it does get a lot of sun and there is shelter behind the hedge. This way the garden will still provide some enjoyment when looking out the window rather than looking out to a wet muddy patch....builders please take note! Here the second rose bush has been moved and small sections of the hedge have been kept for recycling.

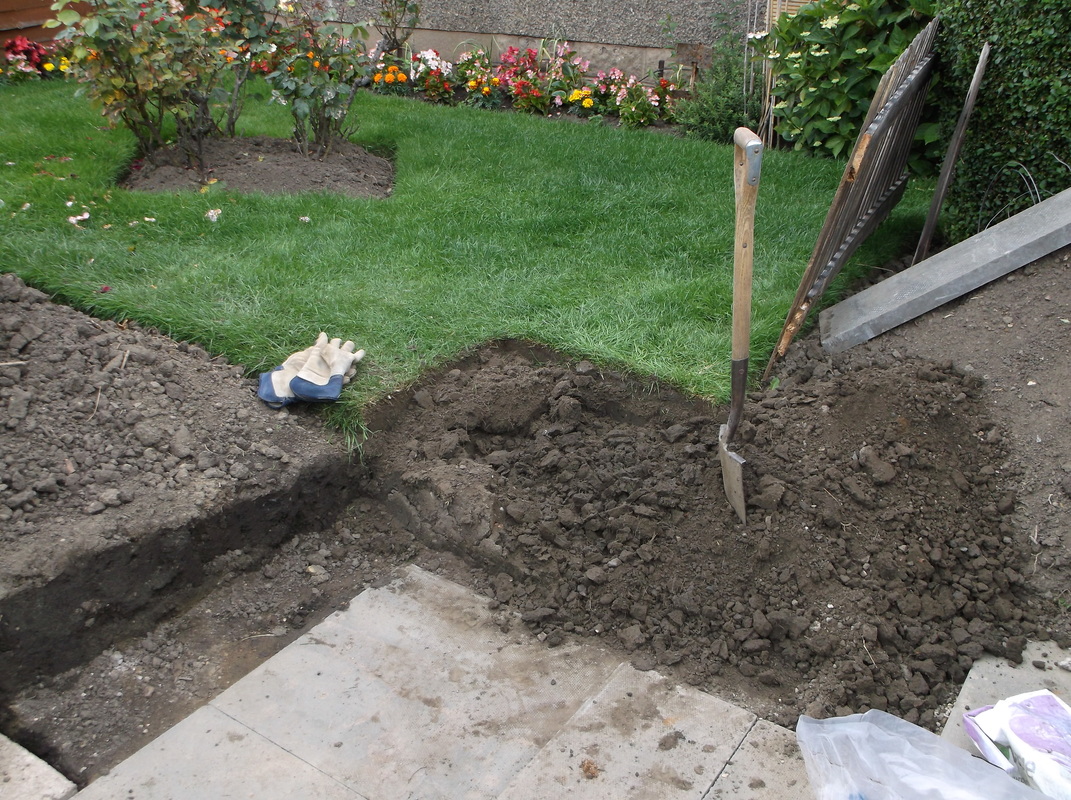
Sufficient soil excavated to get down to street level ready for paving slabs.
The second rose bush also had to be removed. I have moved this to a temporary location and hope to re-use it or find a new home for it somewhere else. In this photograph the entrance area has been slightly widened, the approximate floor plan levelled and the first foundation hole dug. A small section of the lawn will have to be removed to create enough space for the scooter.
|
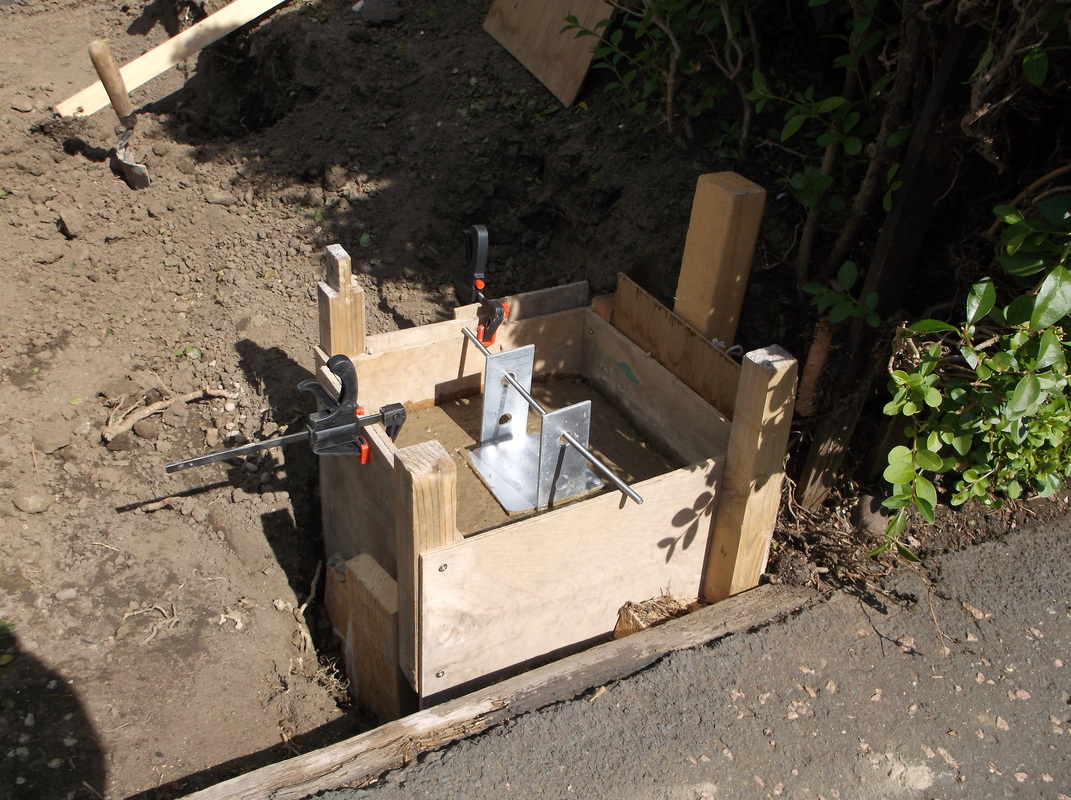
First gate post foundation cast.
The same method of creating the concrete foundation for the metal post holder was used as when i built the decking at my mother's caravan. Plywood was used to create the sides to form the concrete. Wood offcuts were used to hold the sides together with screws. Because of the restricted space the wooden former shown above had to be modified to create the later post bases.

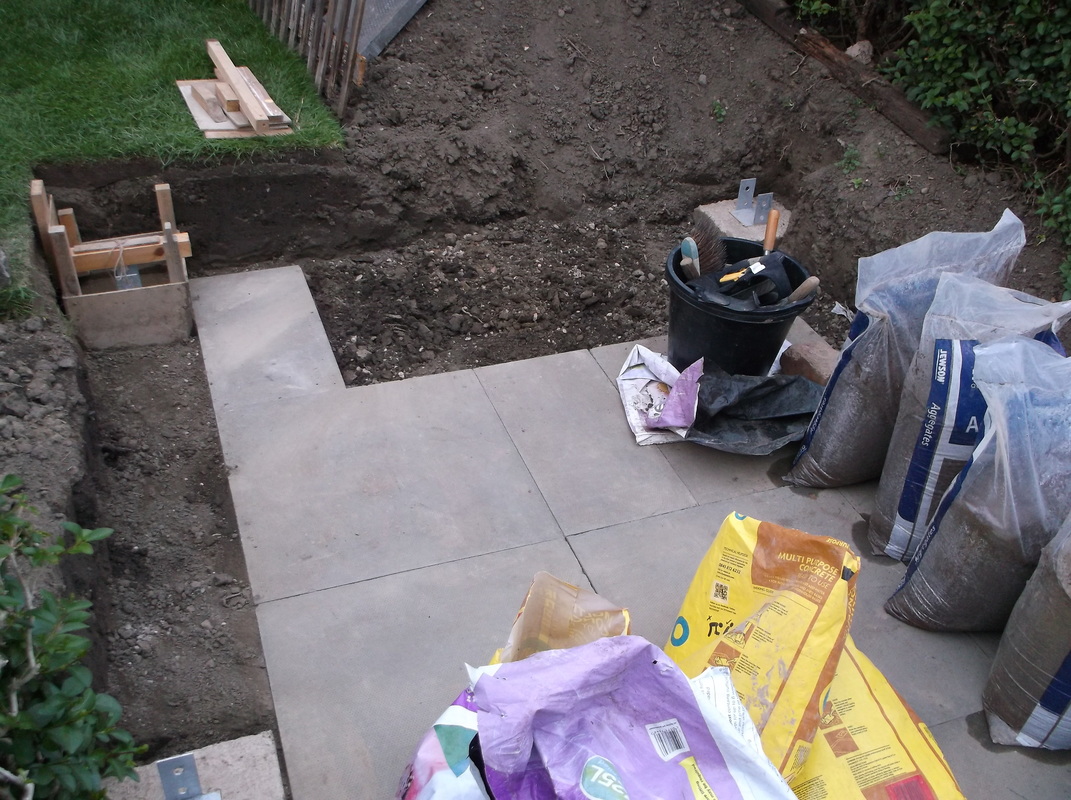
Most of driveway slabs laid, just last corner to go!
The slabs were laid more quickly than i had originally estimated mostly because i had completed all the preparation levelling the site earlier in the year. Here most of the slabs have been laid and some of the top soil removed and bagged up to create space. At this stage there were still two slabs to be laid, but first a section of grass and soil had to be removed.
Laying the last foundation for the scooter port support post.
The removal of the corner area of grass allowed the last corner post to be cast. The slabbed area created a useful work space for later work building the wooden structure.
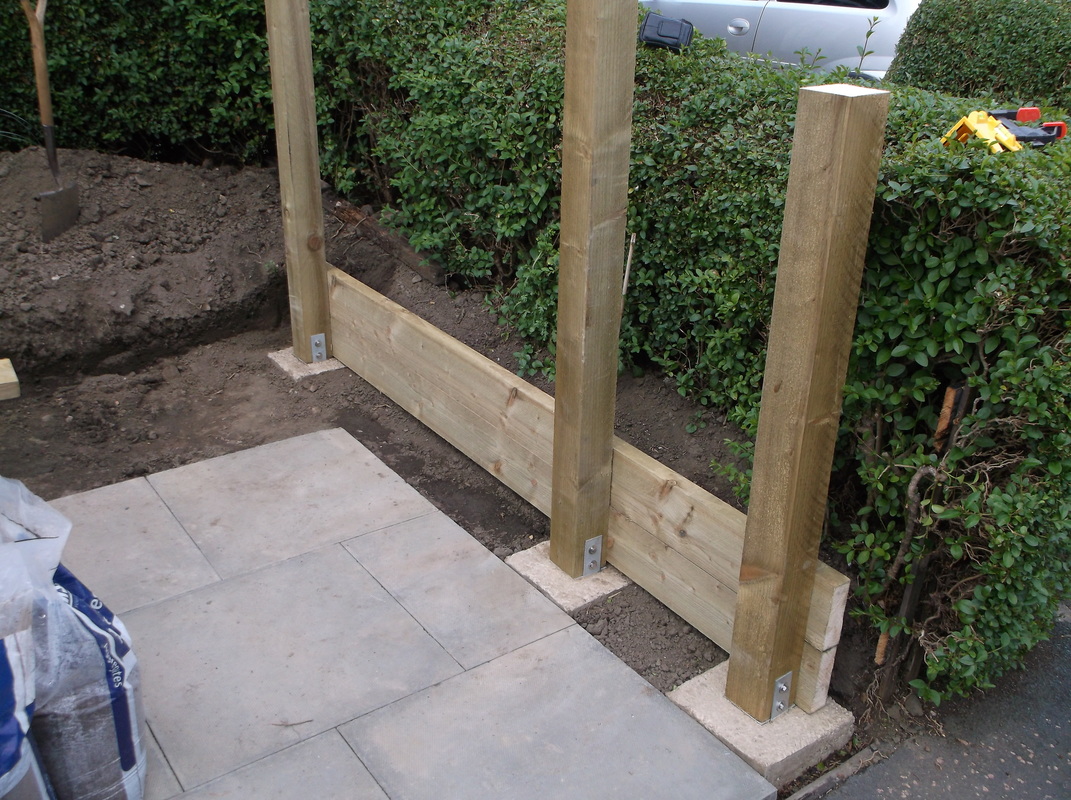
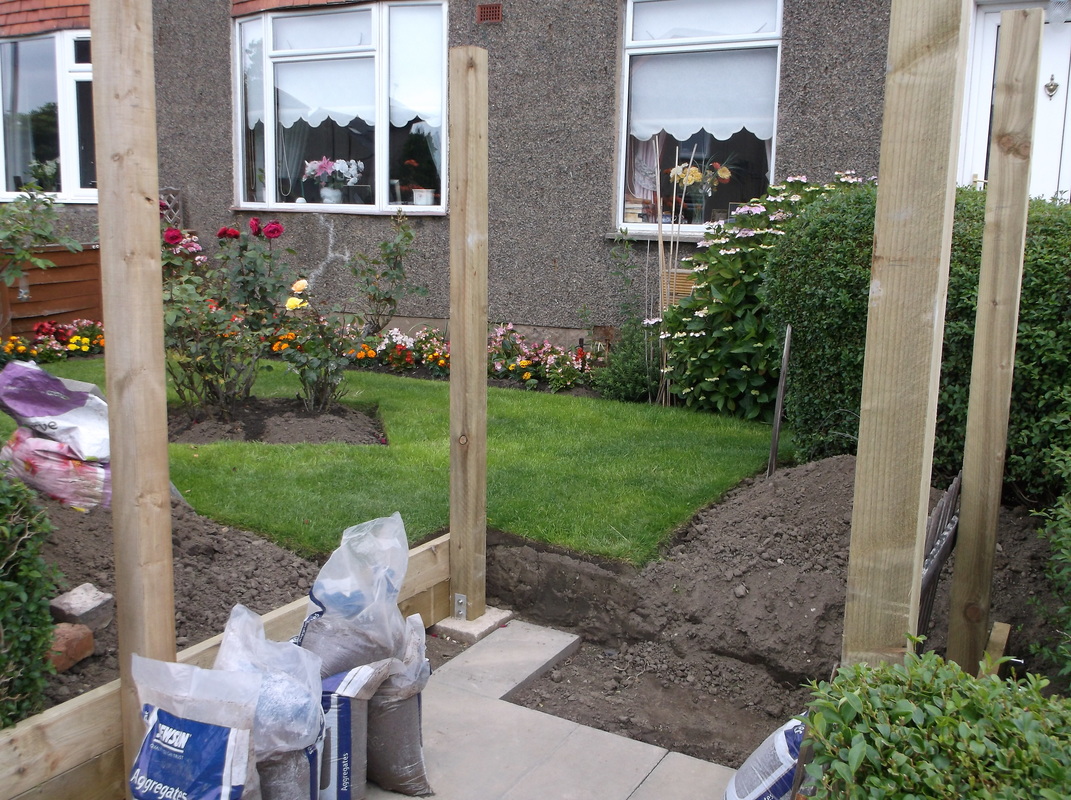
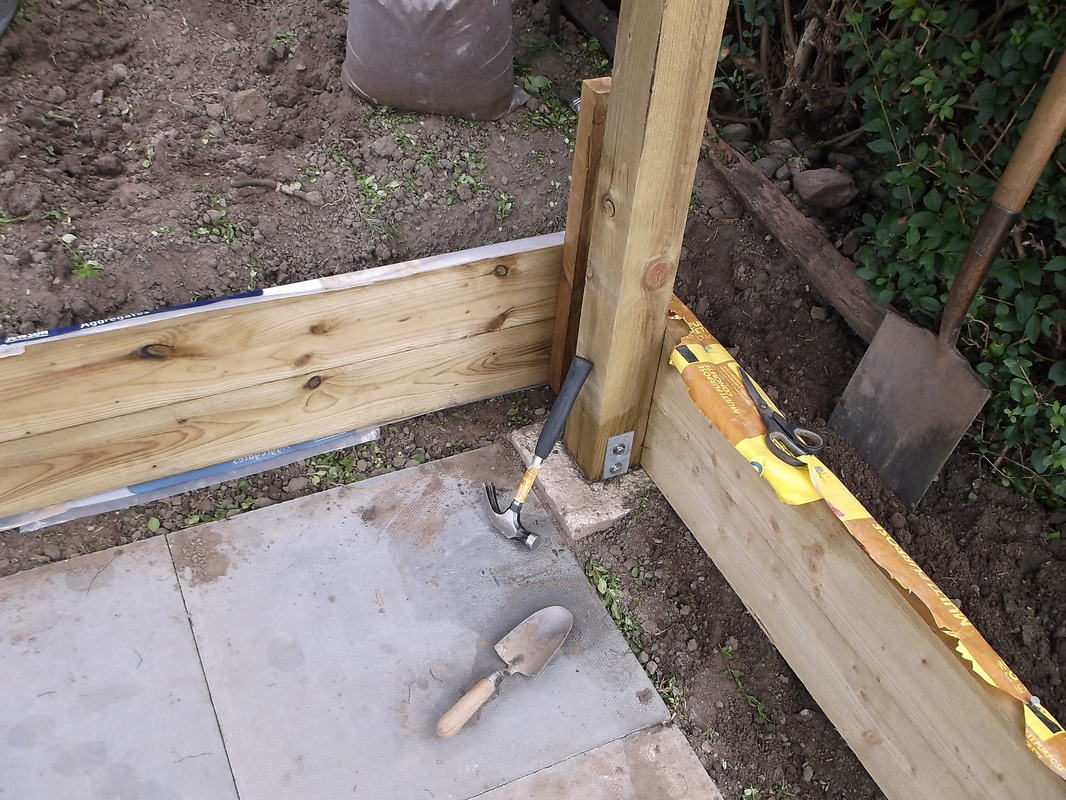
Gate posts, side boards installed.Driveway starting to take shape.
Here the side boards holding the soil back can be seen. Each board was secured to each of the three posts using two countersunk stainless steel M8 x 100 mm hex head coach screws. It was important to allow enough soil to remain between the side boards and the hedge to ensure the soil could hold enough water to maintain a healthy hedge. Great care was taken to avoid damaging the hedge roots during construction and it was regularly watered and fed during this time.
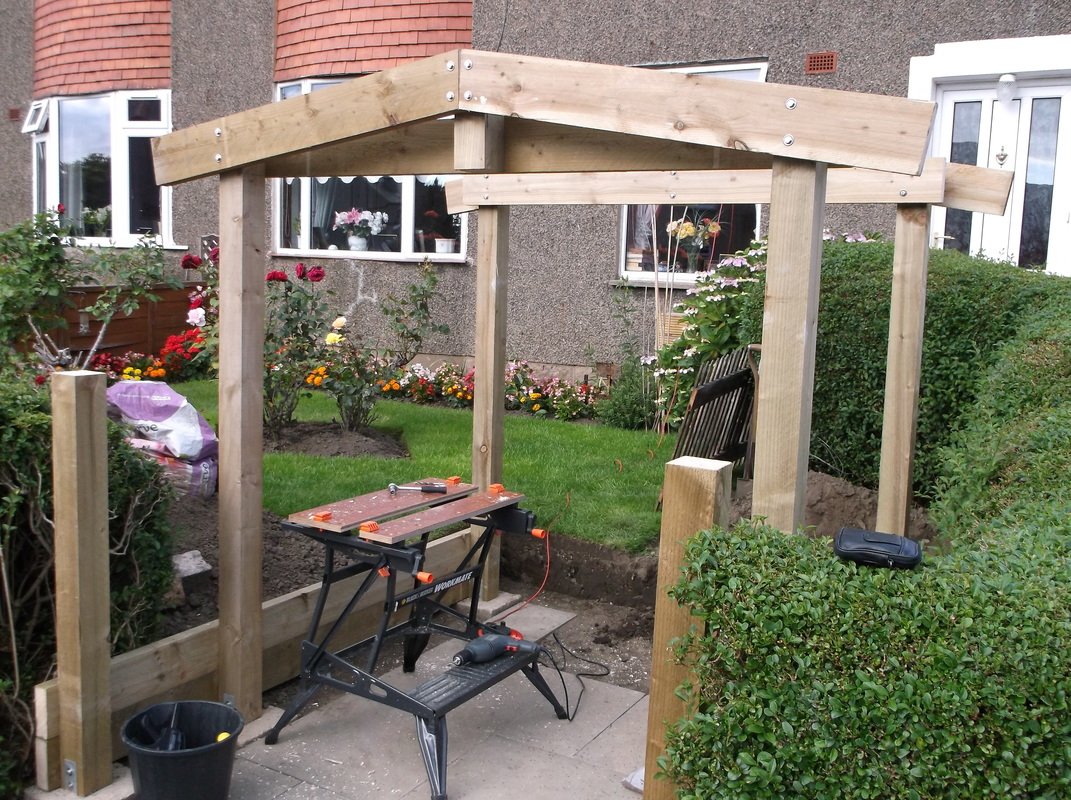
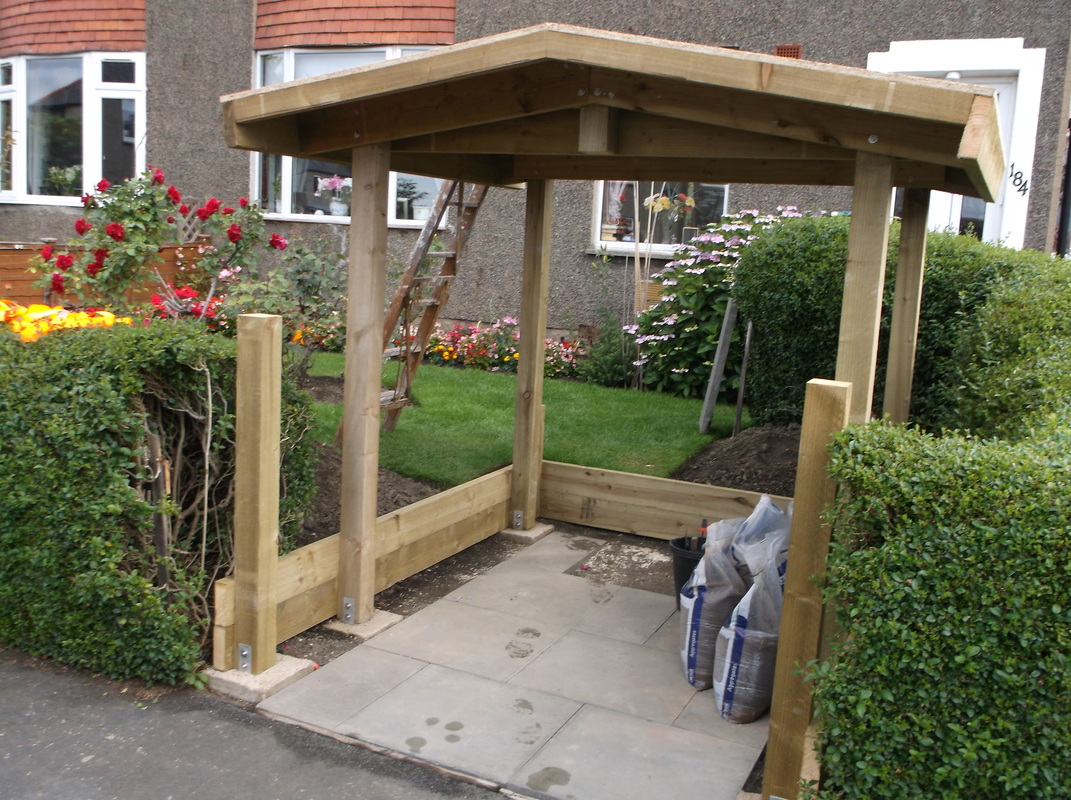
Roof beams installed, ready for roof panel installation.
Here the completed roof support structure has been installed at both ends of the scooter port. By this stage the structure was beginning to take shape and the end was coming into sight!

Roofing felt being installed. Note towel to stop ladder damaging felt.
After the roof sheets were installed they were protected overnight with a large sheet of polythene to protect them from the rain. The following day a bituminous based adhesive was applied to the roof surface and a mineral covered roof felt was applied to the roof. The joins were overlapped and sealed with adhesive. The roof felt was held in place with 18mm galvanised clout nails.
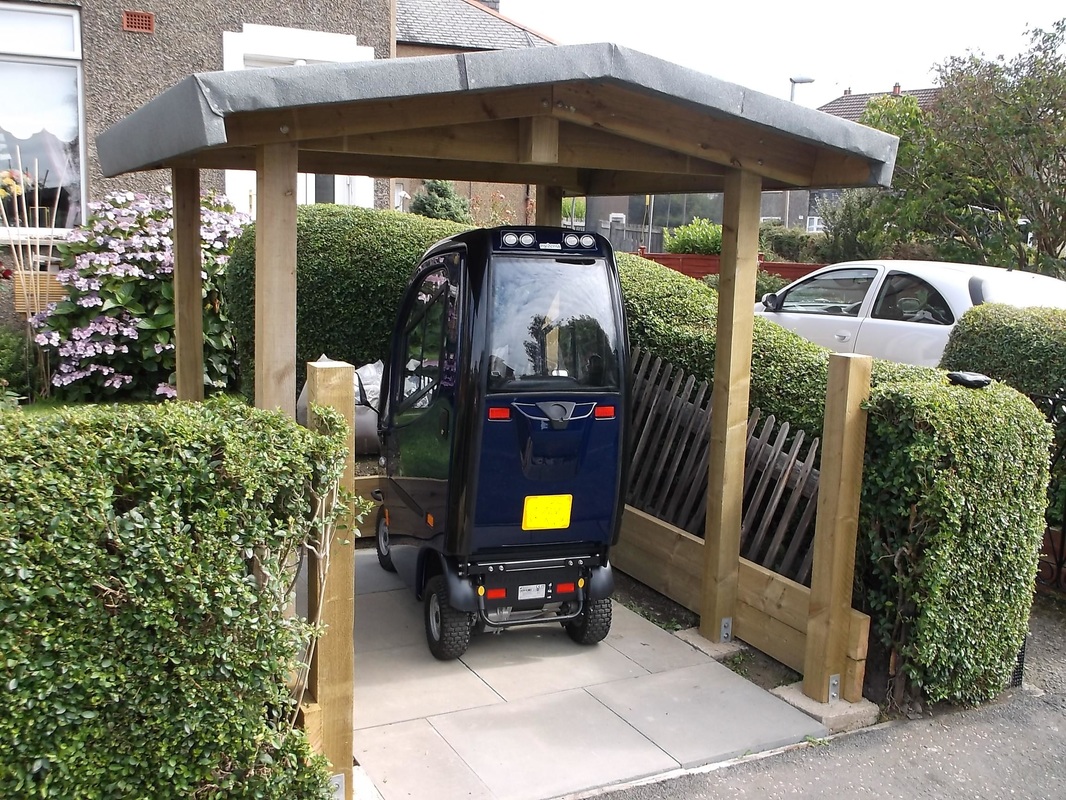
All major construction complete, only gates to be installed.
The scooter had new batteries fitted, and was brought out of storage to its new home. Here it can be seen in the recently constructed 'Scooter Port'. The gates still have to be fitted but the scooter can now be used and safely stored.
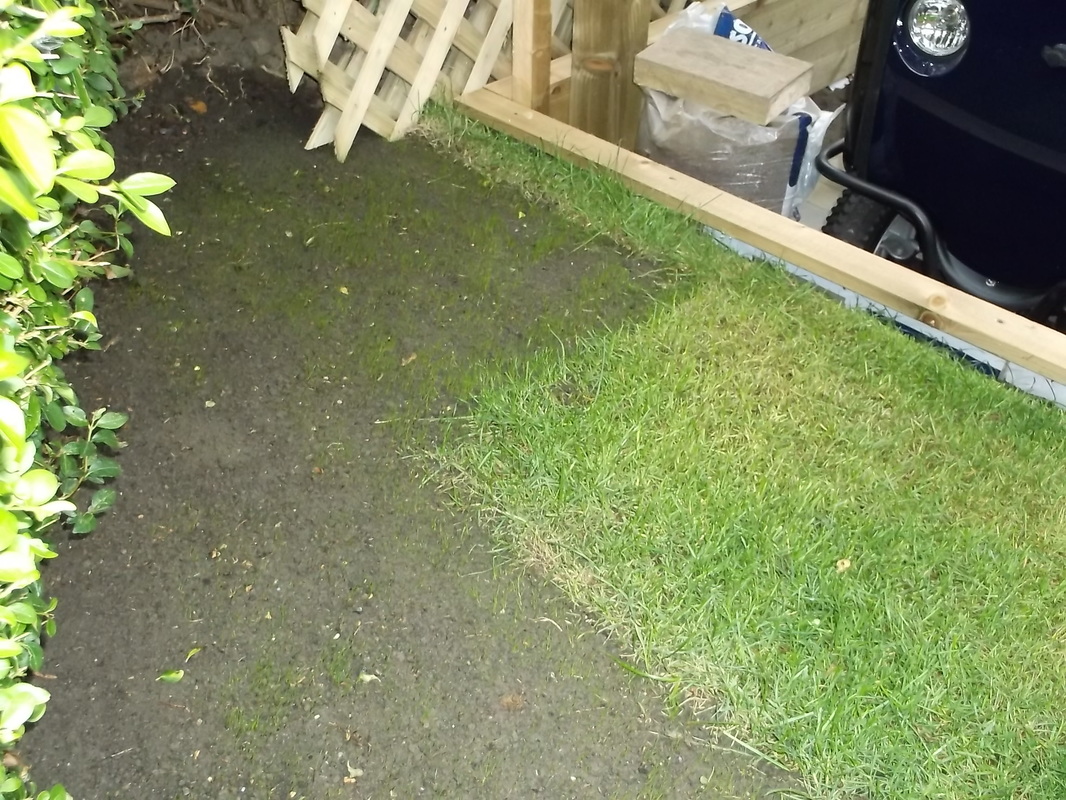
Soil replaced around base boards and grass seed planted. Note wooden capping/trim.
The area of the garden border previously occupied by a Hydrangea bush was levelled and grass planted. A section of grass removed from the lawn was recycled and grass seed was planted. This picture shows the grass seed one week after it was planted and had started to germinate.
|
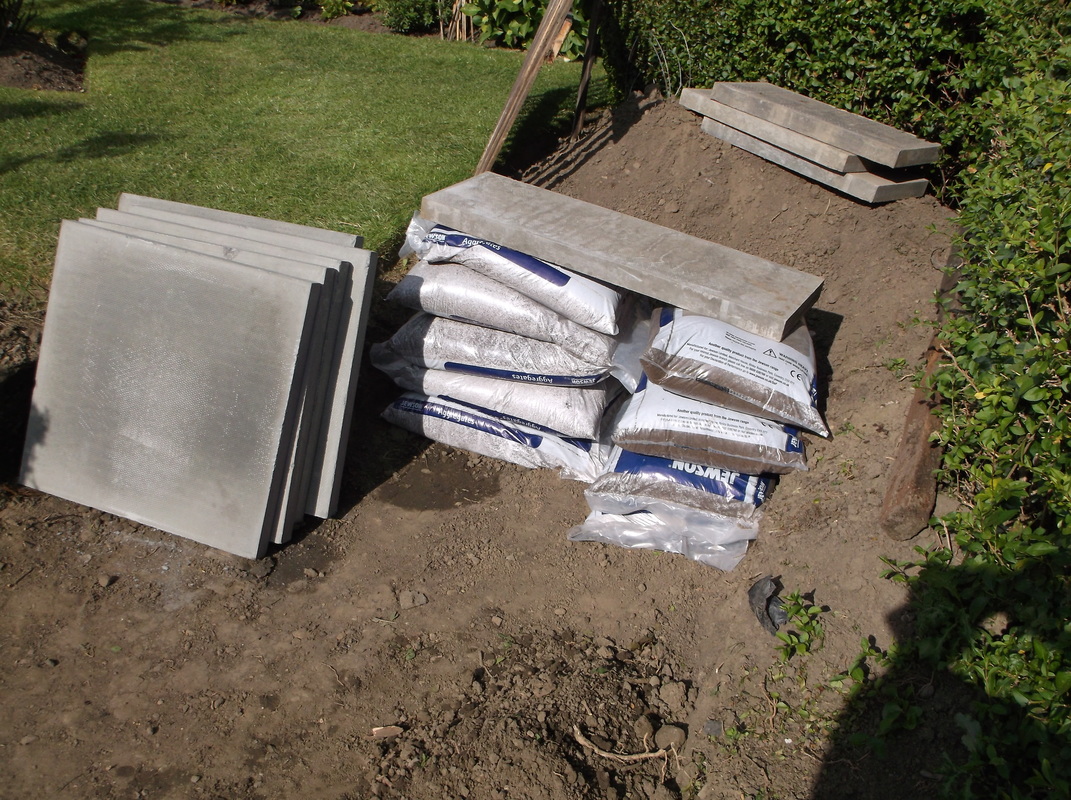
Driveway slabs, sand and cement delivered.
After the first post base had been created the slabs, sand and wood was ordered and delivered. It is when these arrived that i realised how much more work had still to be done to complete the job.
Removing the last section of lawn and excavating the last of the soil.
The corner of the grass was removed and will be reused to create a new grass area at the rear of the scooter port. The soil was removed to create the area for the last two slabs. All of this soil was bagged together with much of the soil removed earlier and was quickly sold on-line to people who required good quality top soil for gardens etc. It was good to re-cycle the soil and recover some of the cost of the scooter port.
Side boards and scooter port support posts installed.
The first step was to measure up, level and install the four posts supporting the canopy and the two gate posts. In this picture the side boards holding back the soil have also been installed.
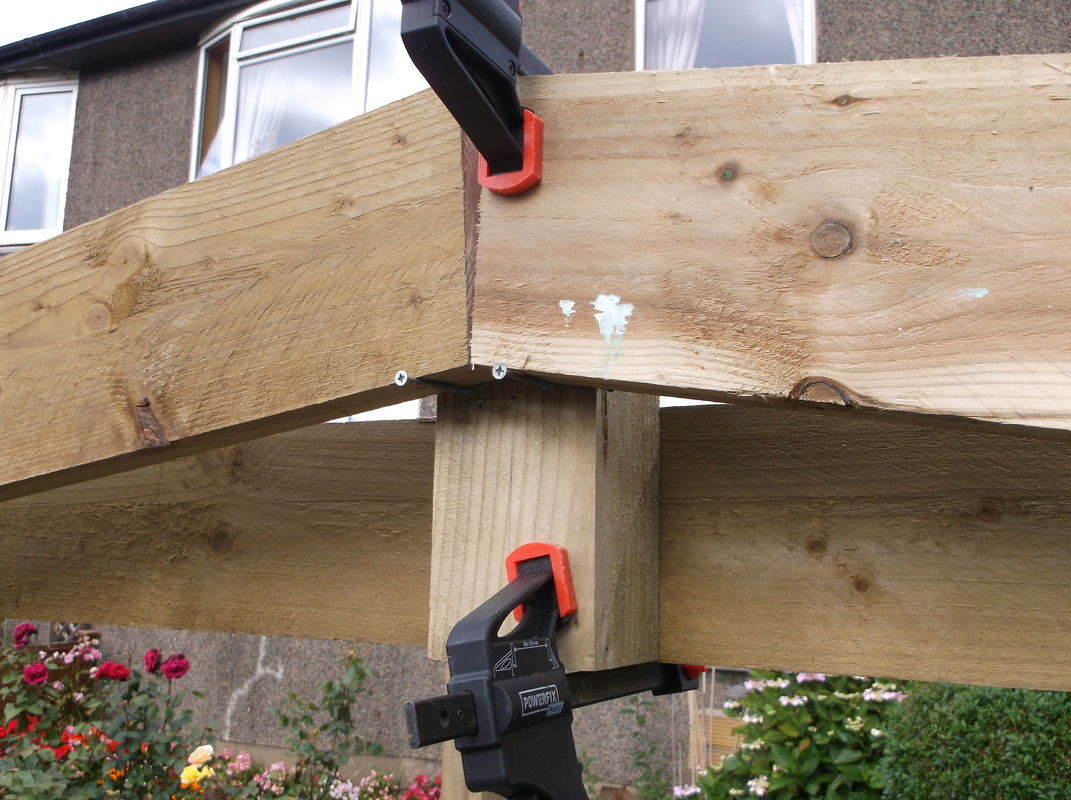
Testing the set up of the roof supports before fixing.
After the four canopy support posts were installed the horizontal spars between the side posts were attached. A piece of off cut support post 300mm in length was used to create a vertical support at the centre. The sloping roof joists were then cut and test fitted. In this picture the proposed set up is shown held temporarily in place with screws and clamps to check the fit before securing everything in place.
Roof panels, side beams and end trims installed.
The roof support structure was completed by installing the side bars and apex support bars. The roof panels made from OSB3 board were attached to these using 50 mm decking screws. The front and rear edges of the roof were finished off with 75 mm deep edging pieces which were also secured to the roof side bars. The installation of the roofing sheets(18 mm thick) made an already stiff structure that much stiffer so it should withstand the severe gusts of wind that can occur where my mother lives at the top of a hill.
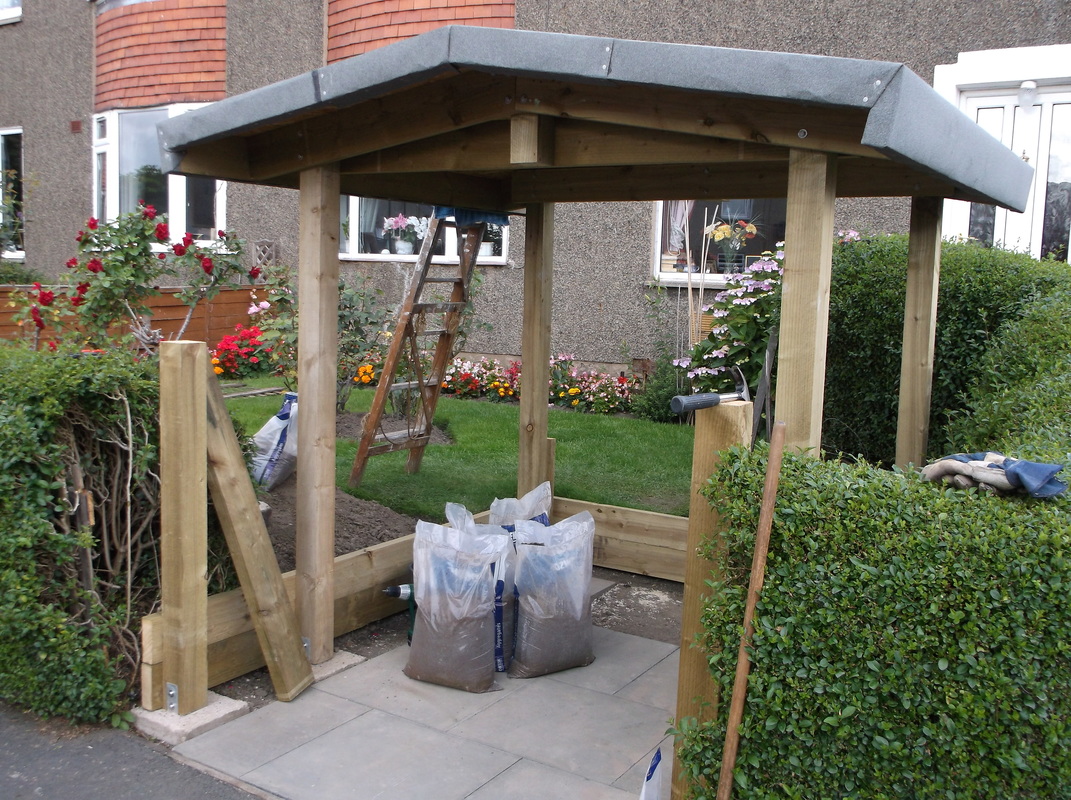
Roofing felt installed. Note spare sand bags, over estimated amount required!
The scooter port structure is now complete and the roof watertight. As can be seen in the picture the rear base boards have now been installed and the scooter port is not far from being ready for use.
Polythene water proofing added to side boards.
I wanted to minimise the amount of water and damp soil that was against the wood holding back the soil so i recycled the concrete and sand bags to create a water barrier. These were cut open trimmed and fitted behind the wooden boards and pulled down through the bottom. The polythene was nailed in place at the top using galvanised nails. A wooden trim cap was screwed down to the top of the wooden boards to cover the polythene.
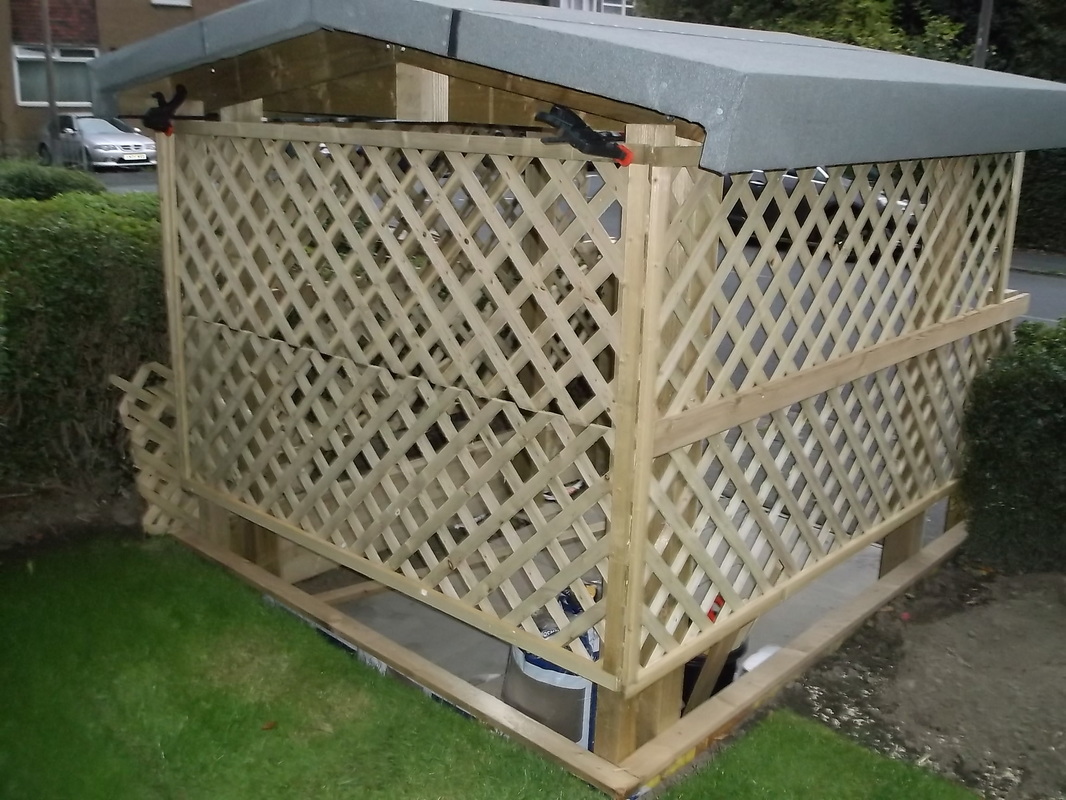
Sections of trellis framed and added around the scooter port.
To add some degree of shelter for the user and the scooter in bad weather trellis was framed up and added to the back and sides of the scooter port. Note the progress of the grass seed. This picture was taken 2 weeks after the seed was planted.
|
Gate prototype in closed position.
|
Gate prototype in partially open position.
|
Gate prototype in fully open position.
|
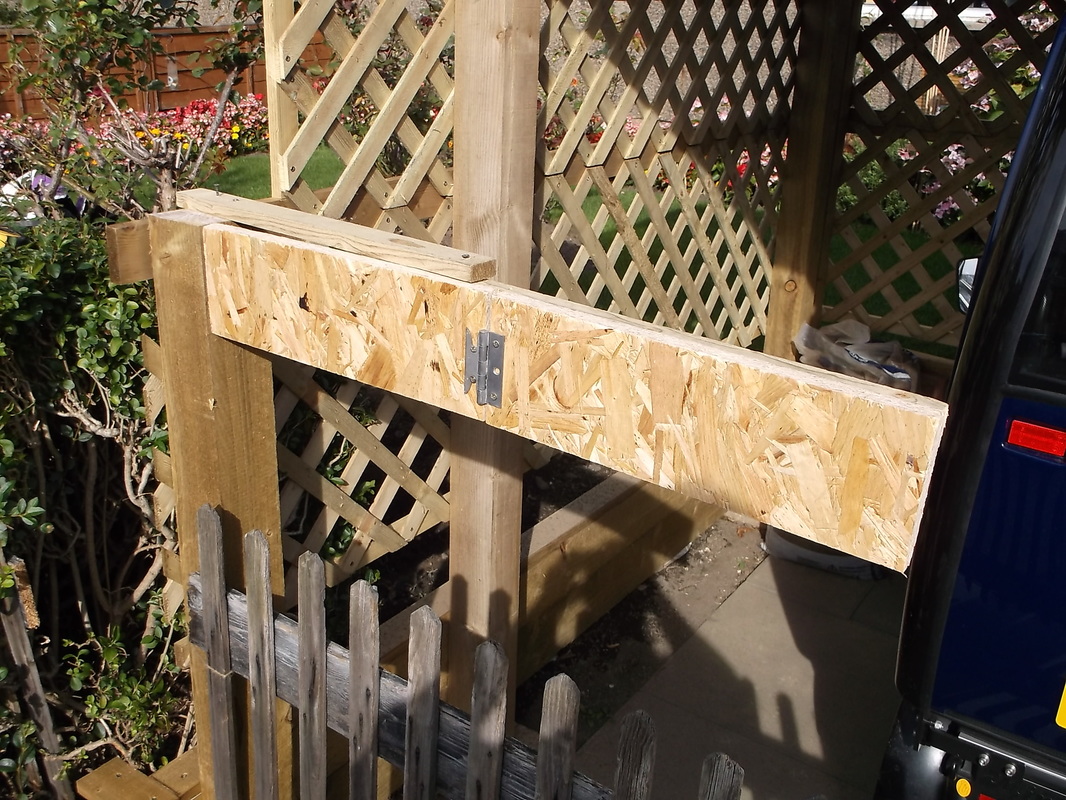
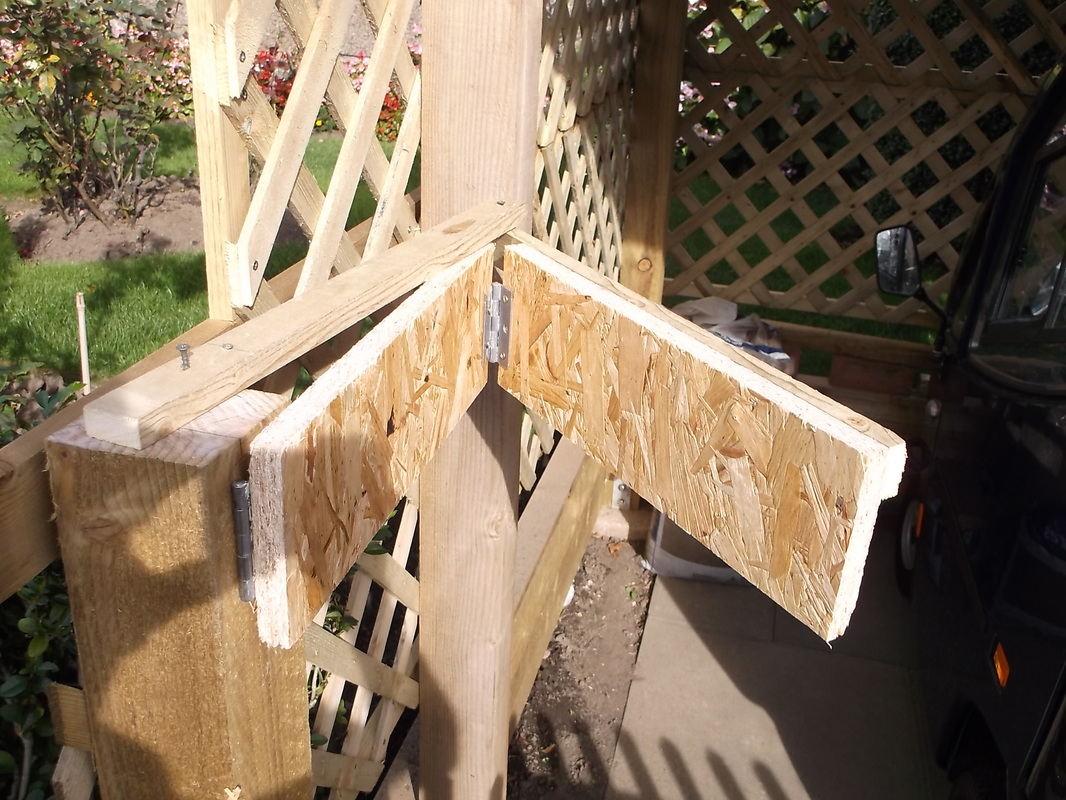
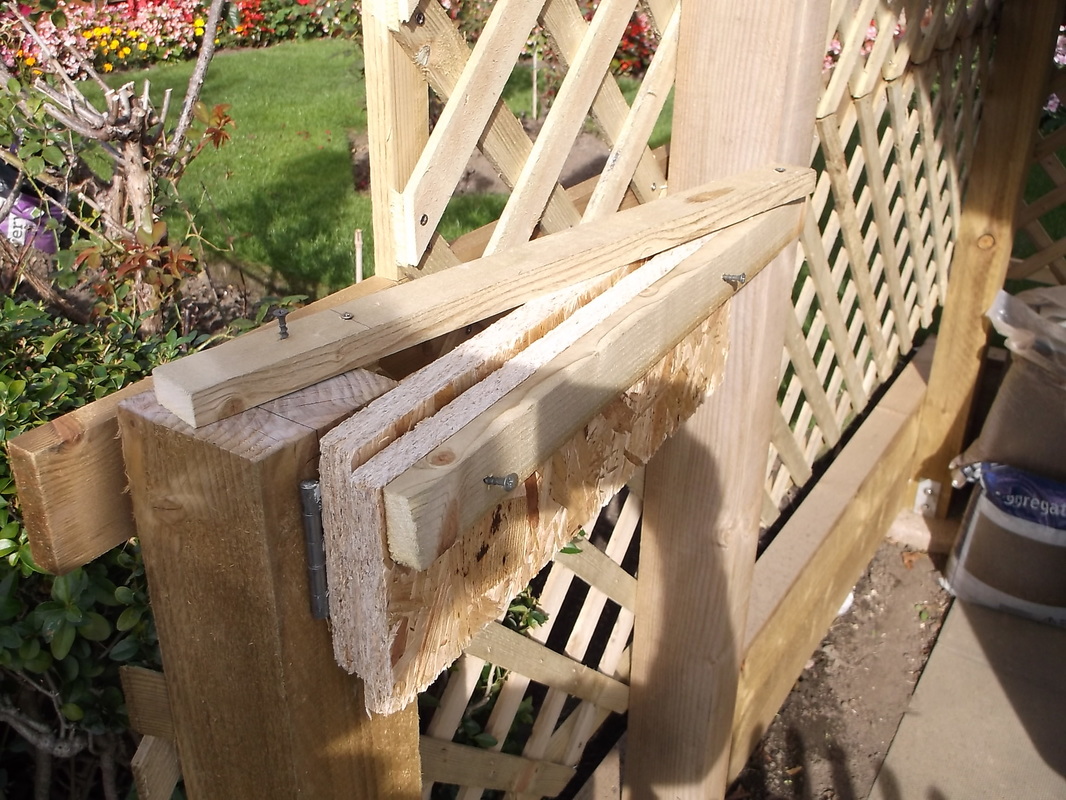
I decided from the start of the project that the gates had to automatically fold clear of the scooter when it was parked in the driveway. There were two main reasons for this.
1. The driveway can be shorter if each half of the gates fold as opposed to being in one piece.
2. If the gates were left unsecured and were moved by the wind they will fold away from the scooter avoiding damage to it.
These pictures show the rough prototype i produced to verify the design calculations. The prototype used some old window hinges, wooden offcuts and decking screws left over from the project.
More information to follow soon.....
