Background
The handrails on the decking were constructed using all stainless steel parts except for the cross dowel bolts used to secure the upper and lower handrails. These were made of mild steel and had a bright zinc plated (BZP) coating. I had hoped that with these embedded in the wood they would be protected from the worst of the weather. However being embedded in the wood meant they were permanently in contact with damp wood and air making an ideal environment for corrosion. After 12 to 18 months the dowels were seriously corroded which in turn was likely to seriously accelerate the corrosion of the wood they were embedded in. I searched everywhere for stainless steel versions of the cross dowel bolts but could not locate any. I was able to locate some plastic ones but these were too short for my application.
I decided that i would have to make my own ones from some sort of tough plastic that could be drilled and tapped to take a bolt. I was able to purchase on line plastic rod that i was able to cut to the correct length, drill a hole and then tap a thread for a stainless steel M6 bolt.
Below is a summary of the work that needed to be done to refurbish the hand rail securing bolts.
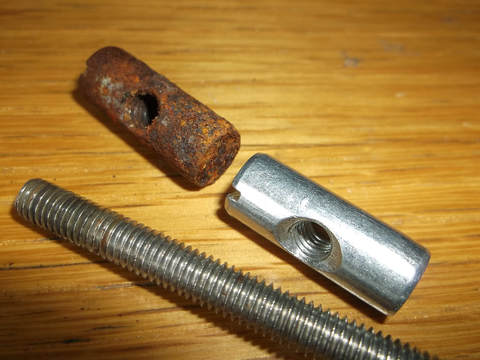
This picture shows the level of corrosion on the cross dowel bolts after two years compared to a brand new one.
Although the cross dowel bolts are badly corroded the threaded screw is undamaged due to it being made of stainless steel.
A few of the threaded screws were very difficult to remove due to the corrosion within the cross dowel jamming the threads of the cross dowel and threaded screw. Some of the corrosion debris can still be seen on the thread of the bolt.
In the months leading up to the replacement of the cross dowel bolts penetrating oil was regularly sprayed into the threaded dowels to slow down the corrosion and to make removal easier.
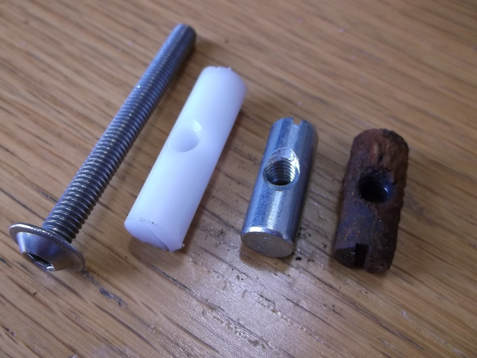
This picture shows the original cross dowel bolts that were used in their original condition(centre) and after two years of use(right). The combination of cold damp air and the moisture retained in the wood grain has caused serious corrosion that would have led to rotting of the wood after a few more years.
The new plastic replacement cross dowels are shown on te left. I decided to increase the length of the cross dowel from the current 25mm to 38mm, almost the entire width of the 41mm wooden spar it fits into. This should help exclude rain water in the future helping to keep the wood grain dry.
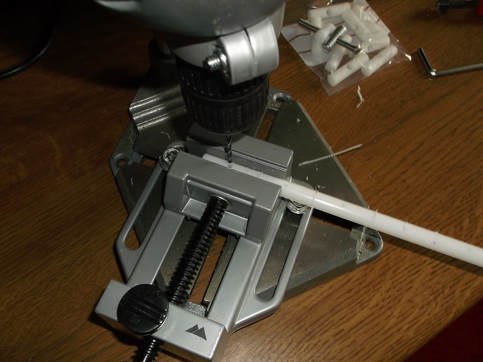
Here a hand drill has been set up in a drill press. I would have preferred to use a pillar drill for improved accuracy but i do not have one.
The work piece is secured in the adjustable vice with the centre line of the plastic rod aligned below the drill.
The plastic rod was marked and scored with the length it was to be cut to and the location of the hole to be drilled.
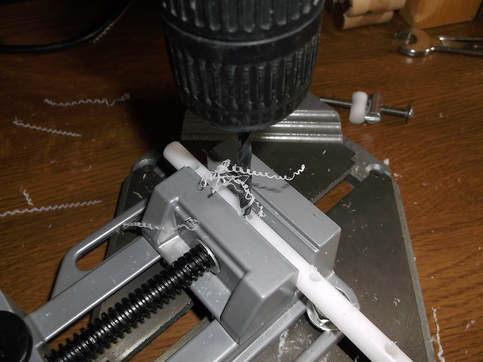
When drilling holes in round rods like these it is easier to use a small diameter drill bit to create a pilot hole and then use slightly larger drill bits to gradually increase the diameter of the hole to be drilled.
The initial hole was drilled using a 2.5mm drill followed by a 3.6mm, a 4.8mm and finally a 5.5mm drill as recommended for the 6mm threaded hole that was to be created.
The drill bit was changed so that each hole was completed before starting the next one.
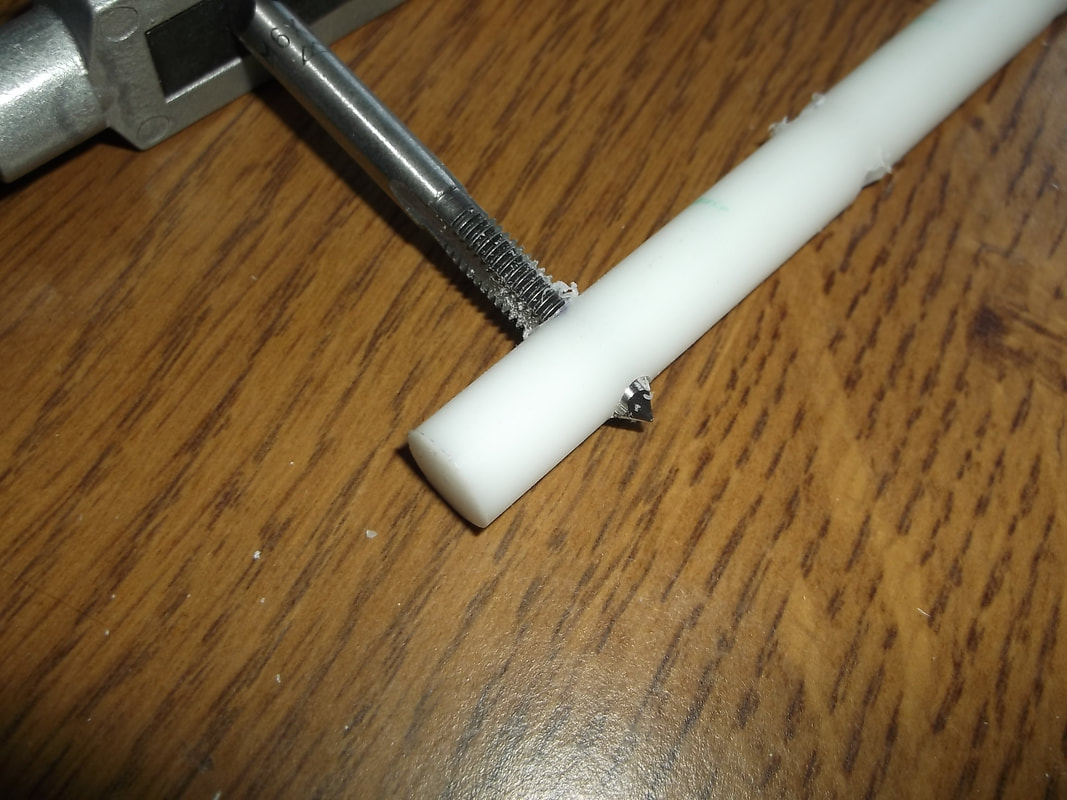
Each 5.5mm hole was given a thread with a 6mm hand held tap. After tapping the thread the hole was cleared of any debris and tested with an M6 threaded bolt.
|
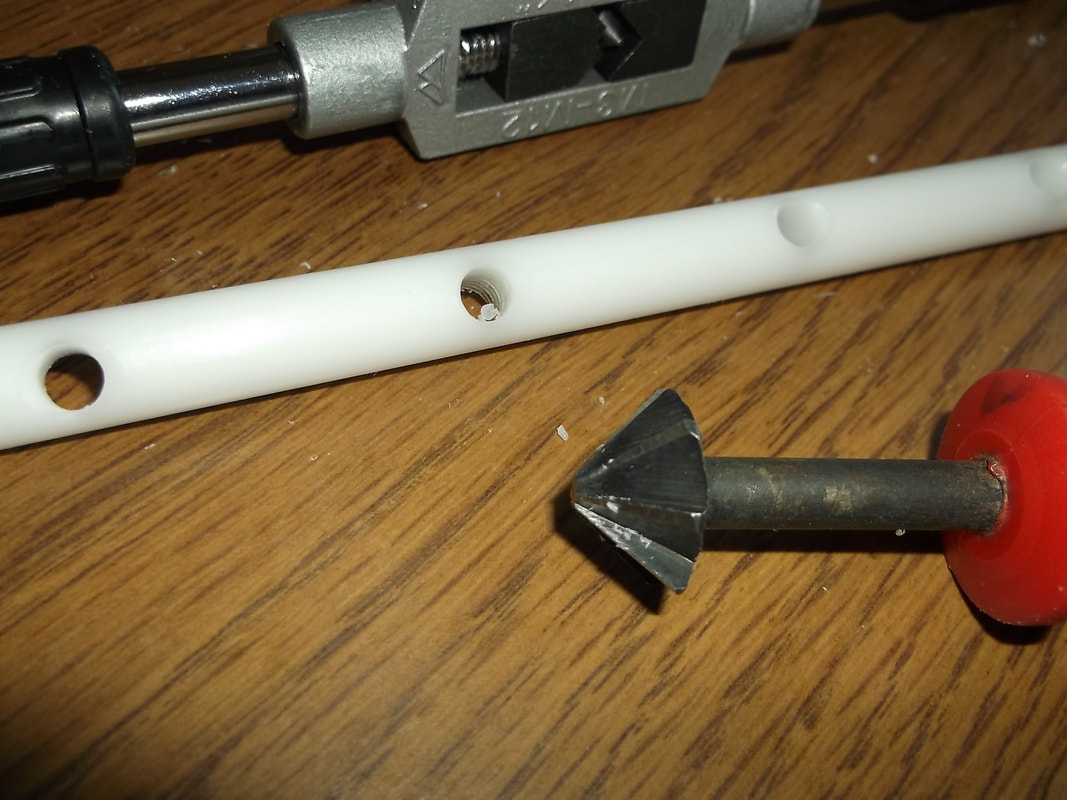
A hand held counter sink bit was used to taper the entrance to each hole. This was intended to make alignment of the cross dowel and bolt in the wooden post much easier.
|
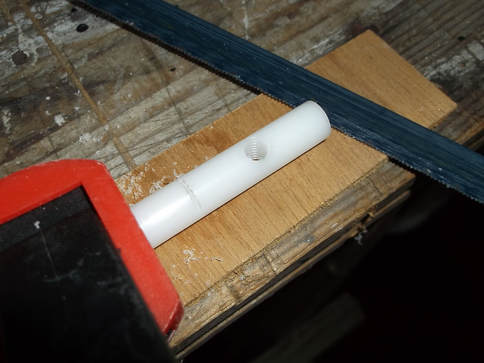
After each hole was drilled and a thread tapped the rod was cut into its individual 38mm lengths.
A slot was cut in the end of each of the plastic cross dowel bolts. The slot was cut in line with the threaded hole to allow the bolt to be aligned in the wooden post for assembly.
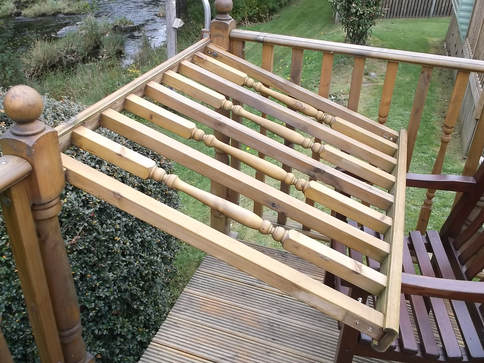
This picture shows how the two coach screws securing the lower part of the hand rails were removed. The upper ones were loosened which allowed the hand rail section to be rotated up allowing the securing bolts to be accessed easily. The process was repeated to replace the two upper cross dowel bolts, but in that case the two upper coach screws were removed and the two lower ones loosened and the hand rail rotated down.
The securing bolts were removed one at a time and the old corroded cross dowel bolts pushed out of the hole. Any loose rust and dirt was blown out of the wooden hole. The new plastic cross dowels were inserted and the bolts re-installed.
Note: For a few months before the bolts were replaced, releasing/penetrating oil was sprayed into the cross dowel mounting holes to try to slow down the corrosion and to ensure the corrosion did not cause the bolt and cross dowel to seize.
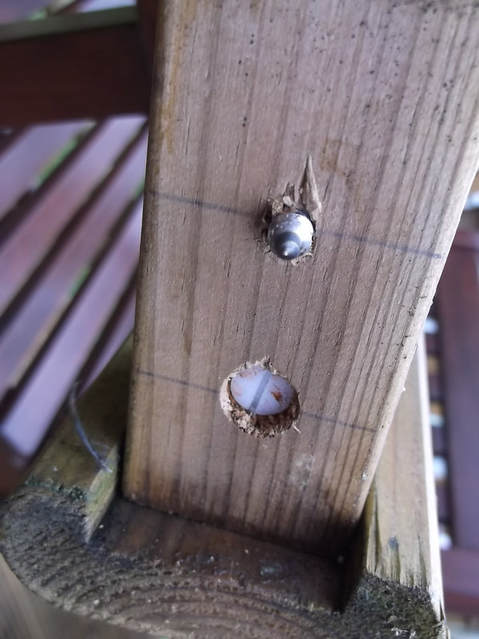
This picture shows one of the hand rail sections removed showing the tip of the coach screw protruding from the wooden post and the new plastic cross dowel bolt installed. Note the slot cut in the end of the plastic cross dowel which was used to roughly align the cross dowel with the securing bolt.
The securing bolt is installed but is not visible as it is on the underside of the lower hand rail piece.
The replacement of the four cross dowel bolts on each section of hand rail took about 20 minutes.
It was not a job i had hoped to have to do when the decking was first constructed but it was better to find a solution now before the corroding iron/steel caused serious corrosion of the wooden posts they were installed in.
