Background
I have had a couple of IKEA up-lighters for a number of years. They have not been used much and unfortunately one was damaged when i was decorating recently. The white plastic shade hit the floor causing the metal bushing securing the light and shade in place to break. When i examined the bushing it was obviously not of great quality as it had shattered into a number of pieces.
Although these lamps are low cost, i did not want to dispose of it as all the other parts were in perfect condition. I thought about re-purposing the light and discarding the upper section that was broken but not after first attempting to repair the damaged parts.
I knew that spare parts would not be available so i would have to modify the lamp in such a way as to make it safe usable and robust. Below is a summary of how the lamp was repaired.
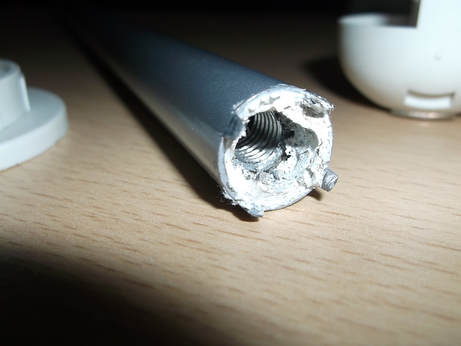 Shaft with damaged bushing with new tapped M8 thread.
The metal bushing inside the top section of the stem had broken off and crumbled into many pieces.
Fortunately there was sufficient material left inside the stem to allow me to use a thread tap to create an M8 thread. I was able to test that the thread was secure and not crumbling by using a piece of M8 threaded steel rod to test it.
The thread can be seen inside the stem in the attached photograph. The white material is some sealant/adhesive left over from an earlier attempt at repairing the lamp....very unsuccessful and messy as it turned out!
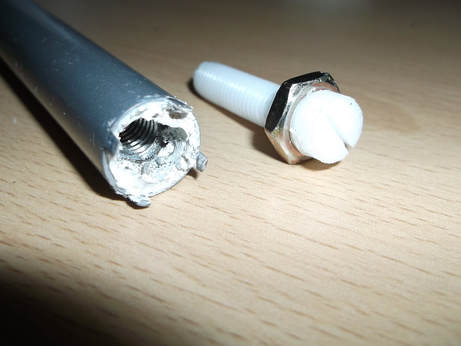 Shaft with newly made plastic screw with M8 thread. Note how original nut used as flange!
I did not want to use threaded steel rod to create a new fixing point because of the proximity to the mains connections when the lamp would be fully assembled. I decided to use some plastic rod left over from the project to replace the rusted cross dowel bolts on a decking project.
The plastic rod was 10mm diameter so first an M10 thread was tapped onto it as it is not possible to tap an M8 thread directly as too much material has to be removed. The diameter of the rod was then further reduced by then tapping an M8 thread over the M10 previously created. Great care must be taken when doing this as excess amounts of material may be removed.
The thread was successfully created, the rod cut to the correct length and a slot was cut in the top to be used to screw the new bolt in place. The original securing nut was re-used as a flange to secure the light fitting in place.
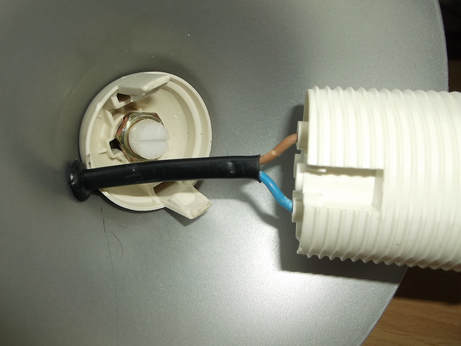 Light fitting base secured to stem using plastic bolt.
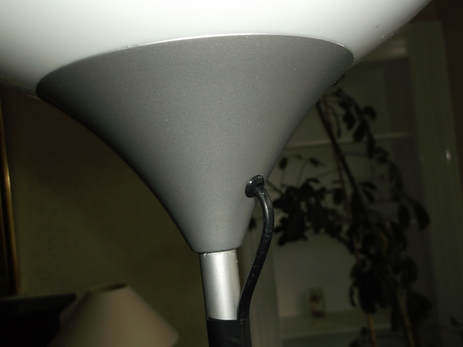
In this photograph the base of the light fitting and the metal cone that supports the shade have been secured in place using the newly tapped threads in the stem bushing and the plastic rod.
A hole has been drilled in the metal cone and a rubber grommet fitted to allow the mains cable to be fitted to the electrical contacts.
The mains cable has been fitted through the grommet and connected to the upper section of the light fitting.
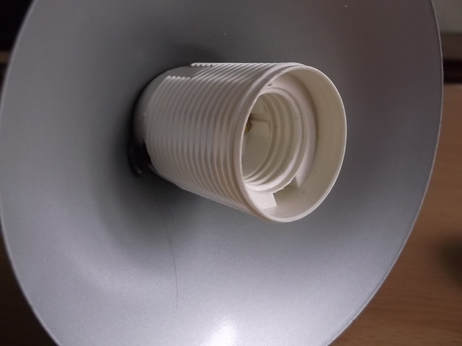 Repaired light fitting re-assembled ready for testing.
In this photograph the electrical connections have been completed and the two parts of the light fitting connected together.
Before finally re-assembling the entire lamp the repaired section was tested with a low energy bulb.
 Repaired light re-assembled and ready for use.
This photograph shows the repaired upper section of the lamp re-assembled to the lower section.
The mains cable entry can be seen on the metal cone. Previously the cable entered the stem lower down and then passed through the shaft and the hollow bushing then directly into the base of the plastic light fitting. The hollow bushing was the part that had broken when the light fell and hit the floor.
The cable was secured to the shaft with black insulating tape, trying to mimic the plastic clips used lower down.
The repairs took just a couple of hours, cost no new parts and saved a perfectly serviceable lamp from the scrap yard.
