Background : Temporary Propagator
While working on the repair of my uncles thermostat for his propagator i tested it using a very similar set up to the one described here. I got the idea that this could be a simple way of setting up and testing a propagator while at the same time bringing on seeds as early in the season as possible. I already had a temperature controller unit which i had used in the greenhouse the previous winter to control a heated sand bed unit i had made a few years ago to overwinter plants and propagate seedlings.
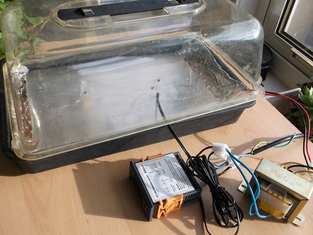 Temporary propagator bench set up.
The temporary propagator uses just 4 major components.
In addition some metallised bubble wrap insulation is used to line the inside of the base of the propagator.
The photograph shows the temporary bench set up used in the Spring of 2014 to germinated French Marigold, Begonia, Dahlia, Alyssum and Impatiens seeds. The temperature probe is shown sitting on the aluminium plate inside the propagator but in reality it was pushed into the compost of the seed tray placed inside.
- An unheated propagator unit available in most DIY stores or Garden Centres consisting of a seed tray and a poly carbonate top.
- Thermostat unit & temperature sensor.
- AC mains transformer. 240V AC to 12V-0-12V AC.
- Aluminium plate plus Aluminium clad wire wound resistors to act as heating elements.
In addition some metallised bubble wrap insulation is used to line the inside of the base of the propagator.
The photograph shows the temporary bench set up used in the Spring of 2014 to germinated French Marigold, Begonia, Dahlia, Alyssum and Impatiens seeds. The temperature probe is shown sitting on the aluminium plate inside the propagator but in reality it was pushed into the compost of the seed tray placed inside.
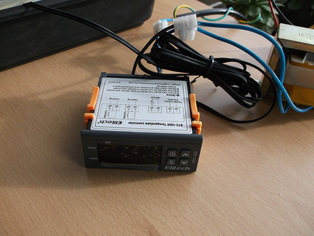 Temperature control unit & temperature sensor.
The temperature controller unit was purchased on the Internet a couple of years ago and had been used in the greenhouse in a heated sand bed project. The control unit is supplied with a temperature sensor(short rod thermistor). The control unit can switch on heating or cooling equipment depending on the function required. The desired target temperature and delta temperature can be set via the front panel controls.
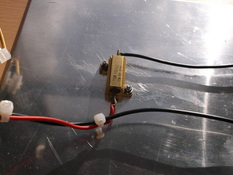
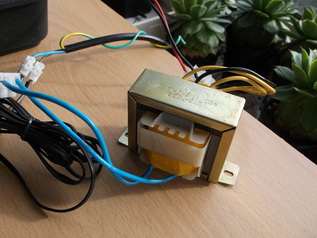 AC Mains transformer.
The simplest approach would be to connect the heating resistors directly to the mains output of the control unit however as there is a lot of exposed metalwork i used a mains transformer to step the voltage down to a safer level and to provide isolation from the mains. I happened to have this transformer already and had used it in a number of projects since it was purchased in 1985!
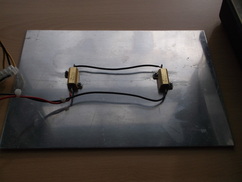 Aluminium wire clad resistors mounted on underside of Aluminium plate. Aluminium wire clad resistors mounted on underside of Aluminium plate.
The heating function of the propagator is provided by aluminium clad wire wound resistors bolted to a piece of 3mm thick aluminium sheet 300mm x 200mm. Two resistors were used so that the heat would spread more quickly and evenly when heating.
|
Aluminium clad resistor close up.
|
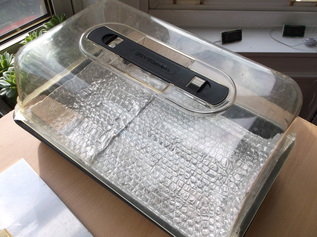 Commercially available unheated propagator unit.
The propagator unit is a readily available unheated unit available from most DIY stores or Garden Centres. The base is lined with metallised bubble wrap insulation which reflects the heat back upwards towards the plants and soil rather than heat the plastic base and surroundings.
In operation small seed trays are placed on the aluminium plate containing compost and the seeds. When the seeds have germinated and established themselves they are moved into the greenhouse, thinned out and placed on the heated sand bed there to further develop. The propagator is then loaded with the next batch of seeds.
Experience has shown that sixty French Marigold seedlings can be germinated in one of these units in under 48 hours as opposed to 96 or more hours if they are simply left on a sunny window sill or in the greenhouse with no additional heating.
