Background : Heated Sand Bed / Propagator (Temporary)
I use the temporary heated sand beds for two major jobs through out the year.
In January/February i start to grow seeds and seedlings ready for the new season.
I had a great deal of success with the wooden frame heated sand bed a built in 2010 and wanted to extend the idea but space was tight and i could not afford the space for another permanent bed. for the next couple of years i managed by using large seed /gravel trays, lining them with metallised bubble film and sand and feeding the cables in and out of the trays. About three years ago i decided to extend the idea and bought two 'grow bag' trays used to hold compost bags often for growing tomatoes. I lined these with metalized bubble insulating film then poured sand on top finally burying the electric heating cable in the sand. I was able to get two of these along one side of the greenhouse and this gave a large uniform area of heated sand bed. I was able to use one 15m length of heating cable to heat both the wooden frame sand bed and the two temporary ones.
At the end of the seed growing season i remove the electric heating cable, clean and store it. The sand is stored in its original plastic bags and the plastic trays are used to soak plants and seed trays ensuring that they are used through out the year and not taking up valuable space being stored.
- The provide heating to sensitive plants that i want to keep over winter in the greenhouse.
- To germinate seeds and bring on seedlings early in the season.
In January/February i start to grow seeds and seedlings ready for the new season.
I had a great deal of success with the wooden frame heated sand bed a built in 2010 and wanted to extend the idea but space was tight and i could not afford the space for another permanent bed. for the next couple of years i managed by using large seed /gravel trays, lining them with metallised bubble film and sand and feeding the cables in and out of the trays. About three years ago i decided to extend the idea and bought two 'grow bag' trays used to hold compost bags often for growing tomatoes. I lined these with metalized bubble insulating film then poured sand on top finally burying the electric heating cable in the sand. I was able to get two of these along one side of the greenhouse and this gave a large uniform area of heated sand bed. I was able to use one 15m length of heating cable to heat both the wooden frame sand bed and the two temporary ones.
At the end of the seed growing season i remove the electric heating cable, clean and store it. The sand is stored in its original plastic bags and the plastic trays are used to soak plants and seed trays ensuring that they are used through out the year and not taking up valuable space being stored.
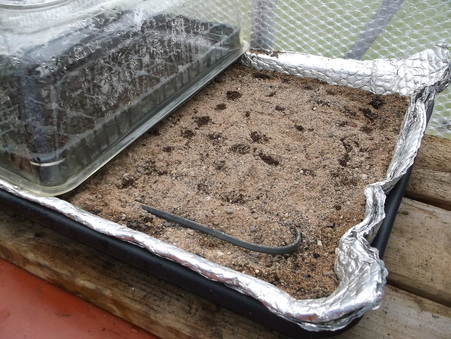 Note: The cable has been removed from the sand to see how it is laid.
The compost filled seed tray has been removed from the end of the sand bed to allow the construction to be seen.
The base is a plastic 'grow bag' tray often used to hold a compost bag to grow tomatoes. In that application the tray acts as a water reservoir.
The plastic tray is lined with two layers of metalized plastic bubble film which acts to insulate the sand and stop heat escaping from the bottom of the tray.
Sand is poured in on top of film which helps it take up the shape of the plastic tray.
The electric heating cable is then buried in channels in the sand ensuring that the loops do not touch or cross over.
The seed trays/cells are then placed directly onto the sand bed and a propagator top put in place. This creates a mini greenhouse/propagator over each tray of seeds.
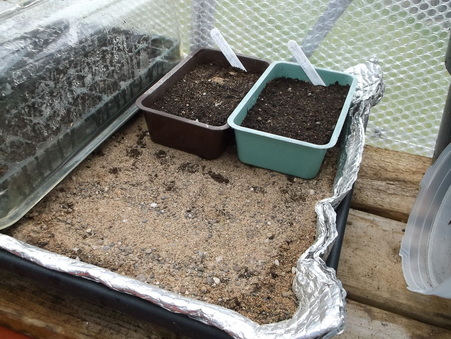
The propagator cover has been removed to allow the layout of the seed trays to be seen.
In this layout 4 quarter trays of seeds that require similar germinating conditions have been put on the bed. The propagator cover has been removed for viewing reasons only.
With this type of set up the compost temperature in the trays can easily be maintained at 18-20 degrees Centigrade.
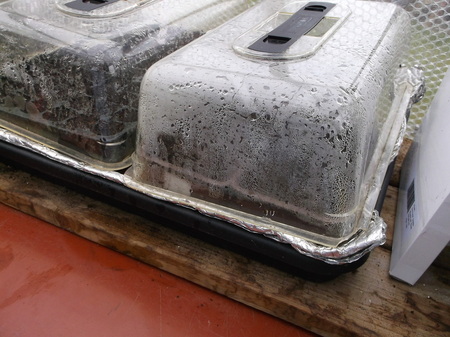
This picture shows the seed trays on the bed with the propagator cover in place.
The tray size, insulation and cover are a good fit and ensure that as much of the heat as possible is transferred into the compost keeping waste and running costs to a minimum.
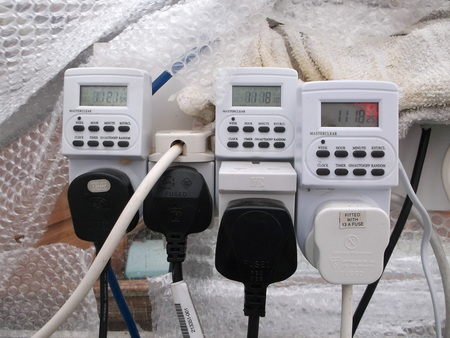
This picture shows the timers i use to control the electrical devices in the greenhouse.
Some of the timers are used to control the heating, a thermostatically controlled circulating/heating fan and LED lighting. I purchased additional timers over the winter and plan a major upgrade of the electrics over the Spring & Summer of 2015.
The timers cost £4-£6 each depending on when and where i am able to purchase them. They can have up to 10 programs per day and are very versatile.
