Background
After the framing had been completed and the decking surface cut to size and laid in place the handrails, baserails, spondles and newel posts were put in place. I developed my own method of securing these in place and also a better method of fixing the fillets between the spindles in place. These are detailed in the descriptions on this page.
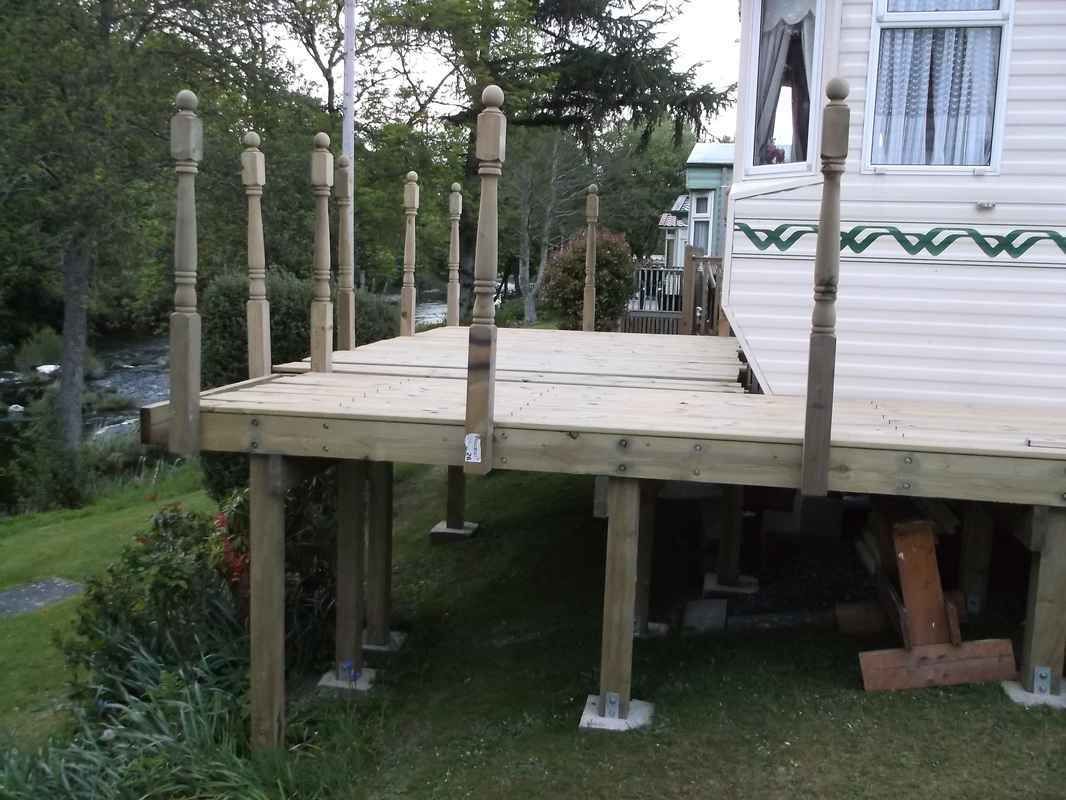
After cutting and positioning the decking planks, but not fixing them down the newel posts were put in place. These were positioned at approximately 1050mm between centres. Each post was fixed to the frame using two M8 x 100mm stainless steel coach screws. The screws were attached on the underside of the frame hidden from view to provide a clean external appearance.
After the newel posts were in place the hand rail and base rails were cut and installed between each pair of posts. Often installers simply drive a decking screw at an angle through the hand and base rail to secure them to the newel post leaving a rather ugly hole, particularly on the hand rail. Water and dirt often gather here leading to rot. I decided to use a more complex but visually better looking system. Refer to the pictures below for more details.
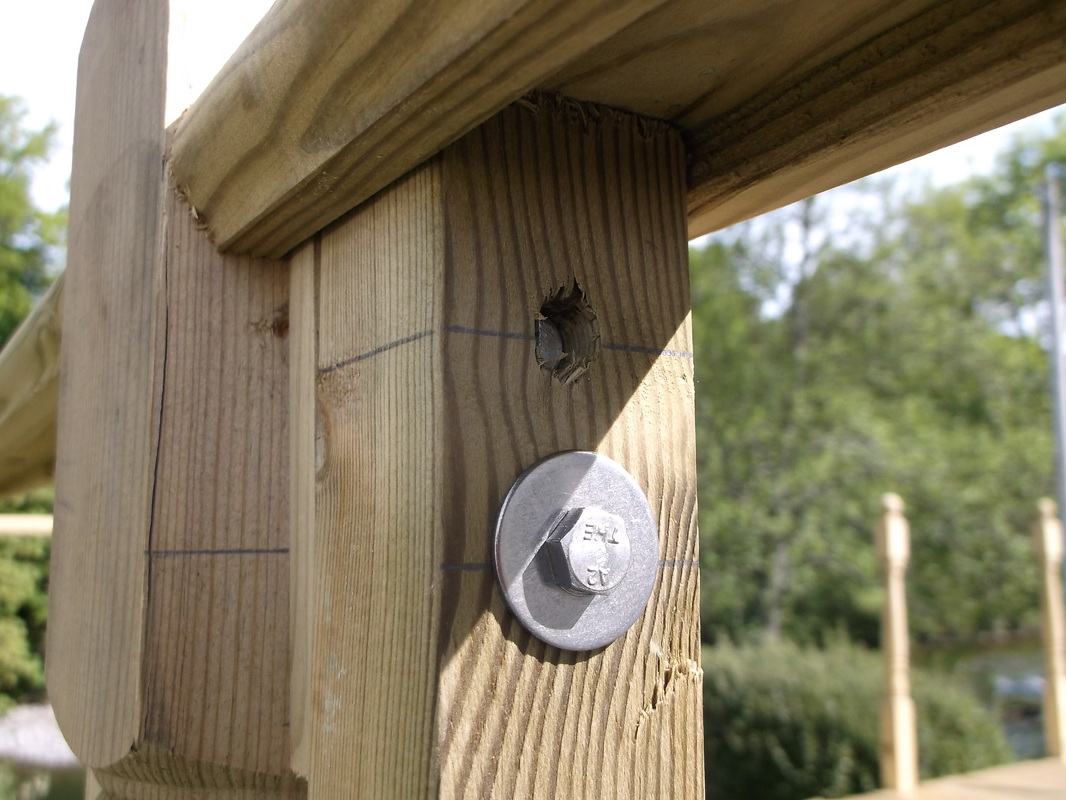
I developed my own system of installing the handrails and base rails which is much superior to the angled decking screw or flimsy bracket method often used. My design uses metal dowels which are commonly used in self assembly furniture construction. The end spindle in each panel was drilled at each end to allow a button head M6 x 60mm bolt to pass down it through the hand rail and base rail. A hole is drilled in the side of the spindle to take the metal dowel. The hand rail and base rail are then very firmly secured to the spindle. The spindle is in turn secured to the newel post with an M6 x 80mm coach screw. This method of construction creates a very rigid frame and securing method for the hand and base rails. It has the added advantage that the entire panel can be removed for cleaning and oiling plus any other maintenance.
The spindles were fixed in place using my own method which is detailed elsewhere on this page.
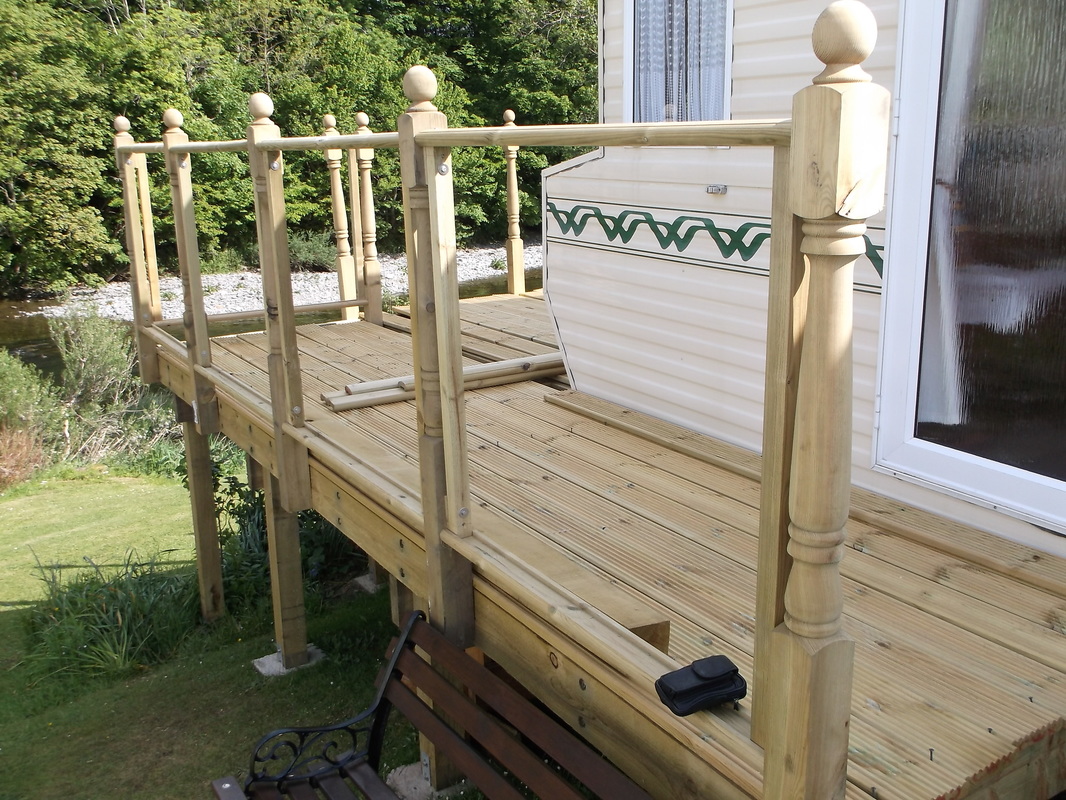
Rather than use just one type of spindle, plain and 'colonial' types were used alternately. It was felt that using only 'colonial' types would give a too cluttered appearance and using only plain types would give a stark 'wall' like appearance. This alternate spindle type approach also provides an added level of safety over using only 'colonial' types as these are actually quite weak at their thinnest point. If anyone were to stumble and fall against them they are likely to give way letting the person crash through. The plain spindles are many times stronger so would prevent this from happening. |
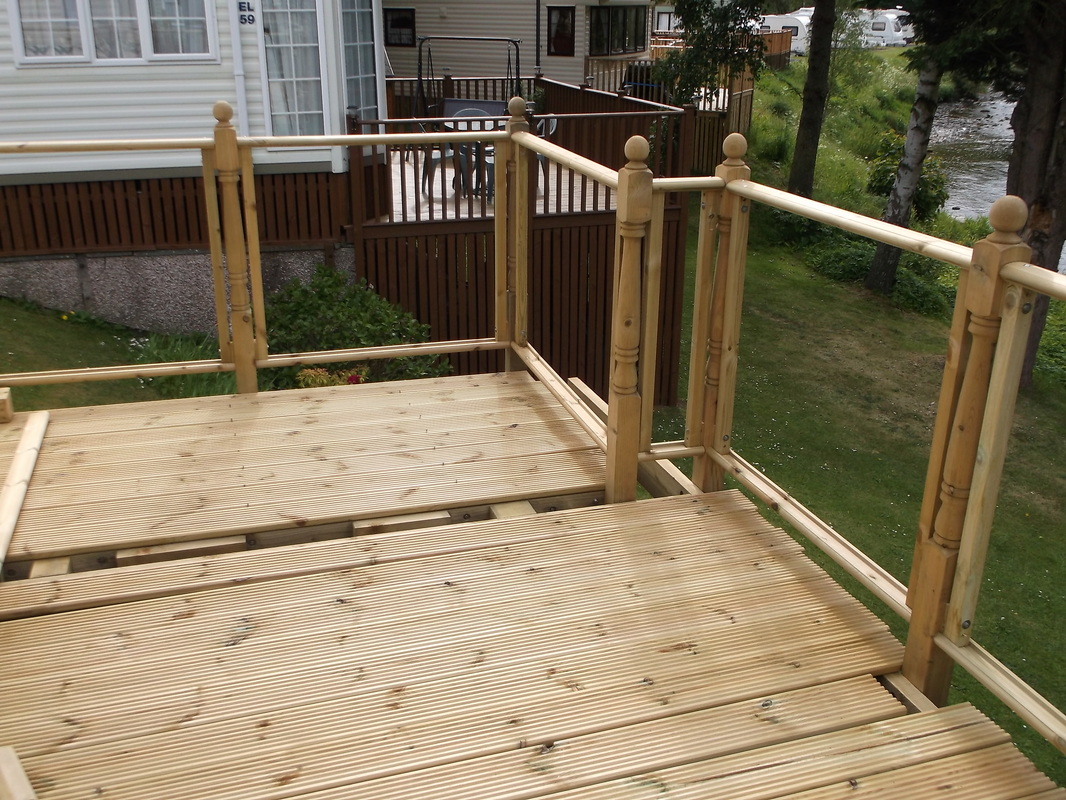
After the hand and base rails were installed the decking was nearing completion as all the heavy structural work was complete. This picture shows the decking planks laid roughly in place ready for fixing. They were not fixed in place until all the spindles were installed.
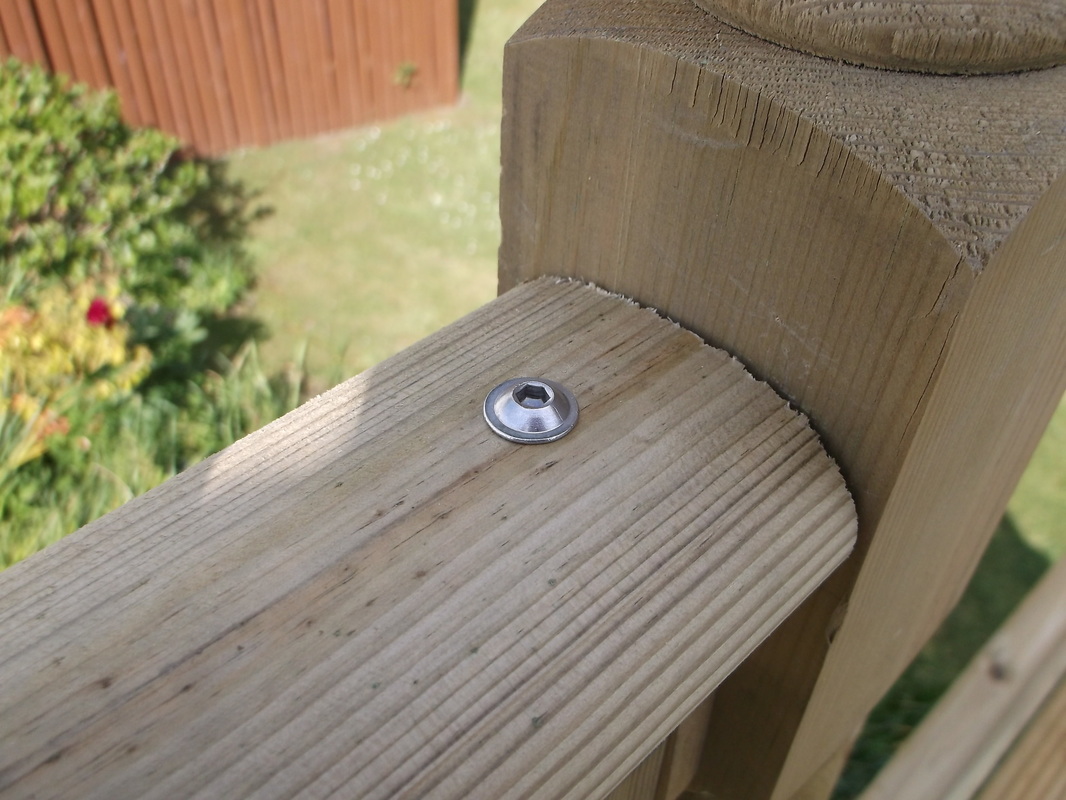
This picture shows the button head stainless steel bolt which secures the hand rail to the spindle below via the metal dowel bolt. A similar system is used to secure the base rail in place.
The button head bolt provides a clean visual appearance and will not provide a snag or cut hazard to clothing or hands which a hex head bolt may do. Flange head bolts were used to reduce the possibility of damage to the wood when the bolt was tightened and removed the need for a washer below the head although this could still be fitted at a later date if required. 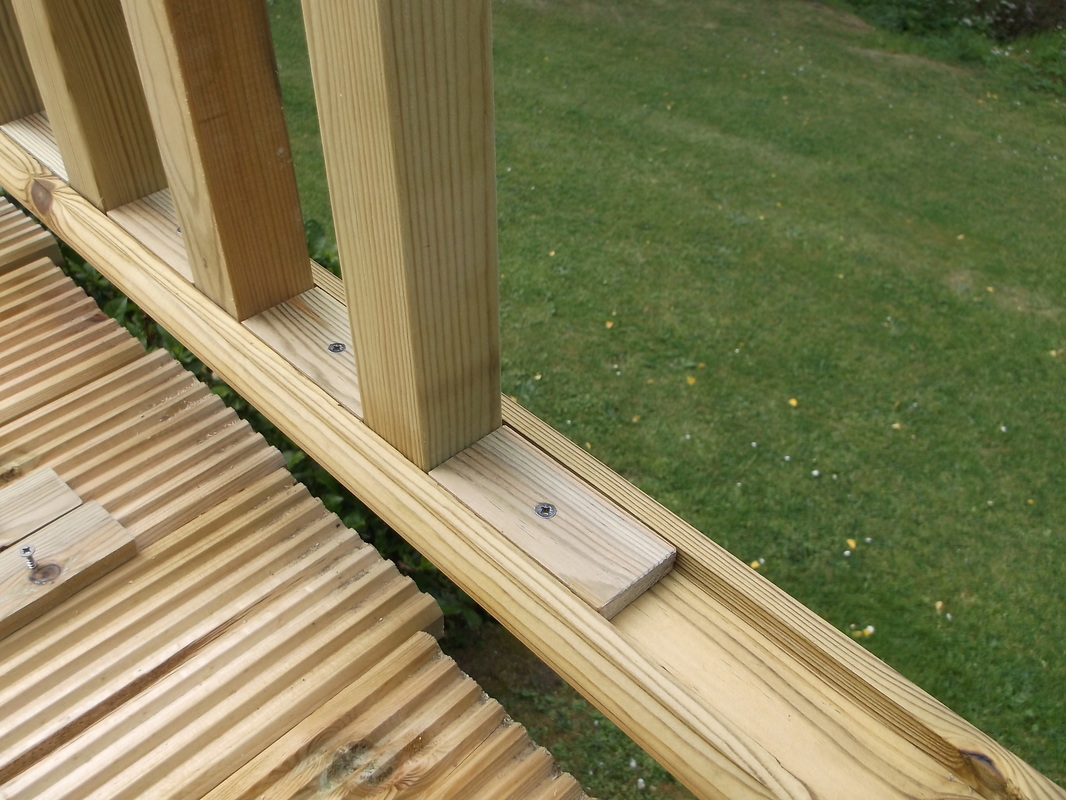
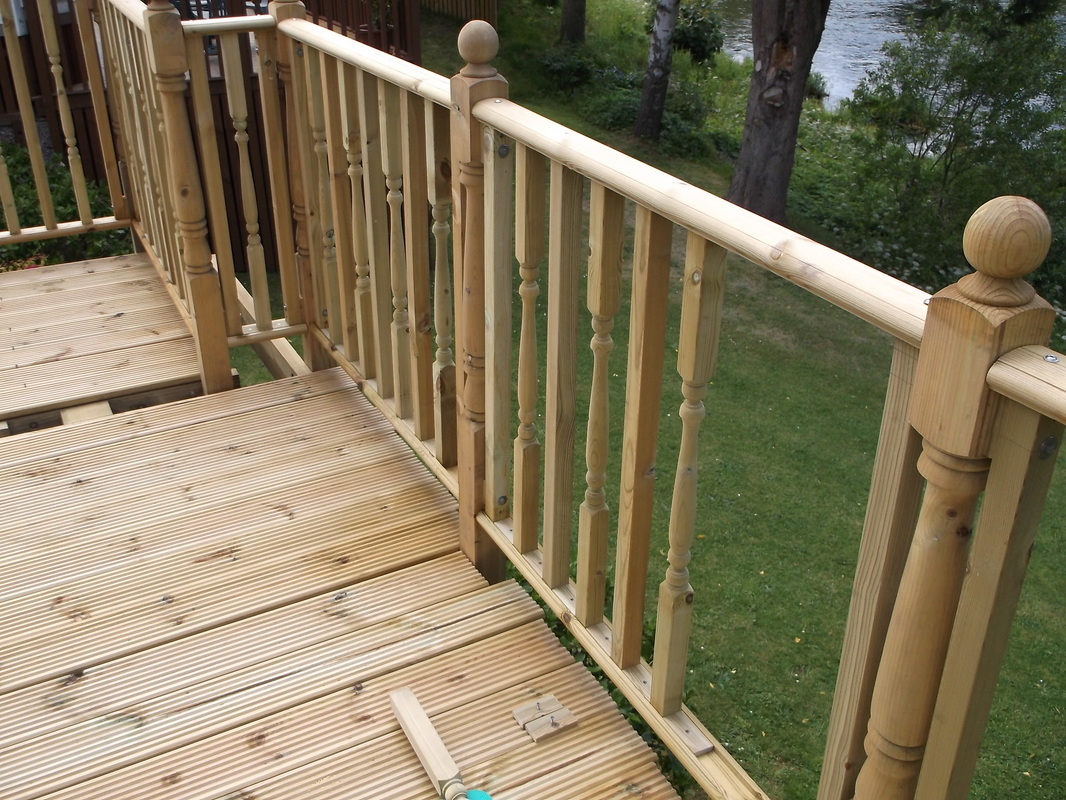
After examining many decks i was not at all impressed with the way the fillets between the spindles were fixed in place. Most commonly they are fixed with one, maybe two pins/nails usually applied with a nail gun. Invariably these are lightly zinc coated and within a few years start to rust, in turn causing the wood to rot resulting in the fillets coming loose and dropping out. This can to some extent be slowed by regularly applying decking oil or stain but the water gets behind the fillet and rots the pin/nail from the back.
My method uses stainless steel self drilling, self tapping 25mm screws. Each fillet was measured and the screw driven in through the mid point as the spindles were put in place. Carefully planning the work meant that the fillets could be cut and the screws installed a few turns before the fillets were installed with the spindles. I used a long thin electric screwdriver( Refer to this page for details of the refurbishment of this device.) to drive home the screws which was perfect for this job due to the restricted space between each spindle. A normal electric screwdriver/drill type device would not do the job as easily. Although using a nail gun is quicker for the installer my research confirms it leads to a great deal of repair and rework for the owner within a few years. |
