Background
Over the past couple of years it has become more obvious that my mother's caravan would need some maintenance around the corners and panel joins. For many years caravan manufacturers have used a type of sticky mastic to seal the join between panels, around windows and to seal the corner sections to the body. The mastic is designed to remain flexible but over the years with sun, wind, rain, freezing conditions, and in Scotland that can all be in one day!, the mastic hardens and cracks. This can allow water to get into the caravan and reach the wooden superstructure. Sadly if routine maintenance is not carried out the problem often does not get noticed until there is a smell of damp and or rotting wood. By this time the damage is often quite serious and requires a lot of time, money and effort to repair.
Over the bad winter of 2015-2016 i discovered that some water had been getting into the caravan around the door frames and around the seals at the front corner windows. Although the damage found inside the caravan was mostly cosmetic due to the construction of the caravan frame the water was able to travel quite a distance from where it entered. I had to take some time investigating and locating exactly where the water was getting in as the water would then run down the frame to floor level and move out from there. Initial investigation of a slightly damp carpet under a seating are might lead you to think the water was getting in at floor level but in fact it was getting in around the window and corner seal and traveling along the wooden frame parts.
As soon as the suspected entry points were identified i applied kitchen/bathroom silicone sealant to temporarily seal the areas until a more permanent repair could be completed later in the year when the weather was better.
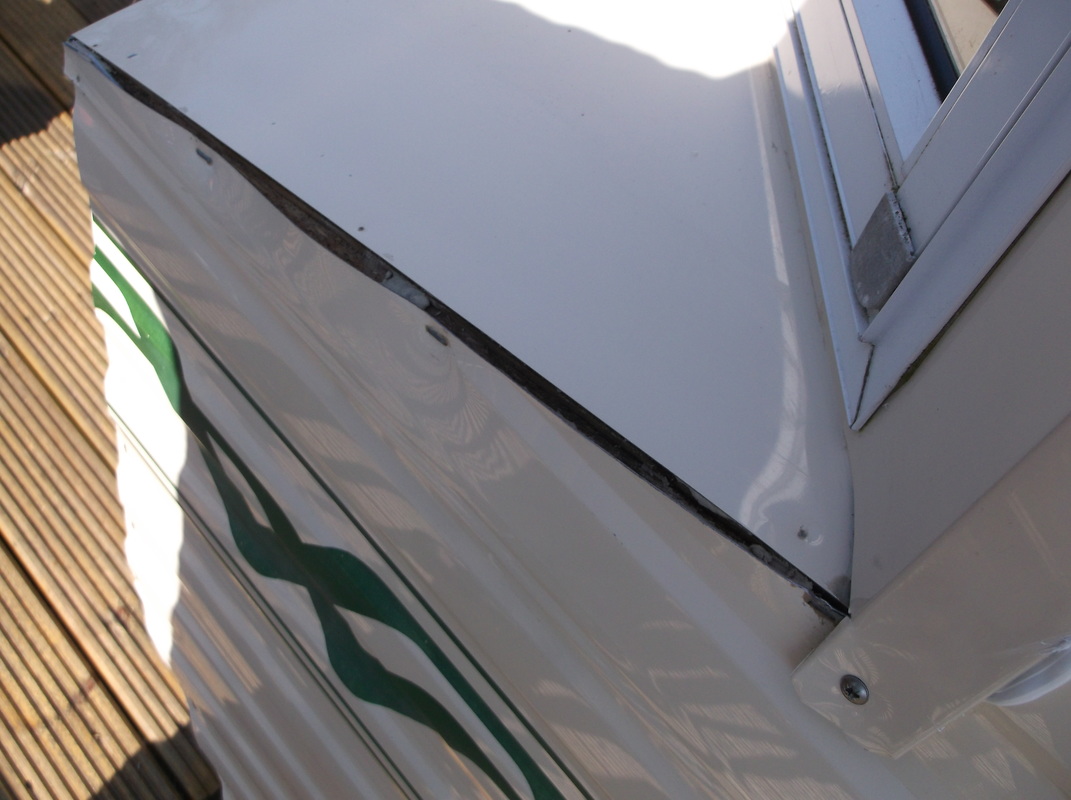
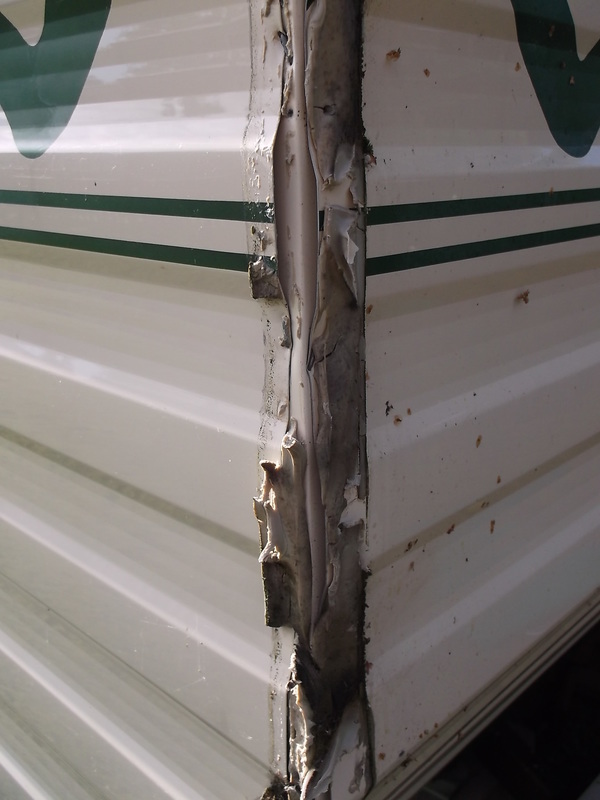
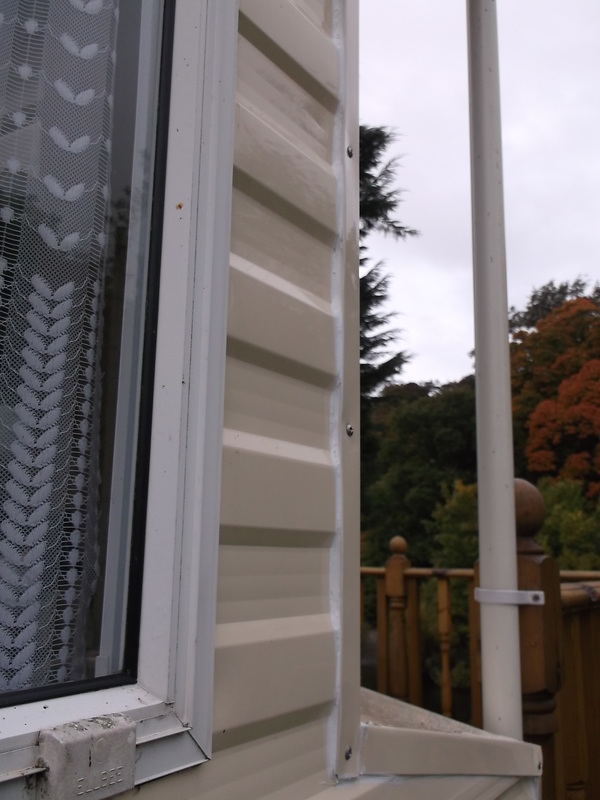
External Corner Seal Repairs : North West Corner.
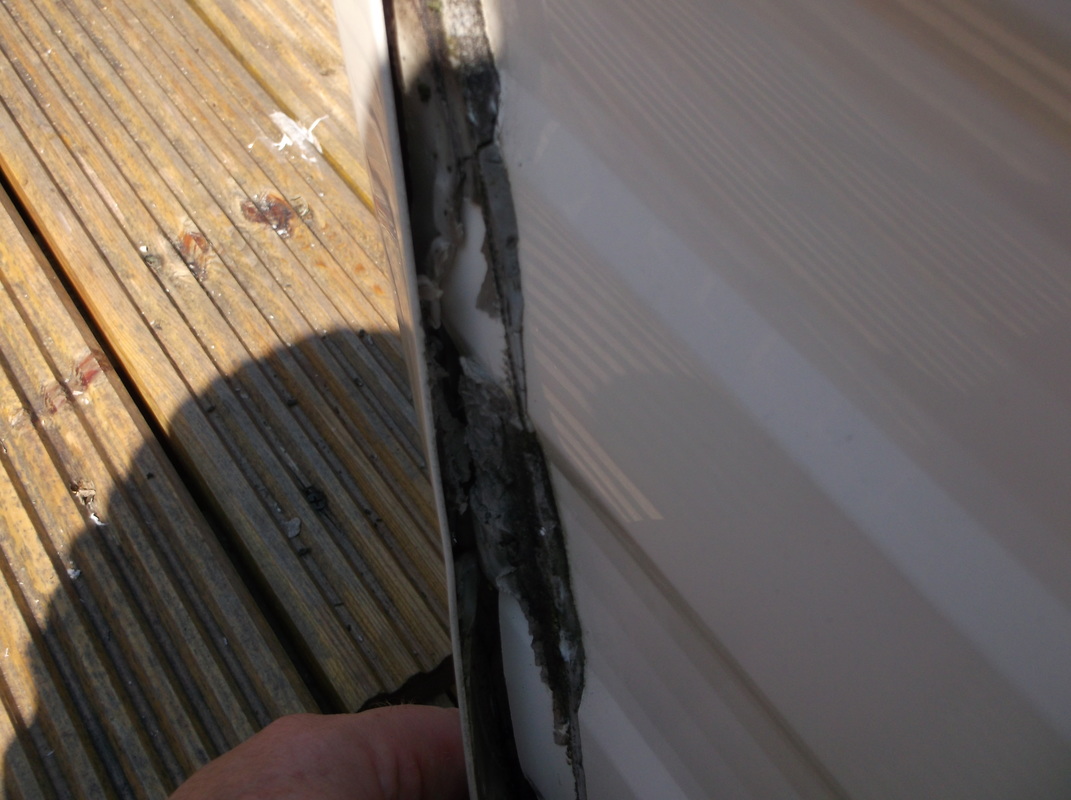
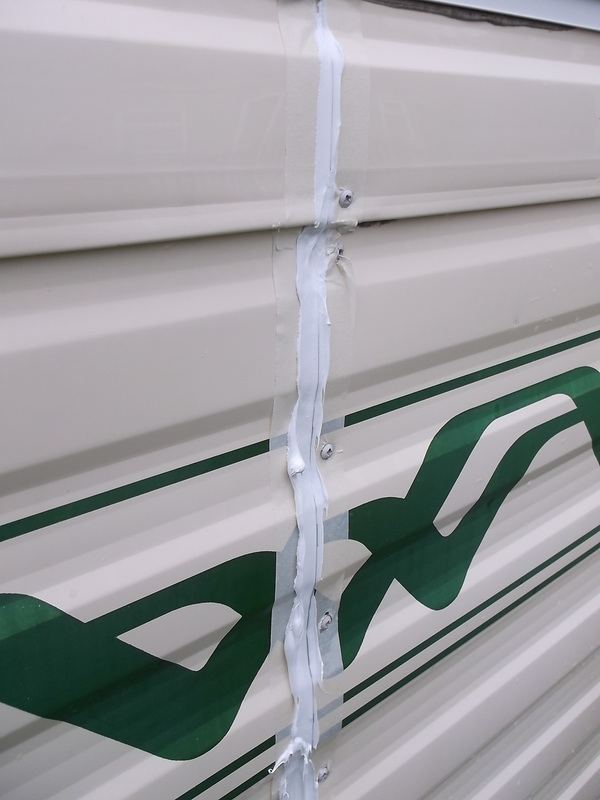
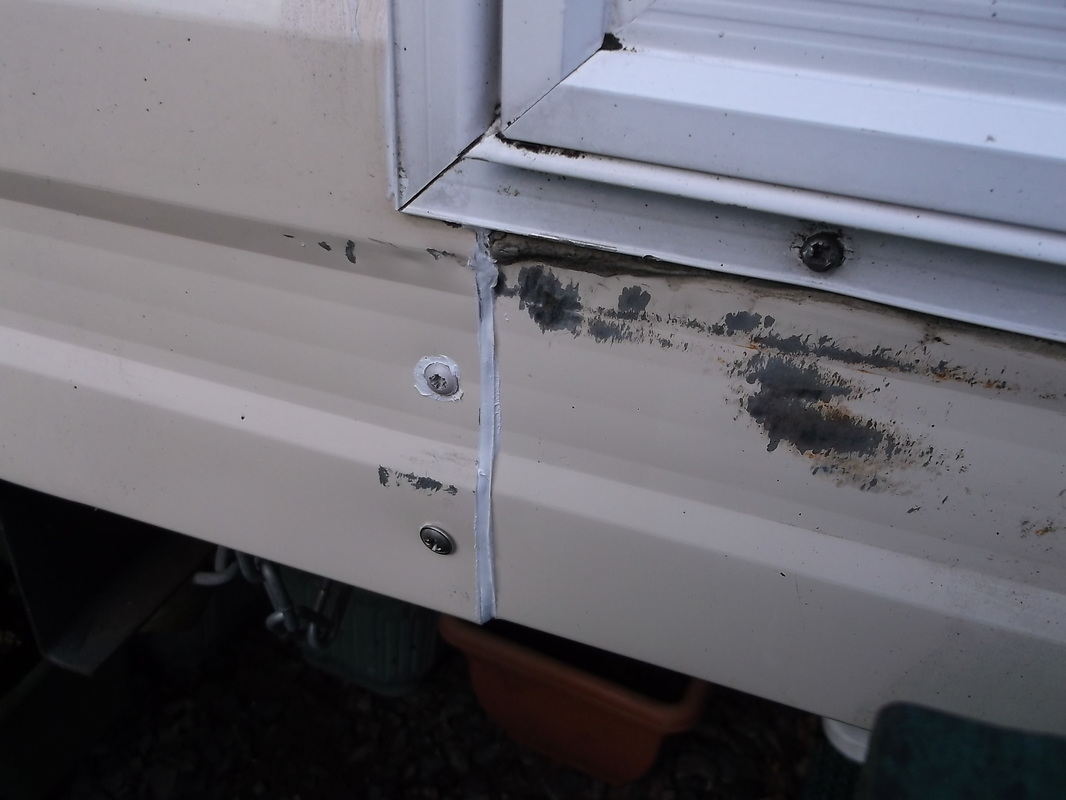
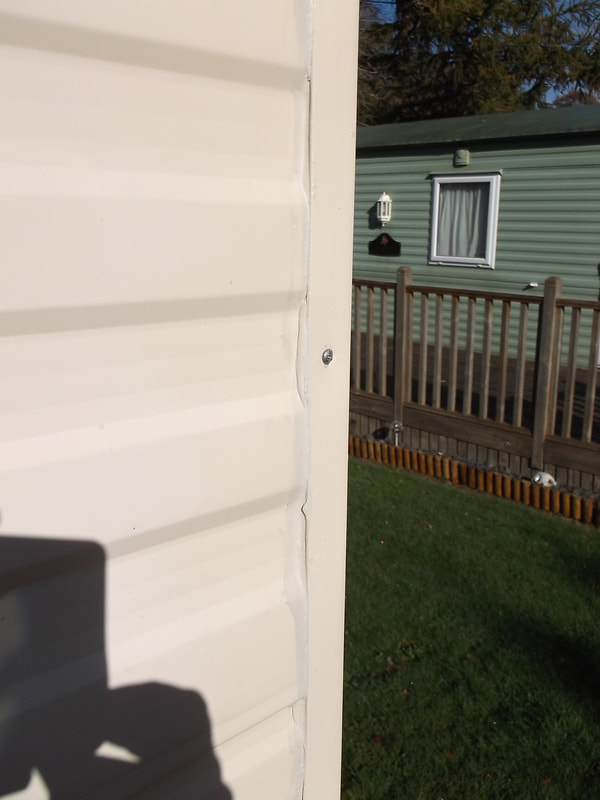
This picture shows the front corner seals which run from the base of the corner window down to floor level of the caravan. Over the past couple of years i had noticed that the mastic had hardened and crocked and pieces were easily removed. I carefully removed the stainless steel nails securing the corner piece and then gently prized the corner off using an ice lolly stick to 'cut' the remaining sticky mastic.
Here the mastic has been removed from both sides of the joint/seal, the caravan wall panel and the inside of the sealing strip and is test fitted to ensure it has not been damaged or distorted when being removed.
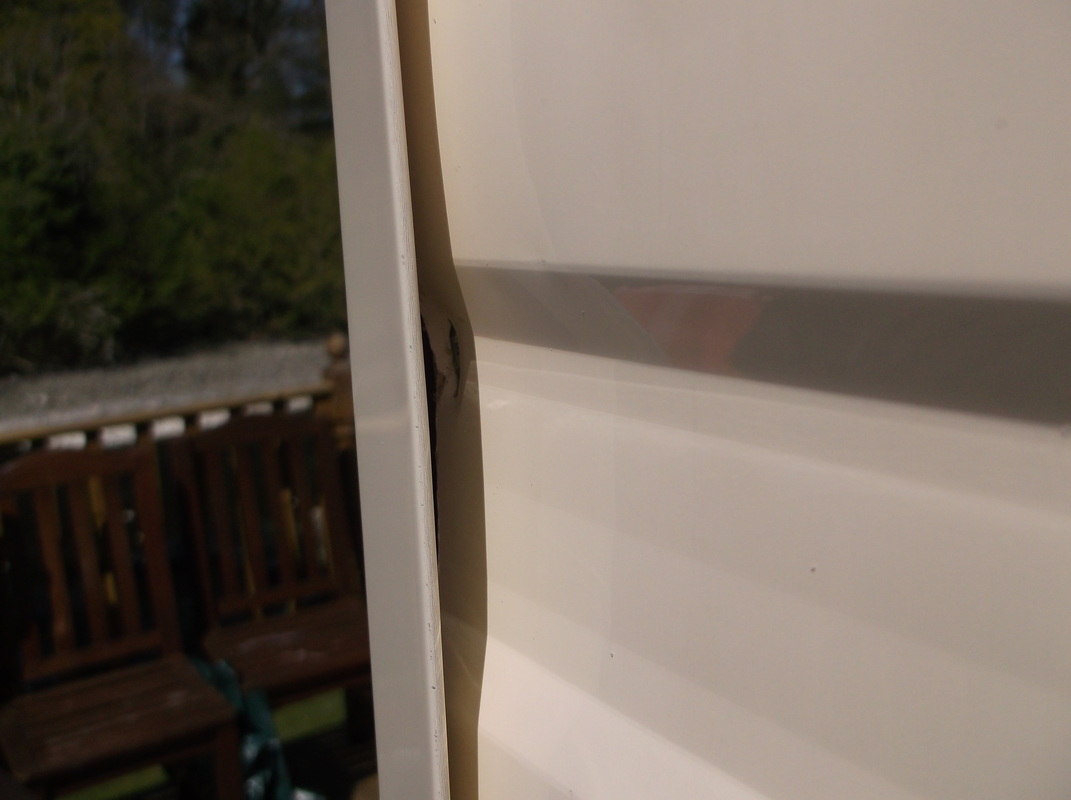
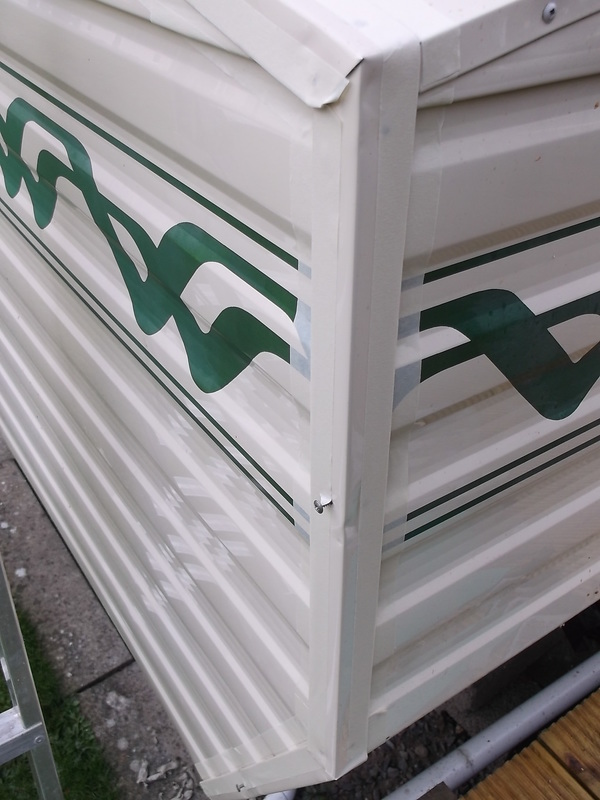
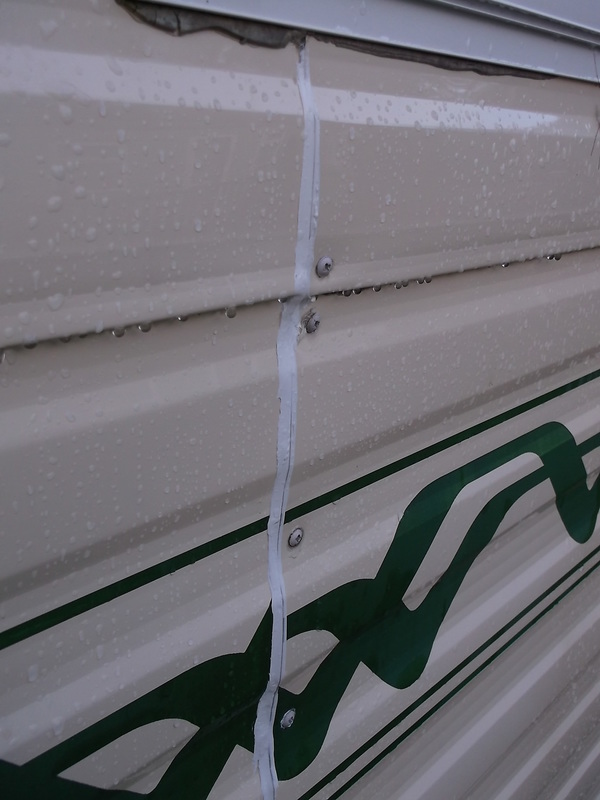
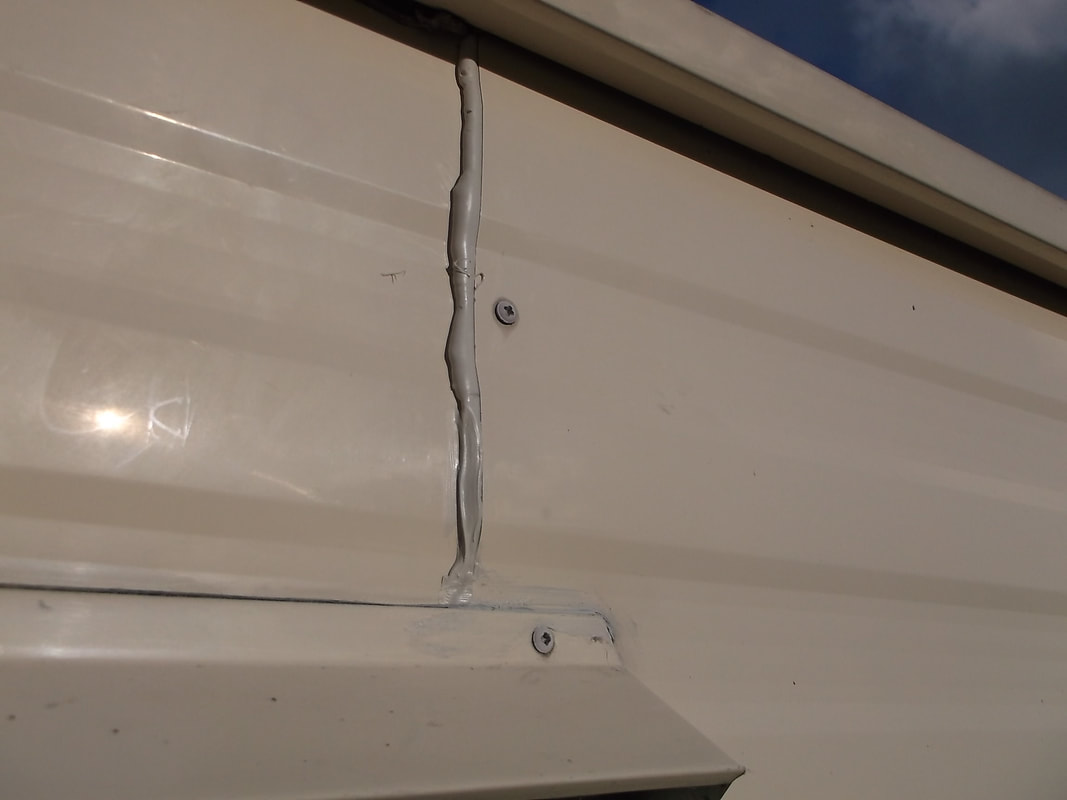
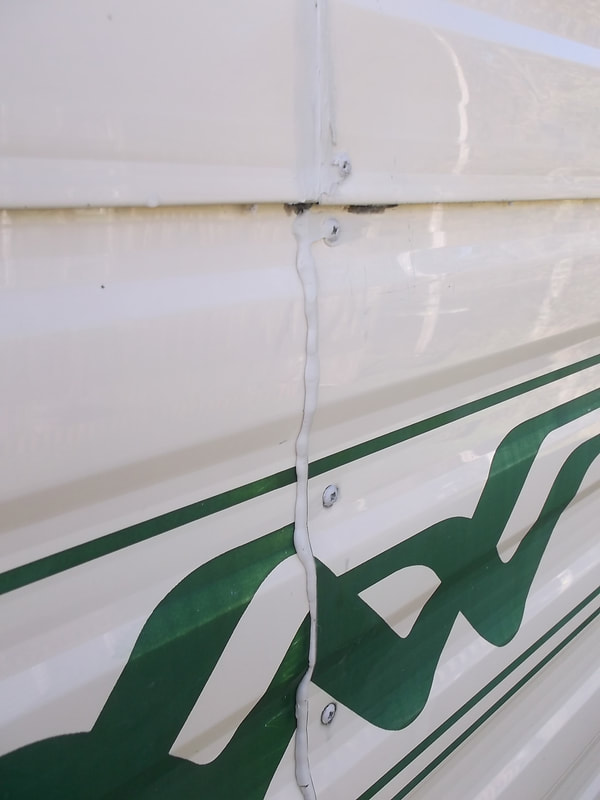
This picture shows the top panel below the corner window four months after the repair was completed. The stainless steel nails holding the trim in place have been replaced by stainless steel screws. The sealant is in very good condition, there has been no sign of cracking and there is no sign of water getting into the caravan.
|
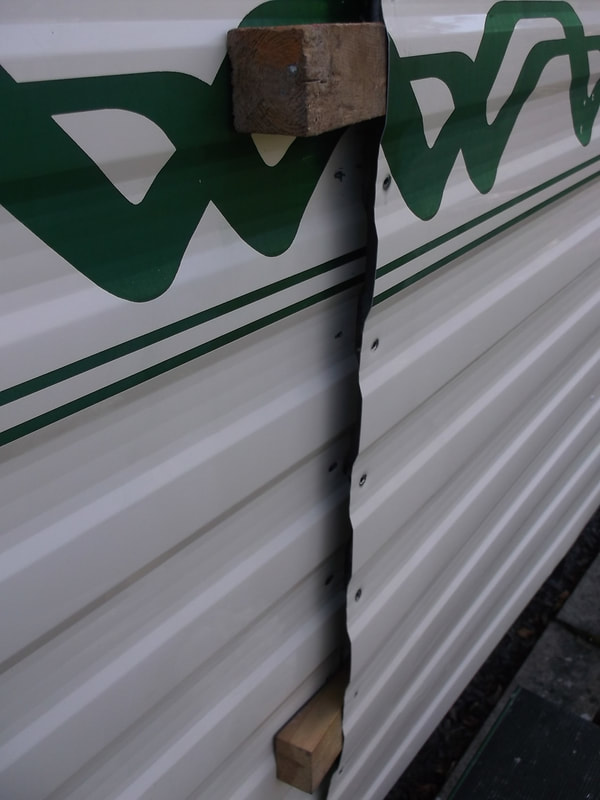
This shows the corner piece removed and most of the old mastic removed. I found it best to use an ice lolly stick to scrape off most of the mastic and them remove the residue using car polish! This also had the effect of preparing a good clean surface for the new mastic. It was reassuring to find that when the caravan had been manufactured a protective metal internal corner piece had been used to protect the wooden corners of the frame.
Here the cleaned up areas of the external panels can be seen. The side panel is held onto the frame using large staples while the top panel was held in place using small pins. The water had been entering via the join at the very bottom right hand corner of this picture. It was not a lot of water but it had been getting in over a couple of years based on the tide marks on the internal wood.
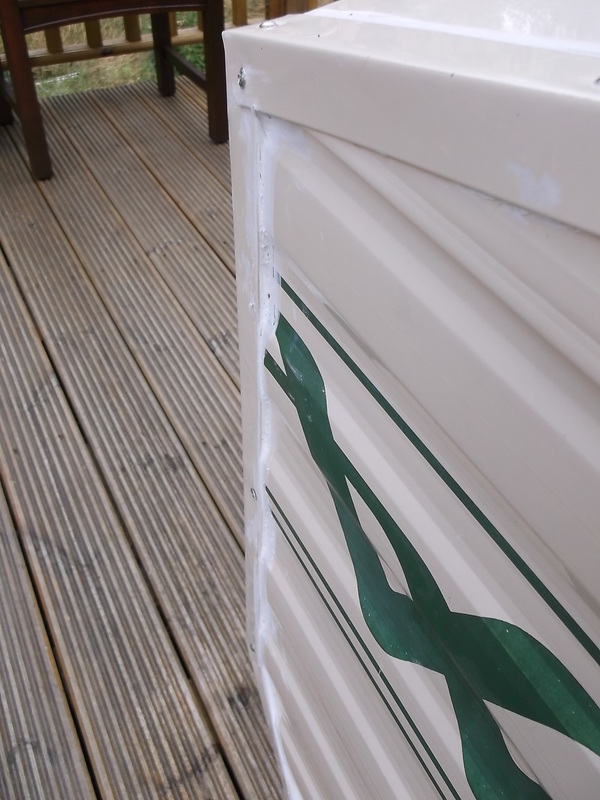
This picture shows the vertical trim around the front edge of the caravan four months after the repairs were completed. The sealant is in good condition and shows no signs of cracking or deterioration. It does however still have to experience a Scottish winter!
|
External Corner Seal Repairs : North East Corner.
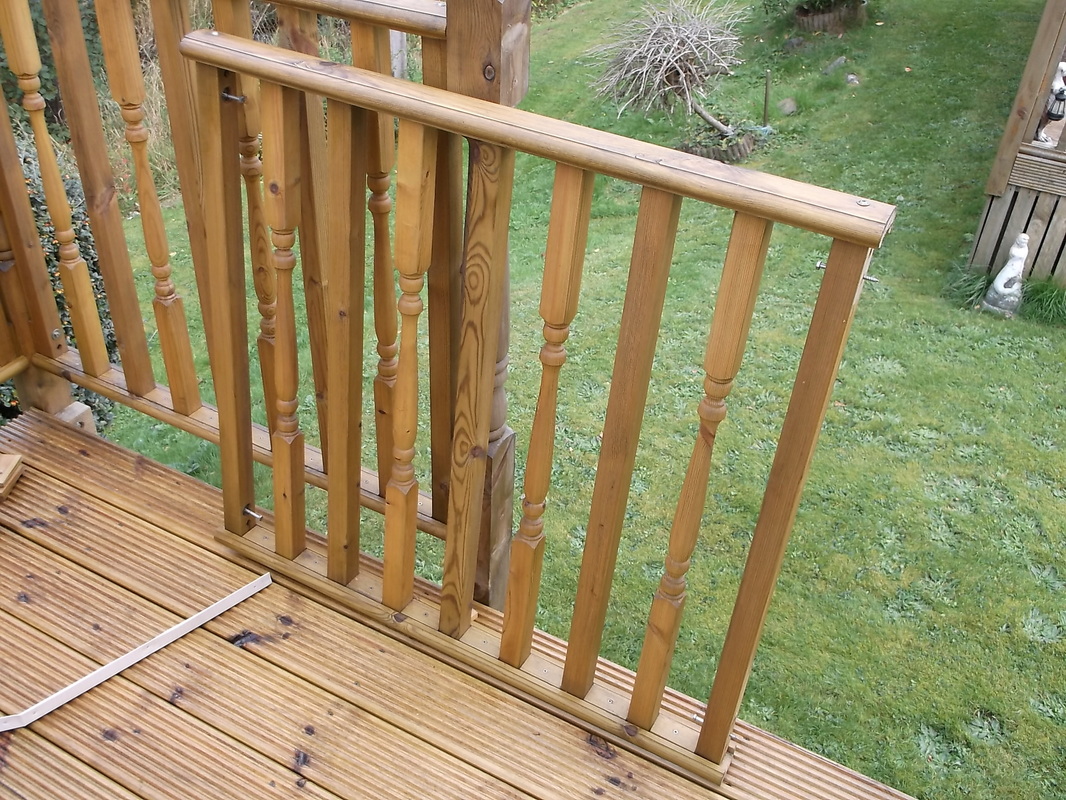
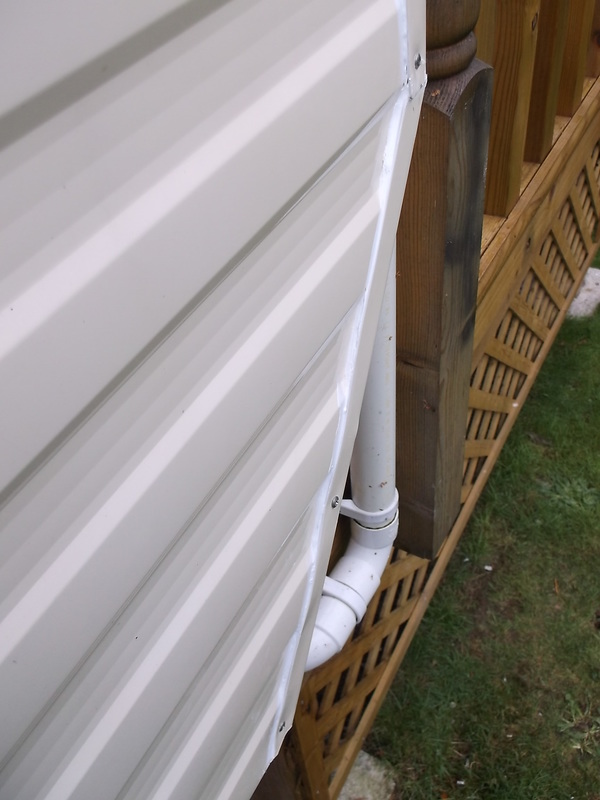
To get access to the north east corner sealing strip i had to remove the corner post and one section of the decking rail. This put to the test my design for the handrail construction.(Click here for decking handrail construction details.) The post and handrail disassembled as expected in less than 10 minutes. The down pipe taking rain water from the roof was also dismantled.
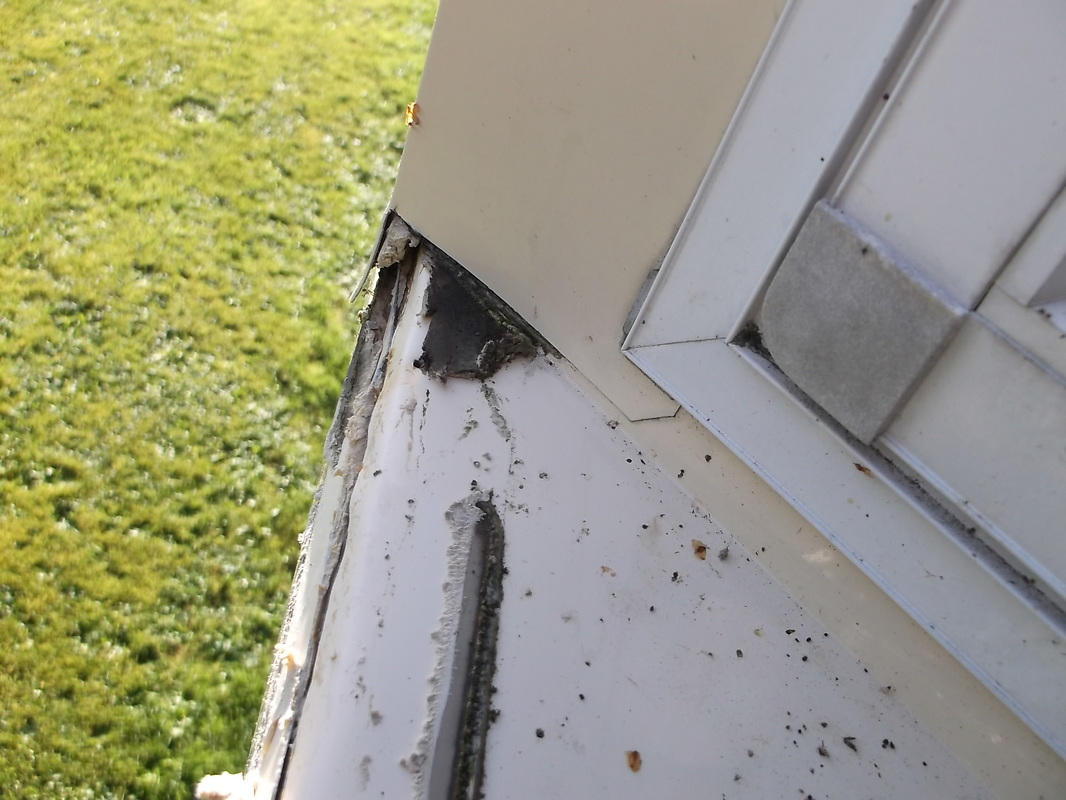
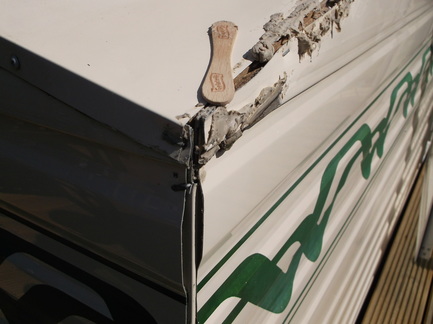
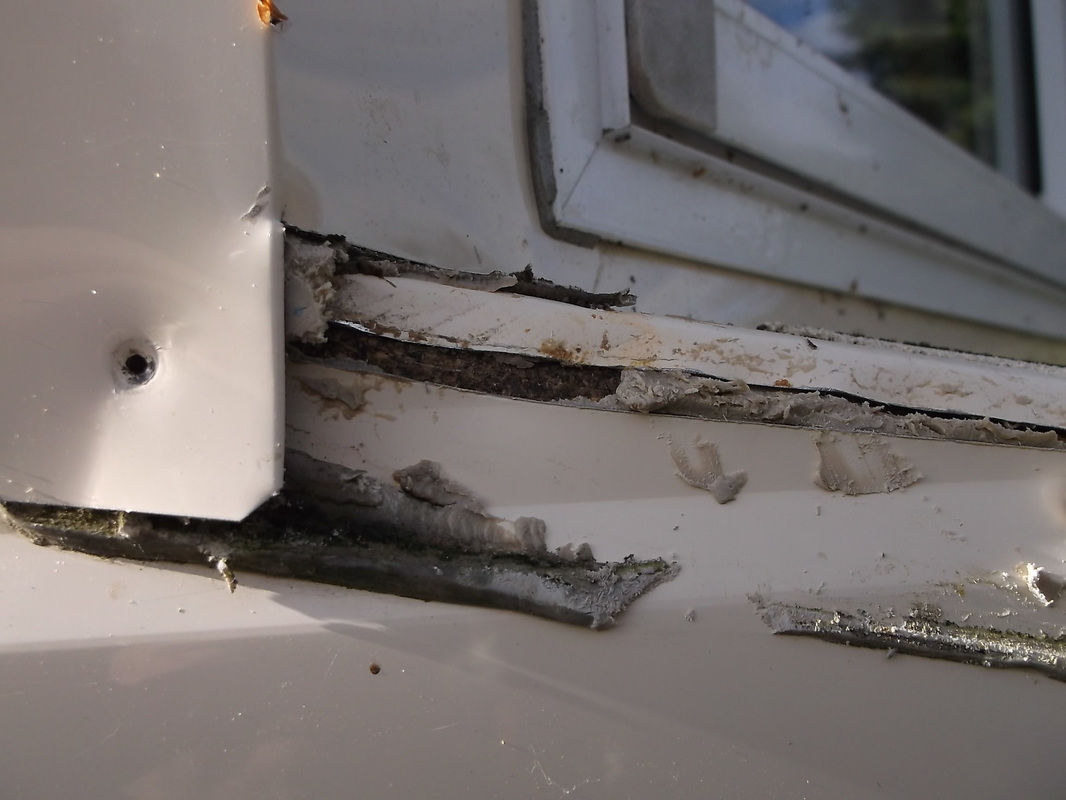
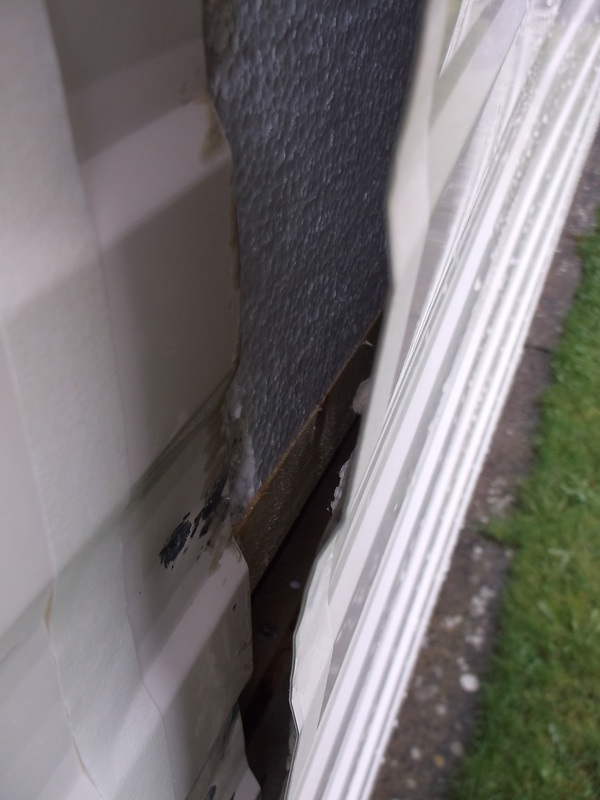
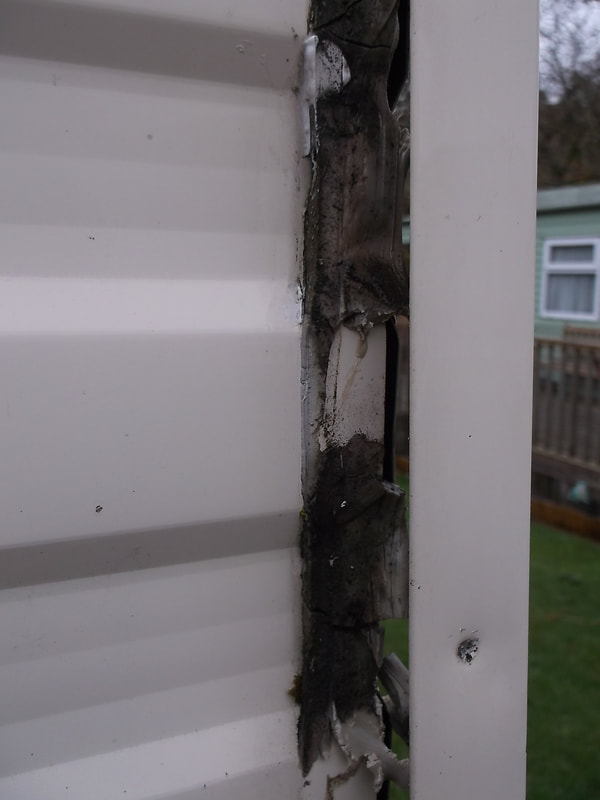
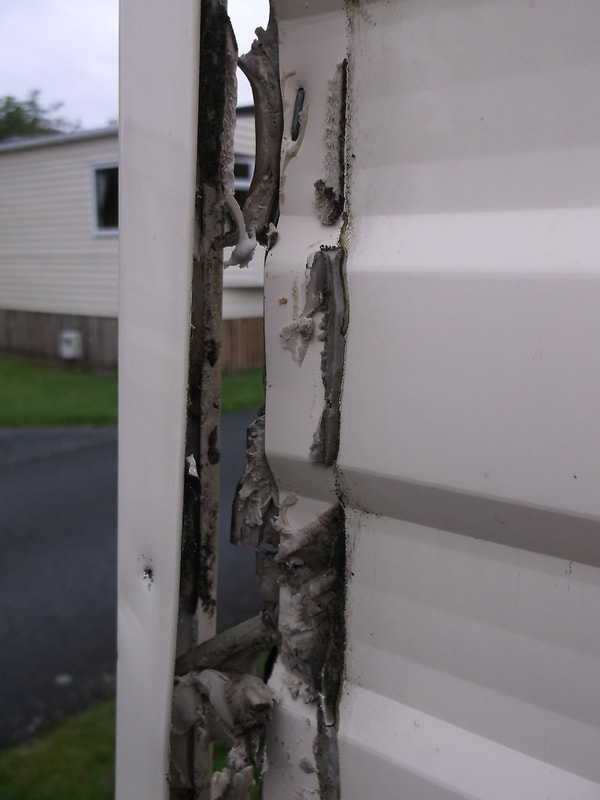
In this picture the sealing strip has been removed. The black area at the join of the window panel and the sloping panel is where water and dirt has entered under the sealing strip and contaminated the sealant. This was the source of the small leak.
This picture shows the area under vertical section of the sealing strip. There were signs that the seal had failed in a few areas due to the mastik ageing and hardening and some dirt had entered the join however there was no sign of water damage. Even if water had penetrated there is a metal strip beneath the external seal protecting the wooden frame.
All the old mastik was removed from the inside of the sealing strip and from the caravan wall panels and then washed and polished ready for the new sealant/adhesive to be applied. Masking tape was applied to the caravan panels and sealing strip to create a neater finish than was achieved on the North West corner. About 30 minutes after the sealant was applied and the sealing strip re-installed the masking tape was removed. In this picture the sealing strip is being held in place with a few screws while the masking tape is installed. The sealing strip was fixed in place with stainless steel flanged head screws rather than using the original stainless steel pins.
|
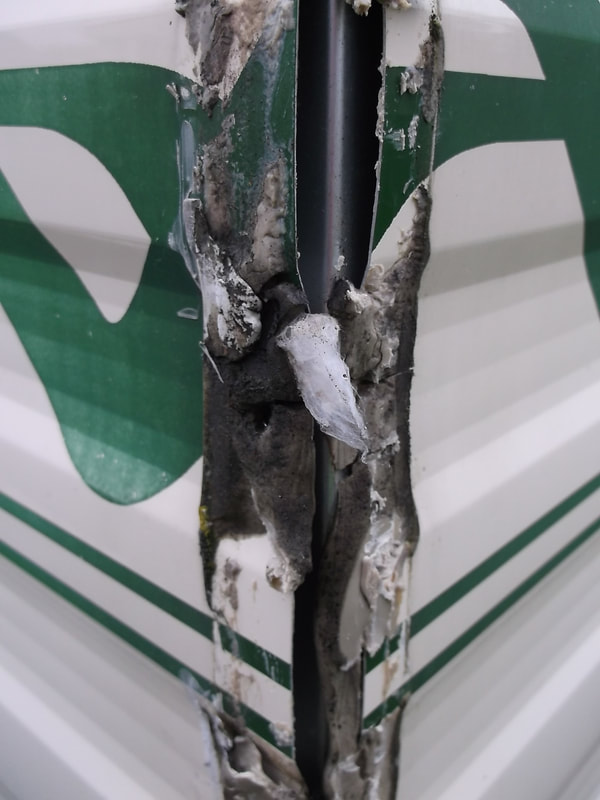
The stainless steel pins were removed from the sealing strip and it was carefully prised from the caravan bodywork trying to avoid distorting the strip. In this picture the chip board can be seen to be damp from water coming into contact with it. I had decided to repair this corner because a small area of dampness had appeared inside hidden behind the seating. Although the wood was damp it was still structurally intact.
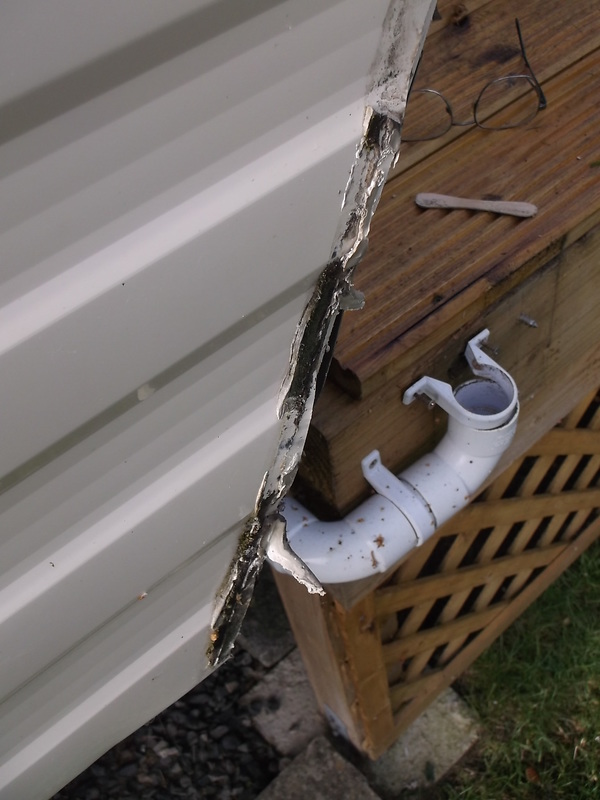
The under cut section of the seal showed some serious signs of failure particularly on the side of the caravan. There were a number of dark areas where dirt had entered the failed seal but again the internal metal strip would have stopped any water getting to the wooden frame.
|
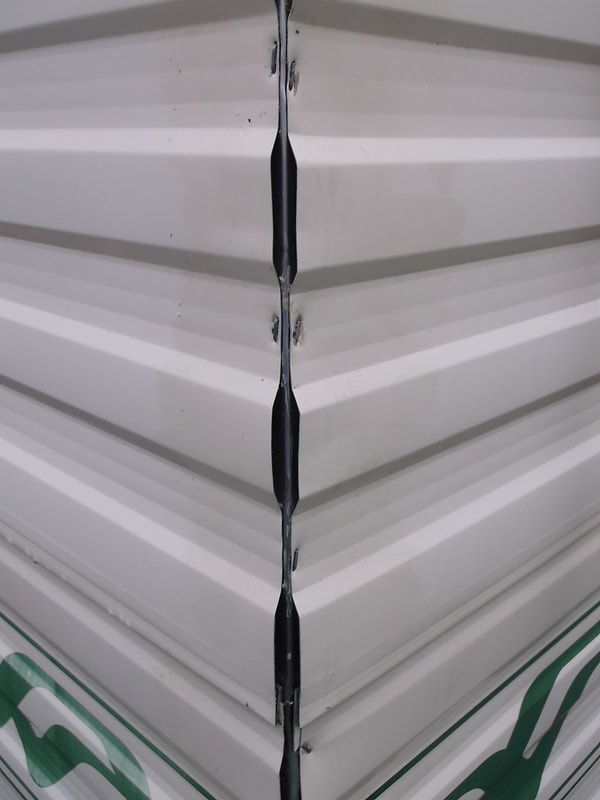
The vertical corner seal repairs.
|
The vertical corner seal section repaired.
|
The undercut corner seal section repaired.
|
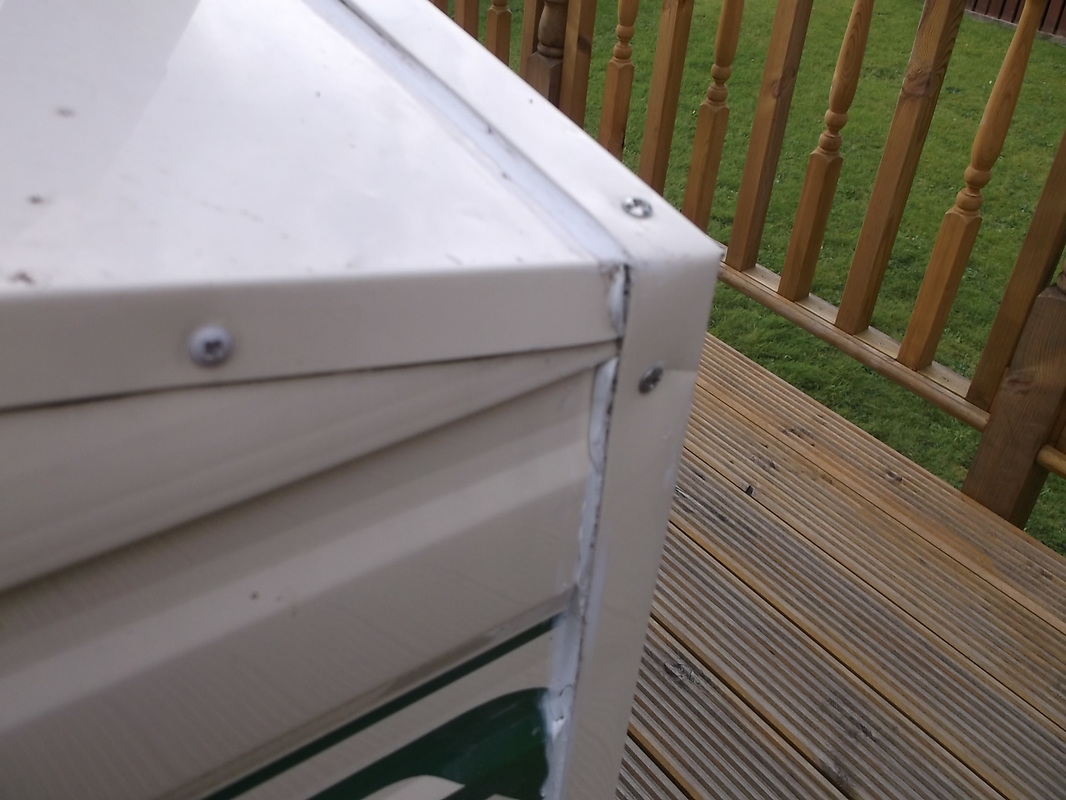
The pictures above show the results of the repairs. Because a section of decking and the drainage had to be dismantled and re-installed and the additional time setting up the masking tape the entire job took a little longer than the North West side did however i was very pleased with the results. From start to finish the job took 5 hours.
East Side Panel-Join Repairs
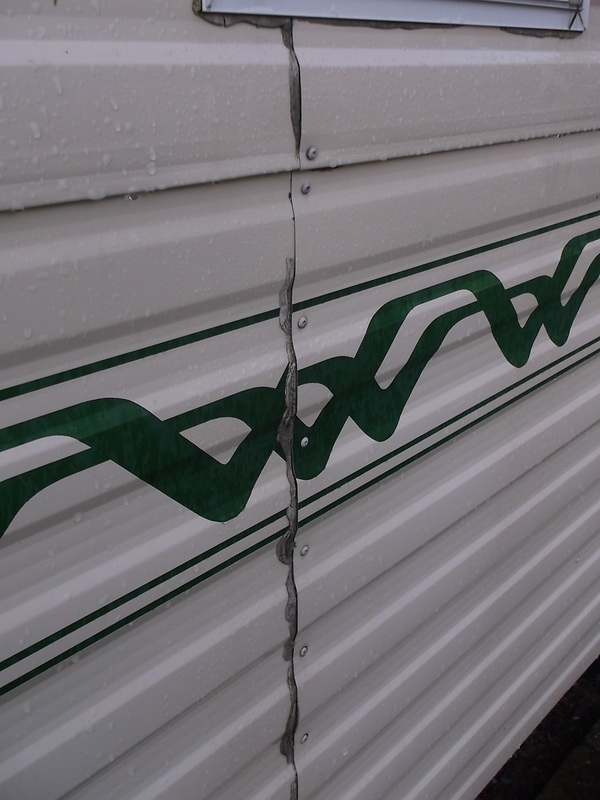
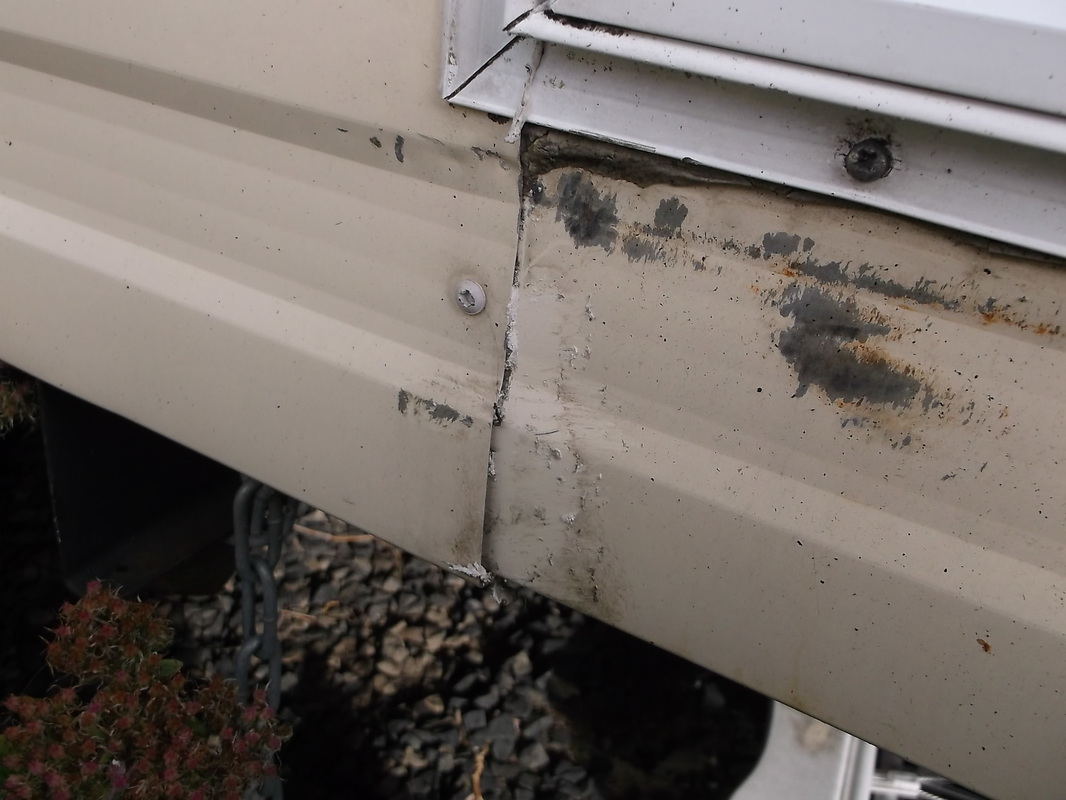
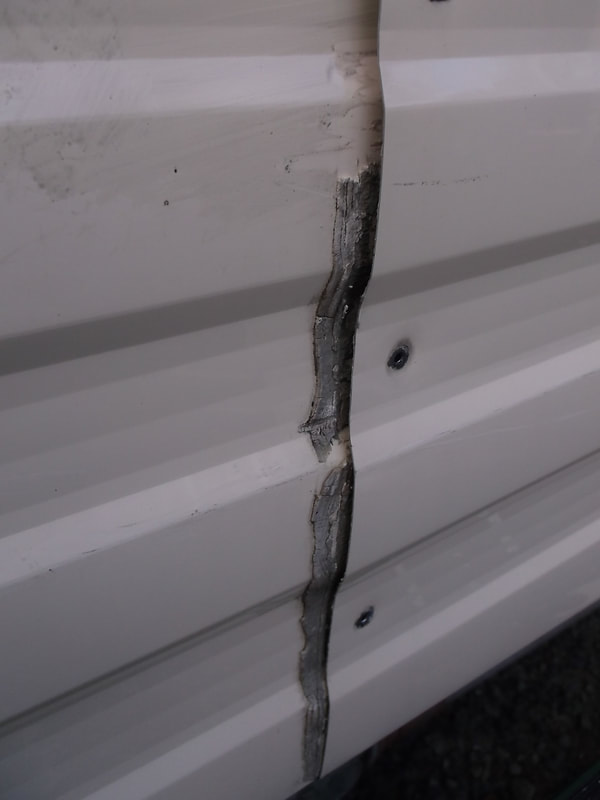
This picture shows one of the panel joins on the east side of the caravan. The sealant was crumbling and gaps had opened up between the panels and the sealant. There was a worry that water may have penetrated the sealant and reached the wooden frame.
Masking tape was applied to both panels of the join. The sealant was applied to the surface of the inner panel as evenly as possible and as deeply between the panels as possible. The panels were then squeezed together and the screws re-installed. This caused the sealant to squeeze out of the joint onto the masking tape.
|
The screws were carefully removed and the panels gently pulled apart to minimise any possibility of damaging them. When the panels were separated the old sealant was carefully removed and the metal surfaces cleaned. Although the old sealant was damaged on the external parts of the panel, that between the panels was in good condition and no water had penetrated. The polystyrene thermal insulation in the frame sections can be seen in this photograph.
The sealant was left for a couple of hours to allow it to start to cure then the masking tape was carefully removed resulting in a very clean line to the join.
Repairing this panel-join took just over two hours from start to finish. |
West Side Panel-Join Repair.
The panel join on the west side is directly below one of the entrance doors. The sealant had completely cured and flaked away allowing water to get to the wooden base frame of the caravan. Although there were water tide marks in a small area there was no structural damage and the wood was dry at the time it was examined.
|
The one securing screw was removed and the remaining sealant carefully removed. Masking tape was applied to both panels and the new sealant applied into the joint. The panel was secured in place, i added a new screw to the lower part of the panel and after approximately two hours when the sealant had started to cure the masking tape was removed to leave a neat, clean finish.
|
Panel Sealing Repairs 2018
Over the past couple of years i have been working on the panel seals around the caravan. I have been doing this on a 'preventative' basis rather than 'reactive', i.e. repair old worn sealing before it becomes a serious problem, penetrates the caravan and causes serious damage to the wooden frame and internal parts. I have spoken with too many caravan owners who did not make regular checks around their vans and as a result entered one day after a long winter to the horrible damp ,mouldy smell indicating that water has been getting in and has done some serious damage.
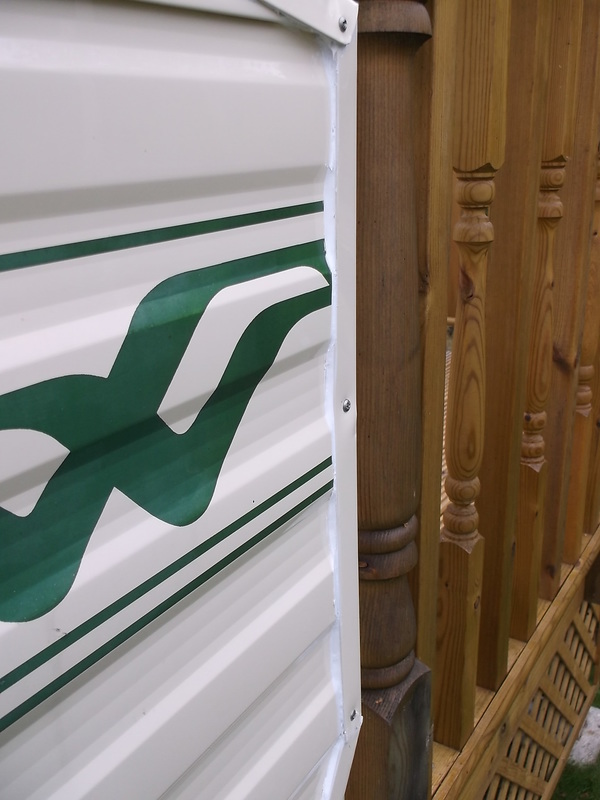
This year i decided to refurbish the two southern facing corners which get a lot of sun. This is both a good and bad thing. The sun dries out the mastik sealer leading to water ingress, but equally any water that does get into and beyond the seal is dried out by the heat of the sun! However the purpose of the mastik is to prevent water getting in in the first place.
This year i decided to refurbish the two southern facing corners which get a lot of sun. This is both a good and bad thing. The sun dries out the mastik sealer leading to water ingress, but equally any water that does get into and beyond the seal is dried out by the heat of the sun! However the purpose of the mastik is to prevent water getting in in the first place.
The stainless steel securing pins were carefully removed from the corner piece and it was carefully removed from the corner of the caravan. The very dark areas indicate were water and dust had endered between the sealant and corner piece.
Fortunately the internal wooden structure is protected by an aluminium corner piece which prevents any water that does get in from contacting the wood below.

The internal surfaces of the corner piece were also cleaned in the same way as the caravan panels. the corner was cleaned on a hard work surface to prevent damage to the shape which would ruin the cosmetic appearance.
While repairing the corners i decided to also do the nearby panel seals. The securing screws were removed and the panels carefully separated. 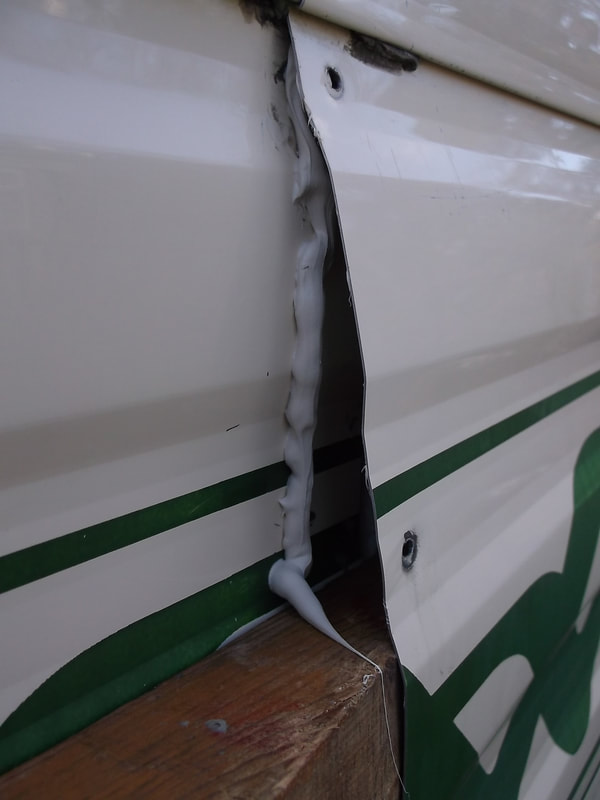
Two parallel beads of sealant were applied to the inner panel.
This picture shows a short panel join above one of the doors after being repaired.
|
The other side of the corner was also carefully removed. Again the sealant showed signs of serious deterioration.
The old sealant was carefully scraped off the metal panels using a specially shaped piece of wood and the remaining residue was cleaned off using surgical spirit. White spirit or turpentine would also do the same job.
The new sealant was applied as a bead to the caravan surface and also one offset on the internal surface of the corner piece. The corner was then carefully lined up and pressed into place. The original stainless steel pins were replaced with stainless steel screws.
The panels were held apart using wooden wedges which allowed sufficient space to allow the old sealant to be removed and the panels cleaned.
The original securing screws were re-installed being careful not to over tighten them so that there was still a few millimeters of sealant between the panels ensuring a water tight seal when the panels move.

This picture shows the seal above the other door after repair.
|
