Background : Greenhouse Refurbishment
My Aunt & Uncle have had a greenhouse for over thirty years but over the past few years they had suffered from a number of broken glass panes after heavy winds. After a big storm a number of glass panes were broken and they reported that the entire frame had appeared to move!. I went to investigate and found that the wooden base had rotted at one corner and was in a bad way at a number of other points around its perimeter. One corner had collapsed completely due to damp rot. This would explain why the glass sheets were breaking. The wind acting on the sides caused the entire greenhouse frame to flex causing the glass panes to shatter. During the last big storm of 2011 the wind had been so strong that the entire greenhouse had in deed moved a couple of inches and what was left of the rotten wooden base had completely collapsed.
I felt that the greenhouse could be salvaged as long as it was taken down immediately and a new base prepared before reconstruction. This would avoid further damage and even total destruction in any further high winds. The first job was to remove all the glass from frame and store it safely in a corner of the garden where people do not normally go. Once this was completed which took just a few hours the remains of the wooden base were cleared away and the greenhouse held down with heavy stone blocks to stop it blowing away until better weather arrived. In the early spring we finally got started.
I felt that the greenhouse could be salvaged as long as it was taken down immediately and a new base prepared before reconstruction. This would avoid further damage and even total destruction in any further high winds. The first job was to remove all the glass from frame and store it safely in a corner of the garden where people do not normally go. Once this was completed which took just a few hours the remains of the wooden base were cleared away and the greenhouse held down with heavy stone blocks to stop it blowing away until better weather arrived. In the early spring we finally got started.
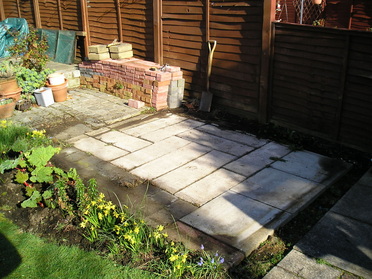
After removing the greenhouse frame and the old rotten wooden base the next step was to prepare the new base. There were a number of slabs at the end of the greenhouse forming a small paved patio area. These were recycled to make the new base together with a few coloured slabs stored behind the garden shed. No slabs needed to be purchased and best of all they did not need to be 'heaved' home from the garden centre or builders supply yard! The original base was made up from a mixture of cobble stones, slabs and large concrete rectangular blocks thought to be a few inches thick. These turned out to be much more of a problem than originally anticipated!
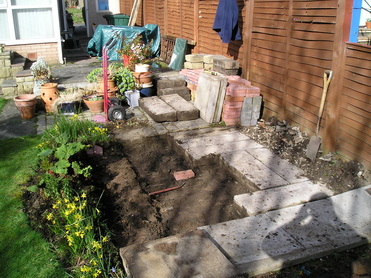
The base was uneven and parts of it had sunk over the years making it completely unsuitable for a new wooden base to be laid. Everything had to be lifted, a new sub base laid and then the new base. The large rectangular concrete blocks turned out to be concrete kerb stones weighing about 50Kg each! It was no easy task moving these out of the way. Removing these created a problem in that when they were removed they left a very deep hole to be filled. This hadn't been anticipated when the job was started.
Fortunately as can be seen in the previous photograph, there was a stack of mono-block paving and building bricks left over from some previous work so these made ideal infill for the sub-base. This avoided the need to bring in lots of gravel, hardcore and sand to level the site. When the site had been roughly leveled some of the slabs were temporarily laid to get an idea of amount of sand required to lay the slabs. The thickness of the kerb stones can be seen in the lower right hand corner of the picture where three of them are stacked.
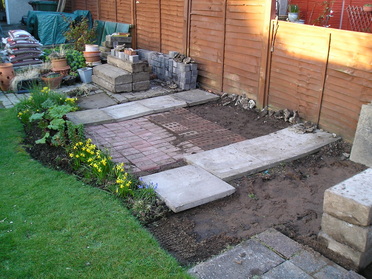
Once a rough level was established the first line of slabs was laid and leveled then working from there another line was laid to get the level for the horizontal and vertical lines of slabs. For an amateur the only way is to take your time and try to have to lift and resit the slabs as few times as possible. Laying out the base took most of the day but it was well worth taking the time to get it right.
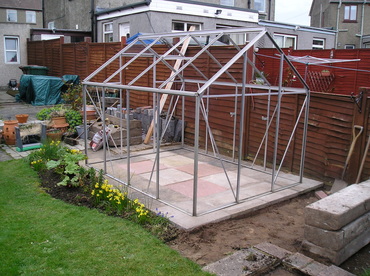
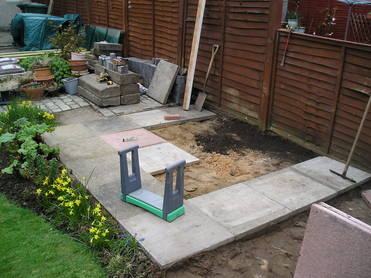
After the slabs of the base had been laid and the frame of the greenhouse minus the glass was laid on the base to get some idea of how well it sat and to mark up the holes for drilling the securing bolts. This was the last chance to make any further fine adjustments to the base
In setting out the slab base and siting the greenhouse frame on the slabs i wanted to meet a number of objectives,
In setting out the slab base and siting the greenhouse frame on the slabs i wanted to meet a number of objectives,
- Centralise the greenhouse frame on the slabs as much as possible.
- Allow access all round to clean the windows of the greenhouse.
- Allow access to maintain and apply preservative to the garden fence and the greenhouse base.
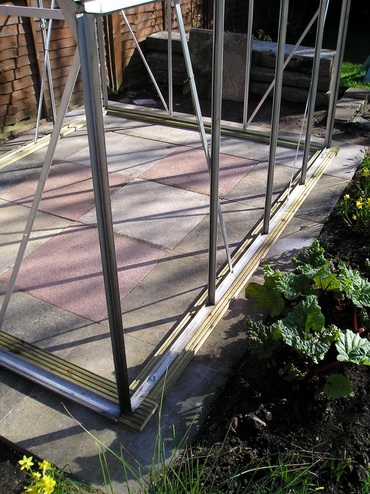
After i was happy with the location of the base and had ensured the greenhouse frame was sitting square the drill holes were marked in the wooden base. The holes were drilled in the wood and the locations for the securing holes in the base marked ready for drilling. Before drilling any holes i verified that none of the holes would be too close to the edge of any of the slabs. I try to leave at least a minimum of 2 inches of slab between the hole and the edge to avoid the possibility of cracking.
The wooden base is made from pressure treated decking wood selected to have as few knots or splits as possible. To provide additional protection the wood was treated with a couple of coats of wood preservative before being fixed in place.
The aluminium greenhouse frame base is fixed to the slabs using M6x50mm stainless steel hexagonal head coach screws. To spread the fixing force and avoid damaging the aluminium frame 25mm stainless steel 'penny' washers were used between the coach screws and the frame.
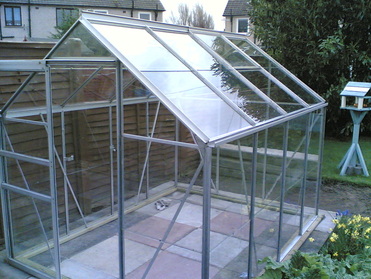
After the frame was secured in place the glass panes were installed starting from the ground level and working up to the roof. In this rebuild care was taken to ensure there was access all around the greenhouse so installing the roof, side and end panes was very easy. If the greenhouse is in a corner site it can take a little creative thinking to get the last couple of panes in place.
Before installing the glass panes the all of the 'W' and 'Z' glazing clips were checked. The original 'W' clips were zinc galvanised types. Any that were rusty or corroded were replaced with stainless steel types. I had taken the precaution of ordering a small supply before starting the rebuild.
Before installing the glass panes the all of the 'W' and 'Z' glazing clips were checked. The original 'W' clips were zinc galvanised types. Any that were rusty or corroded were replaced with stainless steel types. I had taken the precaution of ordering a small supply before starting the rebuild.
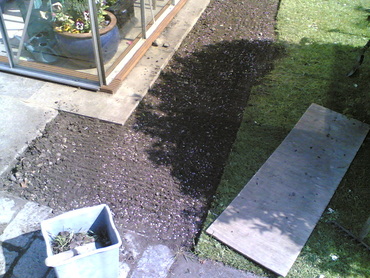
After a few weeks my Aunt and Uncle decided to remove the small flower bed at the side of the greenhouse and replace it with grass. I had just recently completed a small landscaping project and had a couple of rolls of turf left over so we used these to fill in the border.
After the plants were removed the ground was dug over, the soil broken up and leveled then some grass fertilizer was applied. The turf was then carefully laid and trimmed as required.
After the plants were removed the ground was dug over, the soil broken up and leveled then some grass fertilizer was applied. The turf was then carefully laid and trimmed as required.
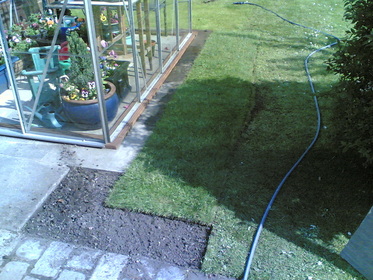
After the turf was laid it was well watered in and left to settle. After laying turf it is best to not walk on it for at least a month to allow the roots to develop well into the soil. This also avoids odd hollows appearing in the surface.
To date although there have been a number of large storms the greenhouse has stood firm and none of the glass panes have broken and as this picture shows the greenhouse was put back into service soon after it was repaired and safe.
To date although there have been a number of large storms the greenhouse has stood firm and none of the glass panes have broken and as this picture shows the greenhouse was put back into service soon after it was repaired and safe.
