Background
In October my Mother's Mini Crosser electric scooter was damaged on a badly potholed local road. On closer inspection it was found that the left hand trailing arm of the rear suspension had snapped. Unfortunately there is no local dealer in Edinburgh, the nearest being in Inverness and Bristol. To further complicate repairing the scooter i could not find any of the local mobility scooter workshops able nor willing to take on the repair.
I was left with two options. Ship the scooter to Inverness or attempt to repair it myself. I investigated hiring a van with a tail lift and transporting the scooter my self or hiring a courier/shipping company. This opened up a whole new list of problems.
As the scooter suspension was damaged a wooden cradle would need to be constructed to ensure the chassis was properly supported during shipping to prevent further damage. This in itself was not a problem. The reason for this was that the scooter has to be strapped down during travel however if the chassis is damaged it cannot be safely secured unless the chassis is supported from below.
Shipping via courier was very expensive and due to the damage to the chassis all the companies i contacted required the scooter to be strapped to a pallet and safely secured so that they never had to actually handle the scooter itself. I fully understood this. The shipping costs were many times the spare parts and labour costs so i had to rule this out.
I obtained the spare parts and maintenance manuals of the scooter and decided that it was highly likely that i could carry out the repair myself. This sounds relatively straight forward however for a while i was caught between the main dealer(Bristol) and local dealer (Inverness) who were in dispute about who was responsible for supplying the parts and responding to my requests for costs and information. After more than a month i was able to resolve this and get agreement as to who i should contact and would supply the parts.
Read on below for the details of this repair.
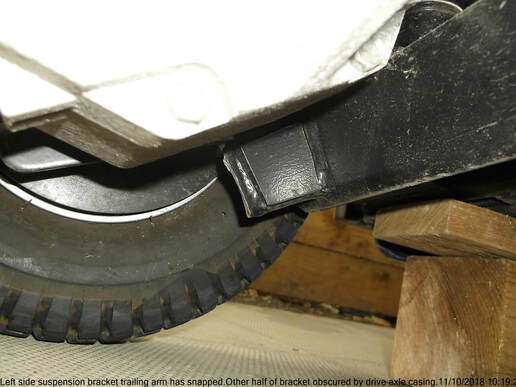
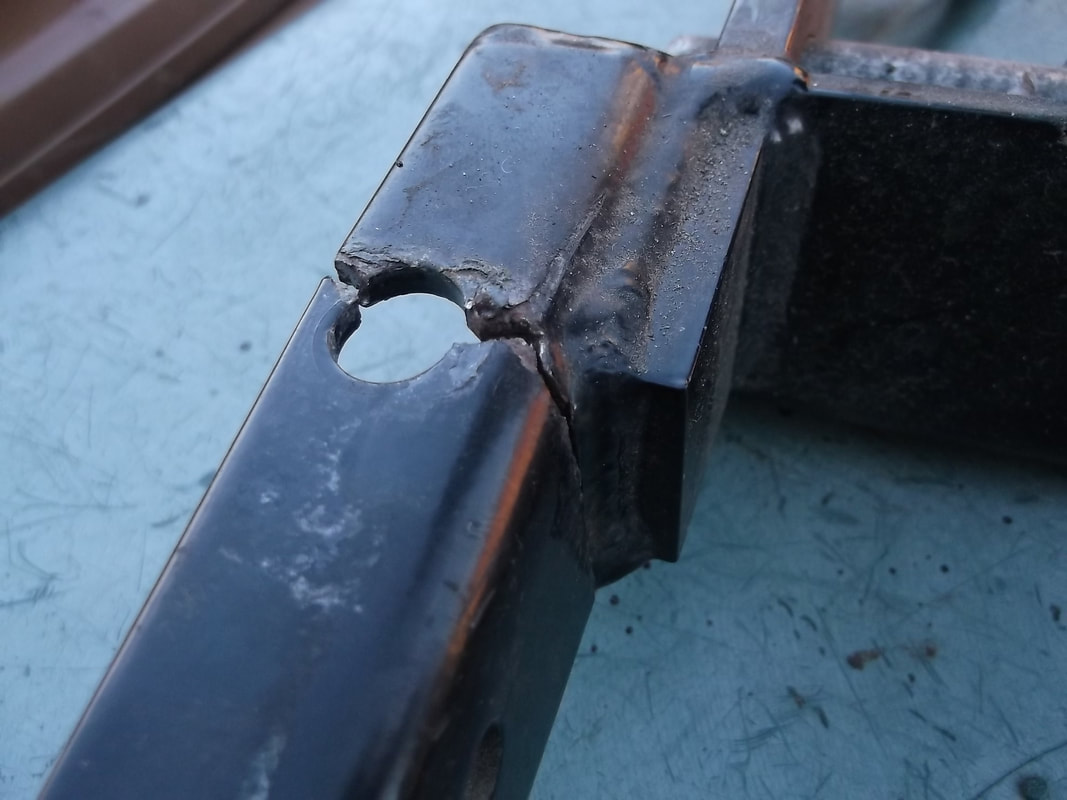
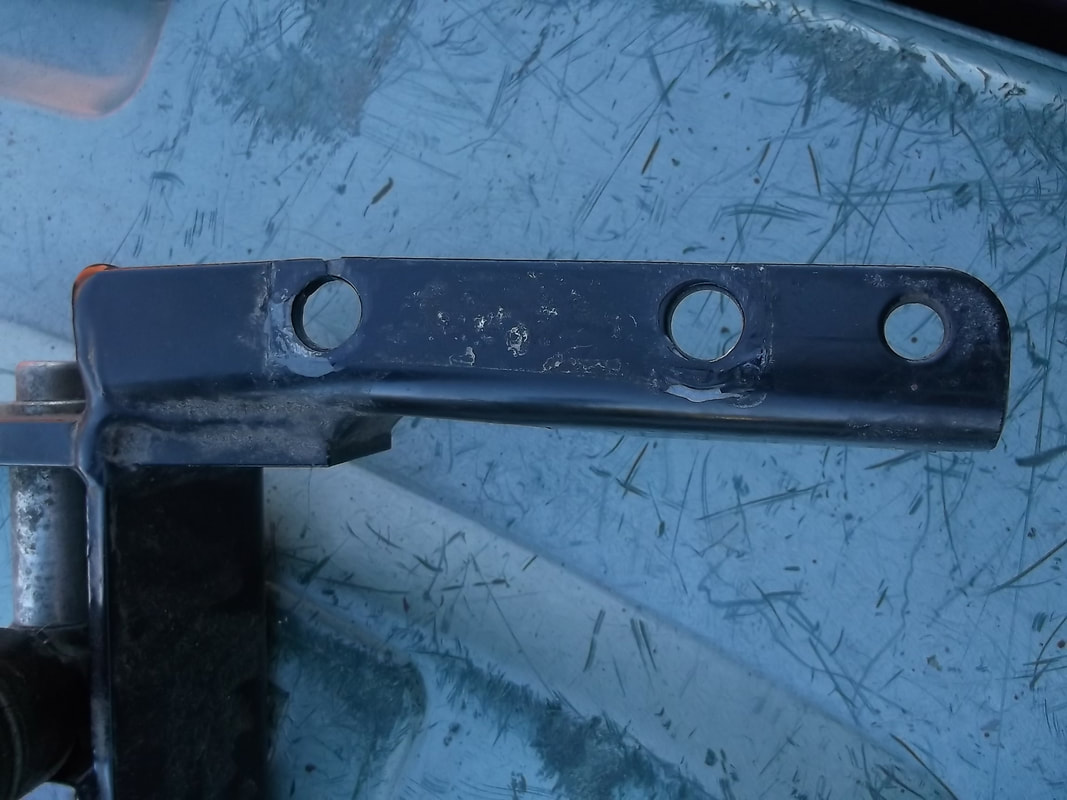
This picture shows the broken left hand trailing arm on the underside of the scooter.
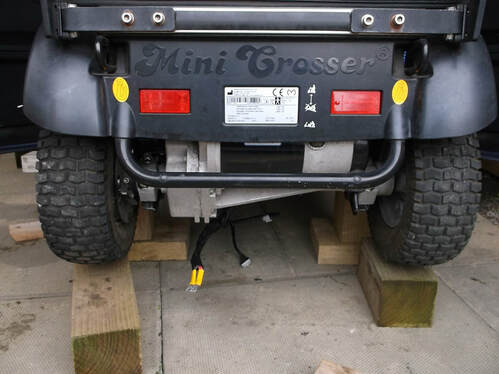
While waiting for the spare parts the scooter was supported on blocks of wood to prevent any further damage.
The scooter will have to be raised and supported before the rear axle and swinging arm can removed.
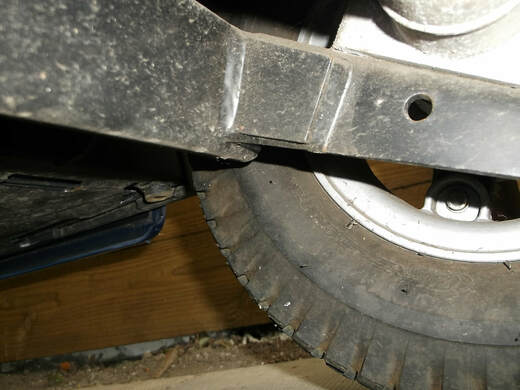
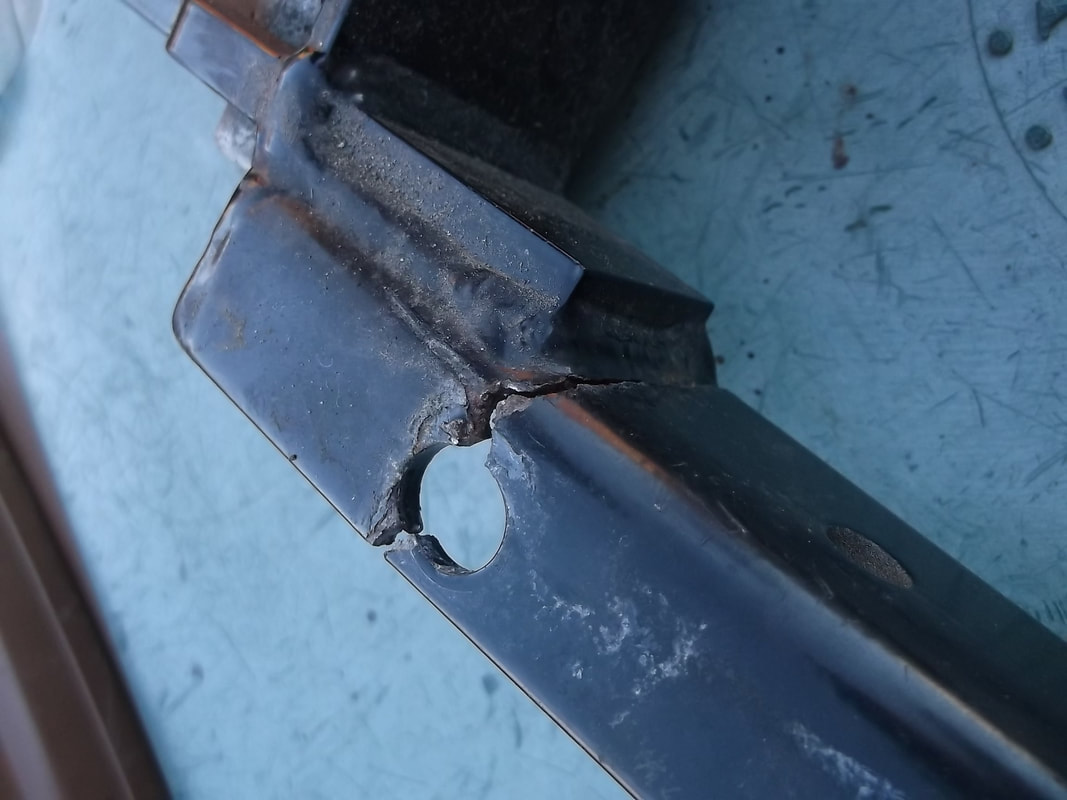
For comparison purposes the undamaged right hand trailing arm is shown here.
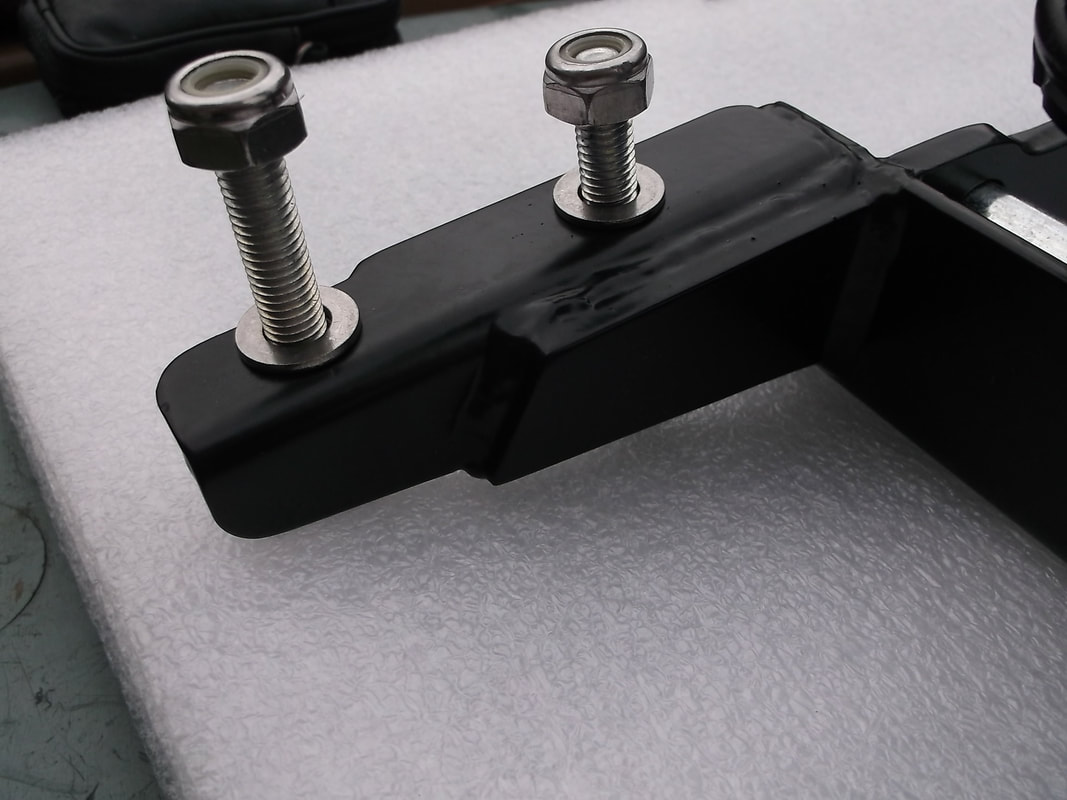
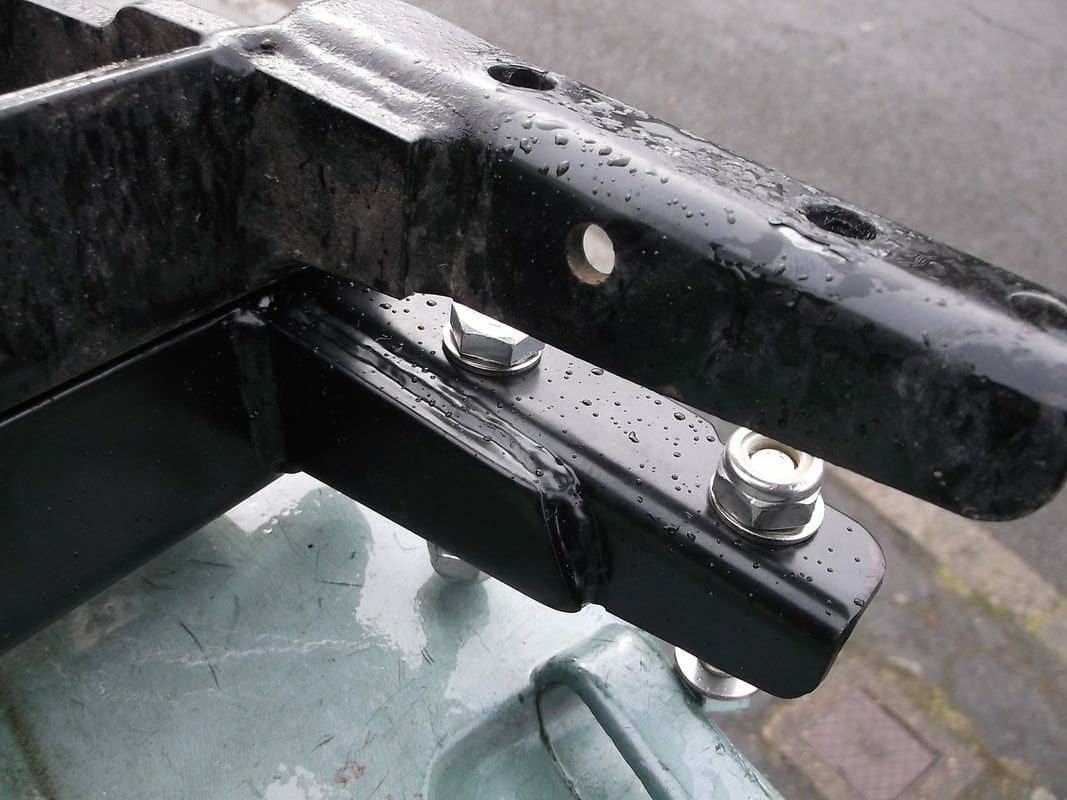
Below are a selection of photographs showing the replacement rear suspension unit. All the fitting and securing bolts are included in the package together with two replacement shock absorbers.
Click on any of the images to view a larger version and scroll through each one.
Click on any of the images to view a larger version and scroll through each one.


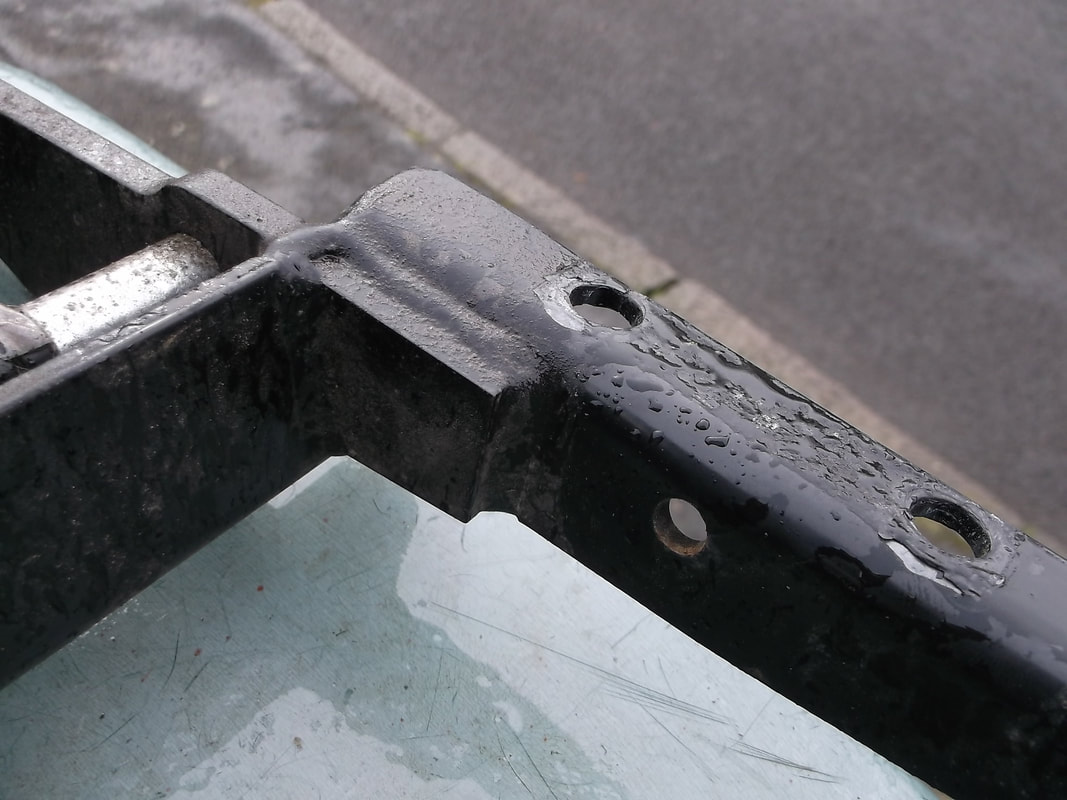
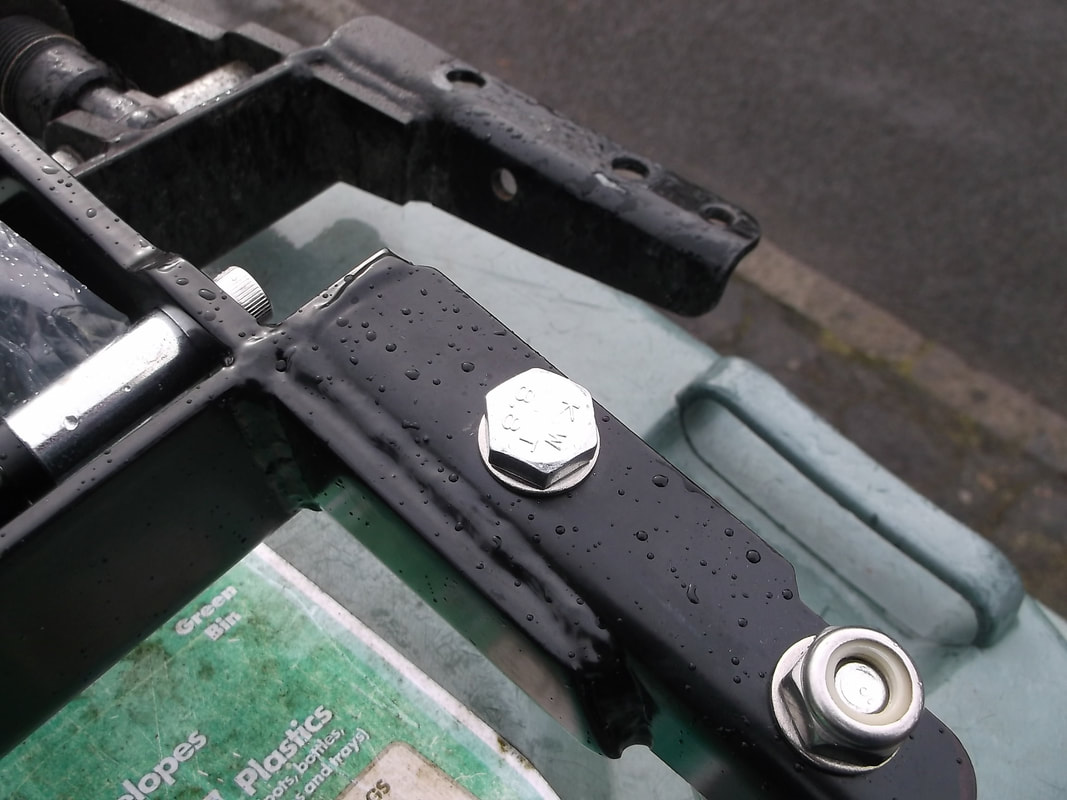
Below are a selection of photographs showing the new suspension unit and the old one after it was removed from the chassis.
Click on any of the images to view a larger version and scroll through each one.
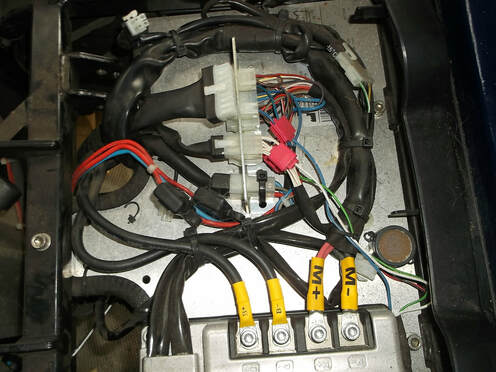 The electrical connections and plastic cable securing ties were photographed before disassembly.
The first job was to remove the batteries and to safely store them. They should be in good condition as they have been connected to the smart battery charger as per the manufacturers recommendations since the damage to the suspension occurred a few months ago.
The next job was to photograph all the electrical connections and nut, bolt and washer locations of all the parts to be removed so that they can be put back into the correct locations when re-assembled.
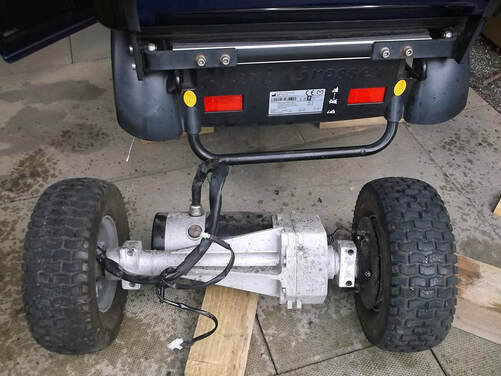 The scooter mounted on wooden blocks with the drive axle removed.
Before starting removal of the drive axle the scooter wheels were 'chocked' at the front to stop it moving.
The securing bolts of the top end of the shock absorbers and the swing arm pivot bolts were loosened. The bolts securing the axle to the suspension arms were also loosed. All nuts and bolts were loosened while the scooter was still on the ground to avoid trying to loosen corroded/seized bolts with the scooter mounted on wooden blocks.
Using wooden blocks under the chassis of the scooter it was gradually raised sufficiently to allow the axle to be rolled out once disconnected.
All the electrical connections to the motor were disconnected and fed through the chassis. The wheels were supported on wooden blocks. The bolts securing the axle to the suspension were removed to take the weight off the damaged suspension unit. Then the upper shock absorber securing bolts were removed. Finally the swing arm pivot bolts were removed.
The axle was then able to be lifted off its supporting blocks and wheeled away from the scooter. The rear suspension unit was then pulled out from under the scooter. The underside of the scooter was inspected for any damage but nothing obvious was found.
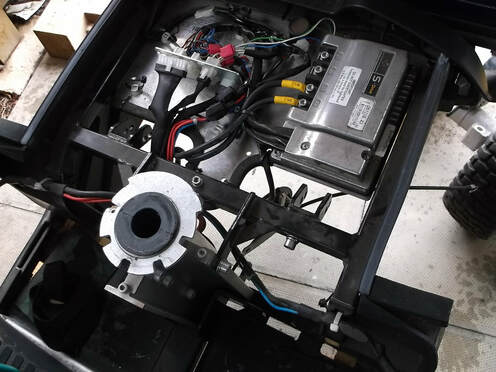 The scooter chassis with the drive axle, suspension and electrical connections removed allowing the chassis and underside to be inspected for damage.
Here the chassis is propped up on wooden blocks and the removed axle can be seen in the background.
The electrical connections between the motor and controller, speedometer and control panel at the front of the scooter have been disconnected to allow the axle to be removed.
While the scooter was in this rather scary state the chassis was checked for damage that may not already have been known about and as much dirt and dust as possible was cleaned off.
 The new suspension unit fitted to the chassis including new shock absorbers.
Here the new rear suspension unit including the new shock absorbers has been installed.
All the mounting bolts have been loosely tightened. They were fully tightened when the axle was installed and secured in place.
A light grease was applied to all pivot and mounting bolts.
The wooden blocks used to hold the scooter off the ground can clearly be seen. It was important that the wooden blocks were the same height to ensure the new axle was correctly aligned when installed.
 The drive axle re-fitted to the scooter ready to be lowered to the ground.
Here the drive axle has been attached to the rear suspension unit. The electrical connections have still to be reinstalled.
To install the drive axle, first the scooter was raised sufficiently to allow the drive axle to be rolled under the rear cross bar.
The scooter was then lowered a few inches by removing wood from each side. The axle was then raised as close as possible to the suspension unit mounting holes by lifting it up onto wooden blocks.
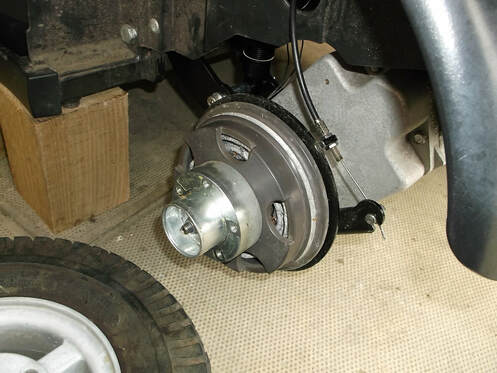
The picture shows the rear drive axle after it has been attached to the rear suspension unit.
The scooter was lowered to the ground by removing the wooden blocks under the chassis, resting the wheels on the other wooden blocks and then using off cuts of wood to create a ramp to roll the scooter onto the ground.
To install the drive axle, first the scooter was raised sufficiently to allow the drive axle to be rolled under the rear cross bar.
The scooter was then lowered a few inches by removing wood from each side. The axle was then raised as close as possible to the suspension unit mounting holes by lifting it up onto wooden blocks.
The picture shows the rear drive axle after it has been attached to the rear suspension unit.
The scooter was lowered to the ground by removing the wooden blocks under the chassis, resting the wheels on the other wooden blocks and then using off cuts of wood to create a ramp to roll the scooter onto the ground.
 The hand brake cable was adjusted to stop the brake shoes rubbing on the brake drum.
After the drive axle was installed, the electrical wiring was reconnected and all the securing bolts and nuts were checked.
The batteries were reinstalled.The scooter was taken for a short test drive. A slight rubbing sound could be hear. It was thought to be coming from the left side rear wheel.
The scooter was put back onto blocks and and the rear wheel removed. The rear brake shoes were found to be rubbing so the cable was adjusted to create sufficient clearance between the brake shoes and drum.
The scooter was taken for another longer test drive to confirm there was no heating in the battery and motor cables and that the brakes were working correctly.
Now that the scooter is back up and running my mum will be able to get out and about on her own again.
