Over the past few years the switch on my Dyson DC05 Animal has become a little unreliable. When switched on it made a crackling noise and each switch position had to be carefully selected or the vacuum would not work. It got to the situation where i could not use it without fiddling with the switch and any bumps or twisting moves using the handle caused the switch to crackle and the motor to switch off and on. I had looked at the internals of the handle on a previous occasion when i was fitting a part i was sent by Dyson during a product recall/rectification and had noted its details. With this information i searched the internet and actually found the exact switch required. This was good news as Dyson ended support for this model over 5 years ago and spare parts are getting hard to find. I ordered the switch, they cane in pairs, from a UK supplier and waited for delivery which was just a few days. The pair of replacements cost less than GBP3.00.
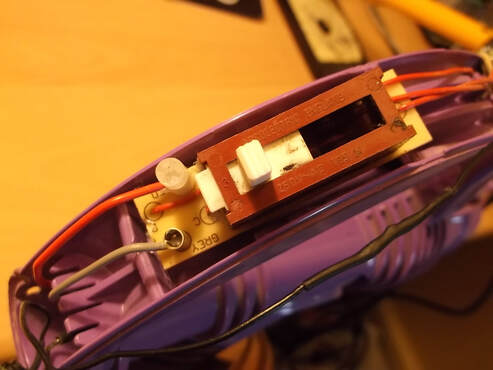
The first job was to remove the plastic covers from the handle. Dyson like to use hidden clip fixings so some care has to be taken to separate all the parts without breaking the securing tabs.
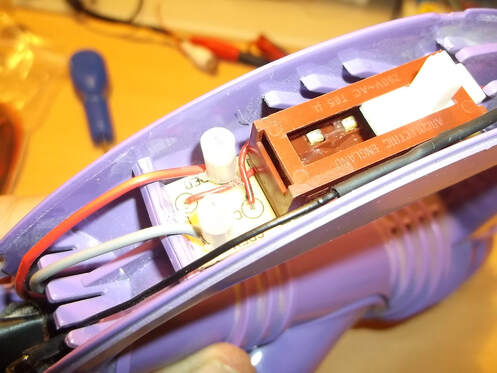
After some careful fiddling with wires i was able to get the circuit board out and into a position where it could be worked on.
From there i was able to easily remove the plastic casing of the old switch which showed what the problem was.
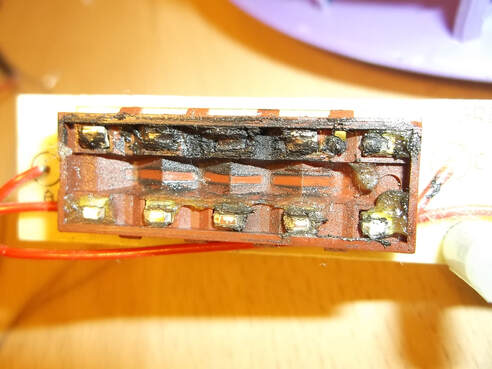
Many years of dirt and dust and electrical arcing while switching on and off had burned the lubricating grease and dust and had eroded the electrical contacts.
Trying to make an electrical contact through all the dirt and grease was never going to be easy nor reliable.
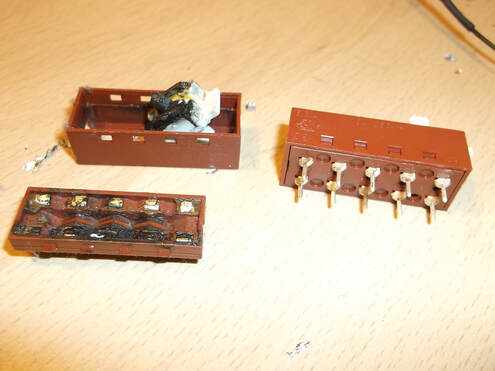
Using a soldering iron and De-solder pump i was able to remove the switch from the circuit board.
This picture shows the new switch on the right and the old dismantled one on the left.
The full extent of the damage to the contacts and the dirt inside the switch can be seen.
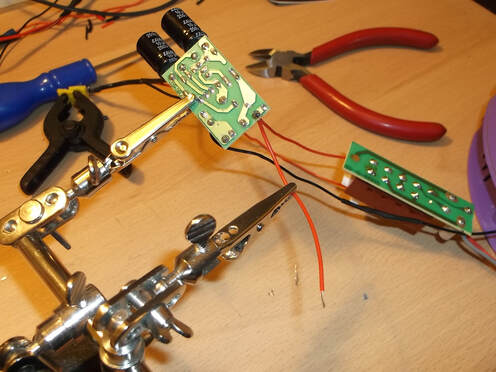
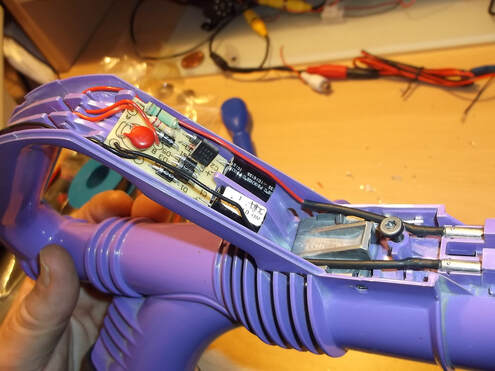
My experience with other Dyson repairs has shown that they only allow the exact length of cable to allow each module to be connected. There is very little spare to allow adjustments of positions when assembling. This prevents loops of excess cable from getting trapped inside the plastic housings and of course also saves cost.
Inevitably with all the handling of the circuit boards and wires one of them broke!
The 'helping hands' were used to hold the circuit board and wire in place while the wire was removed, replaced and soldered into place.
The circuit boards and new switch were carefully reassembled taking particular care of the routing of the wires.
I used the photos taken during disassembly to ensure they were correct.
The clean unused condition of the inside of the switch can be seen in this picture.
In this picture all the wiring has been re-assembled and the only step to be completed is the attachment of the cover.
After this was completed the vacuum was re-assembled and tested.
There was no crackling when the switch was used and all the functions were easily and reliably selected without having to fiddle with the switch
For the cost of a new switch, just GBP3.00 and about 90 minutes of effort the Dyson is saved from the scrap yard!
