Bakground
For a number of years now i have been quite irritated at the quality and lifespan of boot and shoe laces but in particular boot laces. They seem to last at best a few months before the outer skin starts to fray and then breaks revealing the core of the lace. The outer skin then slides along the inner core making it almost impossible to use the lace because when tied it starts to undo itself. It also makes it almost impossible to unlace and re-lace the boot through the eyelets. I tried various sources and makes of lace but they all suffered from the same problem. After collecting a series of unmatched laces i decided to try to fix the laces i had and put them back into use. I found a very good, reliable solution using a sewing machine. Read on below for the details.
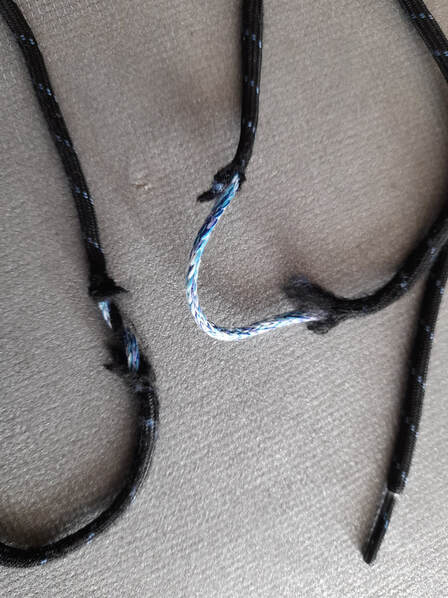
This picture shows a typical example of the problem.
The outer decorative skin of the lace frays then breaks as a result of rubbing against the eyelets of the boot or shoe.
The problem seems much more common on boots than shoes.
When tying the lace the outer skin slips meaning that as you walk the lace will start to become loose. To overcome this the only way around this is to double tie the lace.
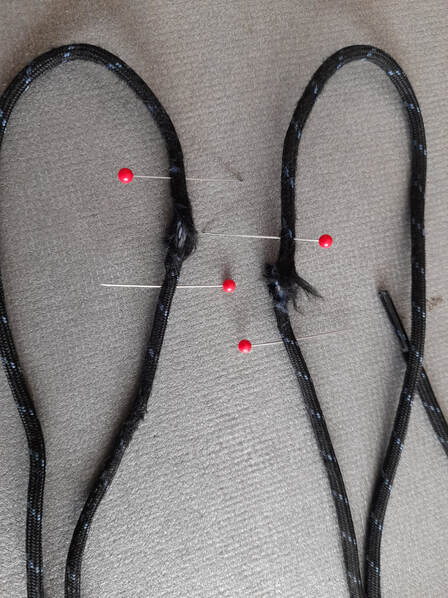
The first step in the process is to untwist and pull the outer skin back as far as it will go to its original position, then use pins to hold it in place.
Then set up a sewing machine with a zig-zag stich of approximately 2mm width and similar stitch length.
Choose a suitable colour strong thread.
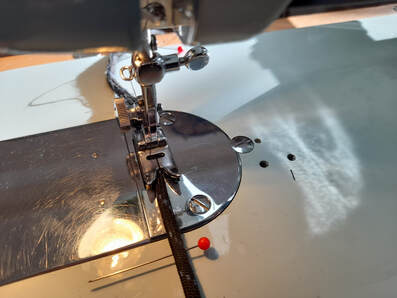
With the sewing machine set up, place the lace under the presser foot making sure that the lace is at least partially sitting on the serrated feed dog below the presser foot.
Set the stitch length to zero and put a few stiches into the lace to lock the thread in place.
Now set the stich length to 2mm(approx.) and start stitching feeding the lace under the presser foot ensuring it remains in contact with the feed dog. Continue for several centimeters after the broken area and stop. Then set the stitch length to zero and insert a few stitches to lock the thread.
Remove the lace from under the presser foot, and if possible rotate the lace through 90 degrees and repeat the process. The zig zag stich will lock the outer skin of the the lace in place. Trim any excess thread and the damaged area of the outer skin of the lace.
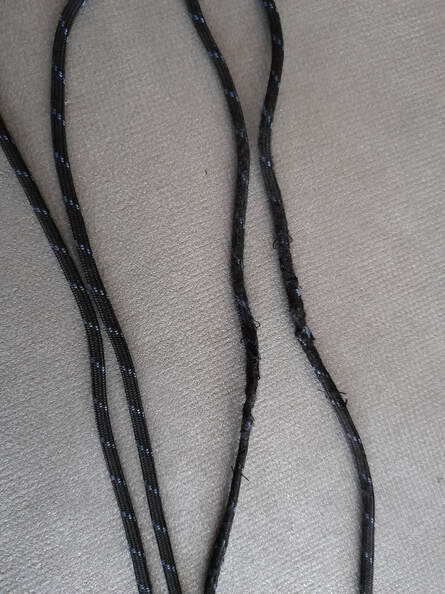
This pictures shows the completed, repaired lace.
I have used this repair procedure on a number of laces now over the past year and all of them are still in use and showing no signs of further damage.
So another successful attempt at 'reduce, reuse, recycle'
It may not be a huge saving in cost but as it takes just a few minutes to repair the laces it is well worth the effort.
